After I had fully restored my RS, i began a frantic search for a GS, i wanted this car above all else as my next project. I looked at many MX-3 GS project cars that i came across, mostly on Craigslist. none of em seemed to be a good candidate for what i was looking for (most of em ran, haha). and since i was in a small town i found myself making more trips to Sacramento than i would've liked. Finally i got desperate, I posted a wanted ad on Craigslist specifically for a project MX-3 GS with a 5 speed. as luck would have it, i received a call the very next day, and to add to my luck, this person lived in my small suburban hometown. He told me he had a running, but not drivable MX-3 GS. he told me he saw that i was looking for a 5-speed, but he told me the only thing wrong with it was that the auto tranny went out and that if i was up for it, could do the swap, but he had no such time. after some prior research, (thanks mostly to you guys here, actually all thanks!), i said i'd pay 400 cash for it, and the very same day, we strapped it to my moms dolly and towed it home!
The guy who owned it was on the ground laughin when i first came to look at it in my own MX-3 RS. he was very nice and actually cut us a great deal on his original asking price because he knew by the sparkle in my eye and my current mx-3 that i deserved it.
ATX to MTX Swap:
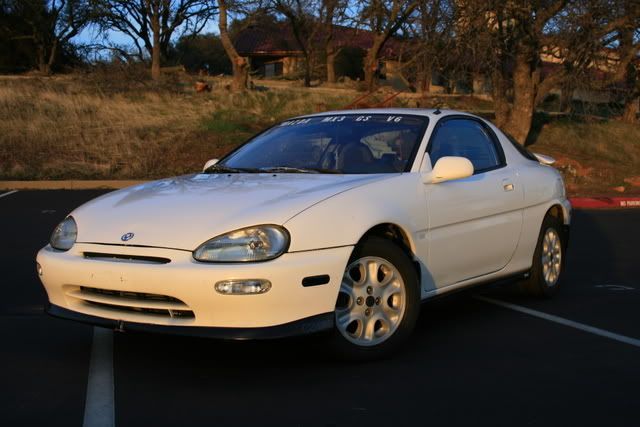
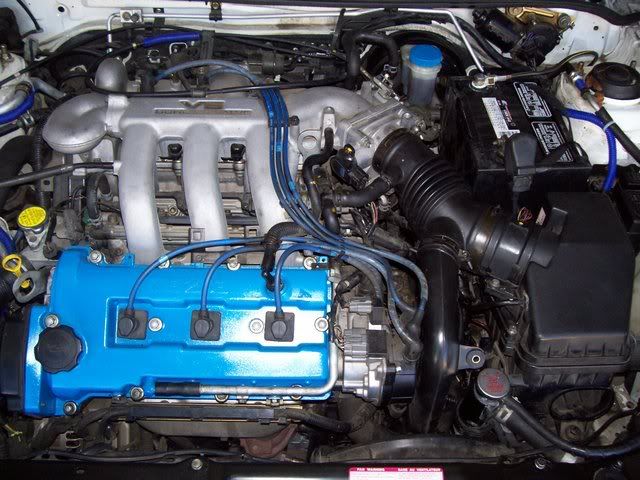
Car and Engine the day i brought her home:
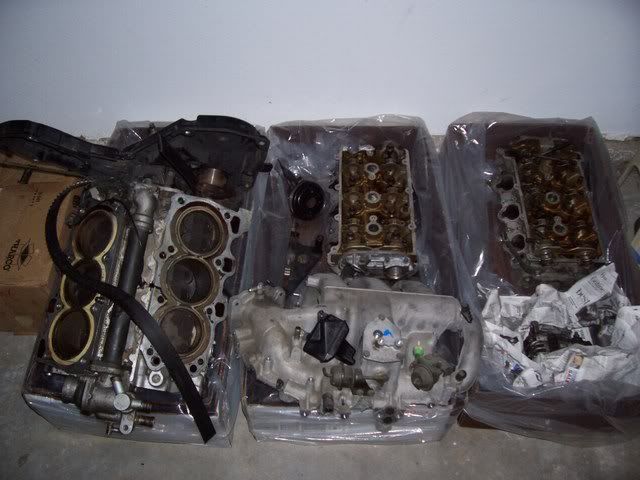
After I got the car, I set out on my quest to find all the parts needed for this swap. Thank goodness for my local wrecking yards, ironically they got their first MX-3 GS with a 5 speed they've seen in a few years. we got all the parts needed for 600 smackers! This is list included:
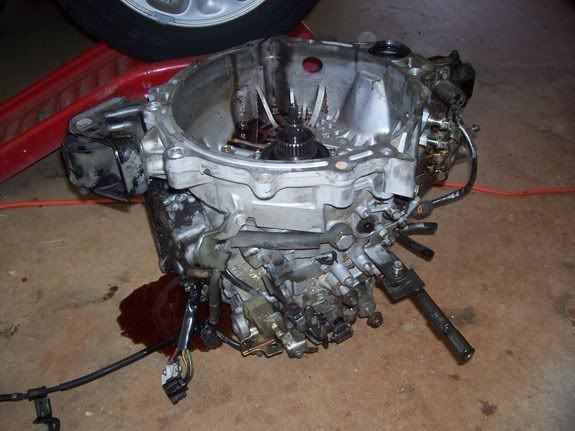
-the transmission (gear-box and bell housing)
-Right and left axle from the manual donor, as well as the half-shaft on the passenger side
-shifter linkages, as well as the shifter itself (both static and pivoting linkage)
-the motor mount number 4 (which is the one that is attached to the transmission on the drivers side on top of the gearbox, its different for the MTX)
-slave cylinder
-clutch petal assembly
-Starter (different for the manual)
All's I needed to get myself was:
-The Flywheel
-Clutch Set (Disk, pressure plate, throw out and pilot bearings)
I started by removing everything that was above the AT, including the battery and its tray, and the intake assembly (everything before the Throttle body):

I also unplugged everything that leads into the Transmission, all the sensors and relays that led to the starter and everything else that is directly attached to the AT (there was A LOT compared to the MTX, haha). FYI: KEEP THE WIRE HARNESS that you pulled out of the AT, just set it somewhere safe for now.
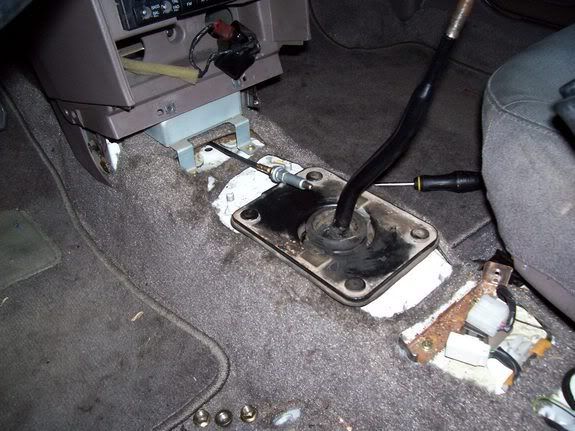
I then went inside the car and removed the Auto shifter, this was very easy, just unscrewed things till it popped out
I left the middle area disassembled so i could easily work the Manual shifter into place later.
Next up: Clutch Petal! For this I removed the drivers seat and laid down on my back so i could get under the dash and work my magic. i removed the middle joint for the steering column because it made things a bit easier to play with. keep working until you have removed the entire petal assembly! for this, i just used a petal assembly that already had both the brake and clutch petal to make things easier. I didn't need to do anything with the gas petal.
Then I started to reassemble the new petal assembly pretty easy, I made sure the clutch cylinder made it thru the firewall for when i hook up the master cylinder later.

After that, i had the adequate bolt ups for the Clutch Master cylinder provided by the petal assembly, which i took the libery of installing (after removing the gold plate that stood in its place). remove the rubber plug in the brake fluid case and attach it to the CMC
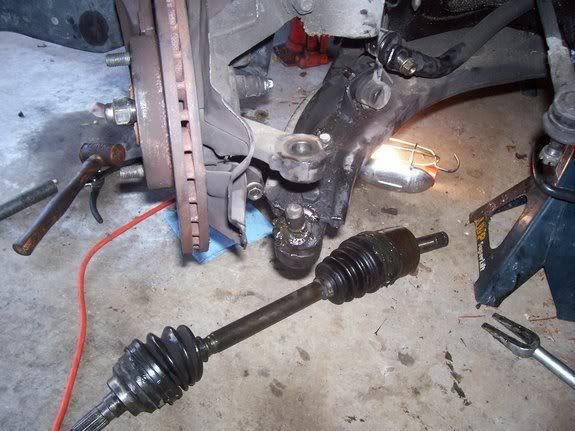
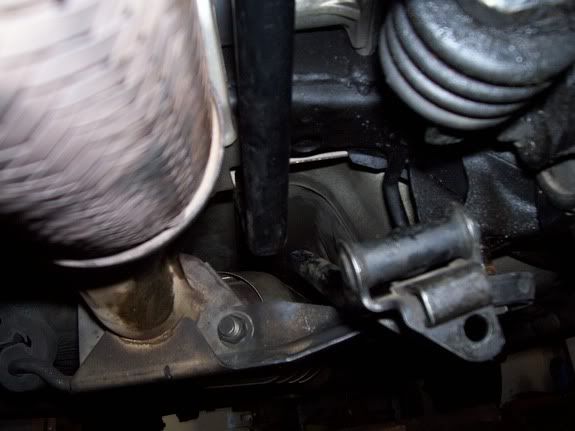
now it's time for the really fun stuff, the axles and removal of the AT. these are the only two major things i have left. first i removed the main nut on the spindle assembly (this was the biggest obsticle i have ever encountered, i couldn't torque it off, and nothing worked not even impact wrenches, so i ended up dremeling the nut off, i didn't need to worry about damaging the axles cuz they're coming out anyways).
after this the axles came out pretty easily, and the half-shaft had three bolts to remove.
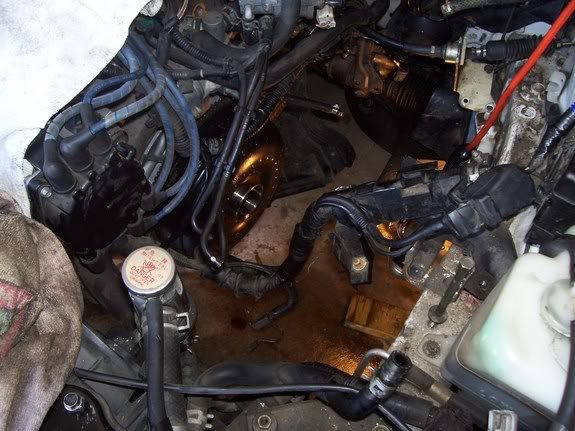
Now the Automatic Transmission, for this I had to put a jack under the engine to support it cause i removed the entire driver's side support on the engine, as well as the black crossmember. then i just removed all the bolts that attached the AT to the engine, and slowly pulled it out from underneath, while at this point, i also took off the torque converter:
Then I added the pilot bearing to my refurbished flywheel that i purchased and added the clutch kit, this was hard because none of the proper bolts were present from the old AT so I had to go out and buy some, make sure they are strongly rated bolts! I mounted the new clutch assembly and flywheel:
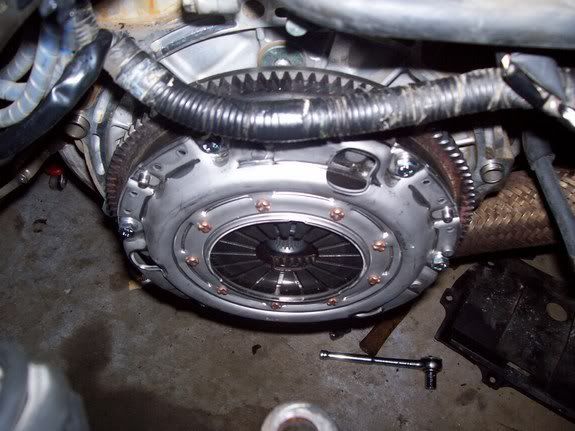
after this, i added the throw-out bearing to the bell housing and hoisted the MT into its place, i suggest adding the number 4 mount before doing this so you can fit the mounts on the tranny into the holes:
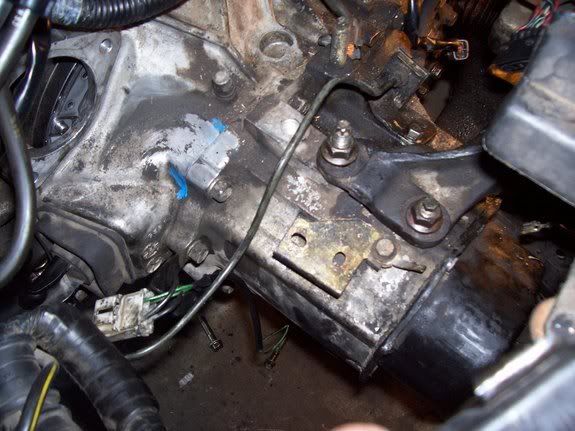
Tighten all the bolts that attach the MT to the engine and reassemble all the mounting brackets and crossmembers that were removed before. add the starter (you may need some sort of spacer) and plug it back in.
Next i added the shifter linkages, i shoved them in from inside the car on the passenger side and bolted in the shifter:
Then i put in the new axles and reassembled the spindle assembly, and added the new nuts
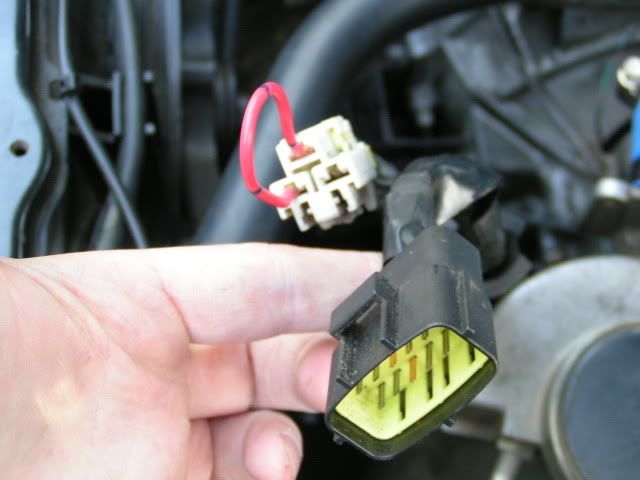
next i located the wire harness that was still attached to the car, i jumped these two plugs right here, this jump is required to start the car with the new MTX:
then i reassembled everything that was left (the intake and the battery), the car started up fine and its been more than a pleasure to drive in these last few months (i also got crazy with some engine enamel
---------------------------------------------
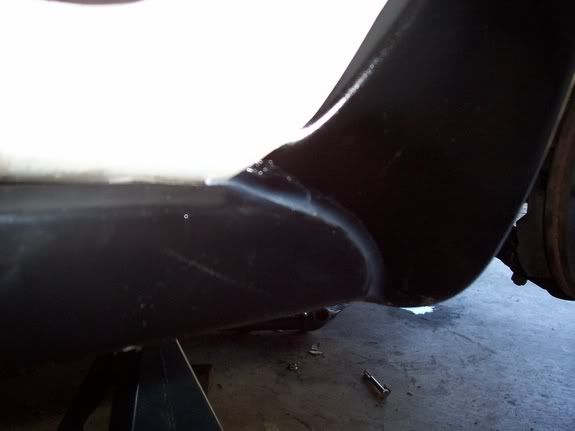
Accord Side Skirt Mod (Not My Idea; Someone else's... not to sure who's)
okay, this is a little side skirt mod that really flows nicely with the GS lip. for this I needed:
- Side Skirts from a 94 honda accord (there are more hondas with em but thats what i used)
- An electric drill, with a small and large drill bit, as well as a phillips attachment
- a regular philips screwdriver
- metal-grade screws (14)
- Washers (14)
- Hack saw
- Black or Clear silicon (if you wish to mold it to the mudflaps)
the First step is to cut off the excess skirt (there will be roughly a foot, give or take a few inches, of excess). After this, if you wish to paint it, you may do so.
The next step is to drill a pilot hole in the very back of the skirt (under the very top lip) as well as in the sheet metal underneath that car (where you drill the pilot hole is completly to your taste, if you wish to have it under the car more, then put the hole further back).
Next take your metal grade screw and use the drill to drill it into the metal, creating a path for the screw to follow, then back the screw out. after that, drill a quarter inch hold into the underside of the flap, this will allow you to get a screwdriver in there to tighten the screw, because a drill is simply too big to get back there. Like so:
Take a washer and the screw, and begin to screw it in place, you cannot use a drill here, you must use just a phillips screwdriver, use the quarter inch hole to get the phillips under the flap. after tightening it down, you now have the back of the skirt mounted, repeat this process so you have four total screws holding it to the car (any less, and there will be a lot of sagging).
After you have the entire skirt mounted to the car, you will notice that the underside of the skirt sagswhat you must do from here is take the hacksaw, and cut flaps that you will use to bolt up onto the underside of the car, three should do the trick, but four would be better. next, create pilot holes in these flaps, as well as the car itself. drill the metal screws into place with washers this is about what it should look like:
After you have all four flaps drilled in, you may wish to cut off all the excess skirt on the underside with your hacksaw.
If you would like to leave your front mudflaps on, you will have to custom cut the skirt in the front. dont worry about perfection, because after you have a rough fit, you can use clear or black silicon (depending on what you painted it) to mold it to the front flap and hide the probable slop cut, like so:
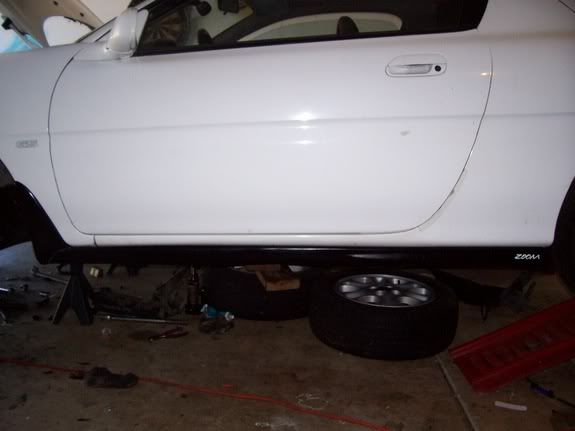
All finished:
-------------------------------------------
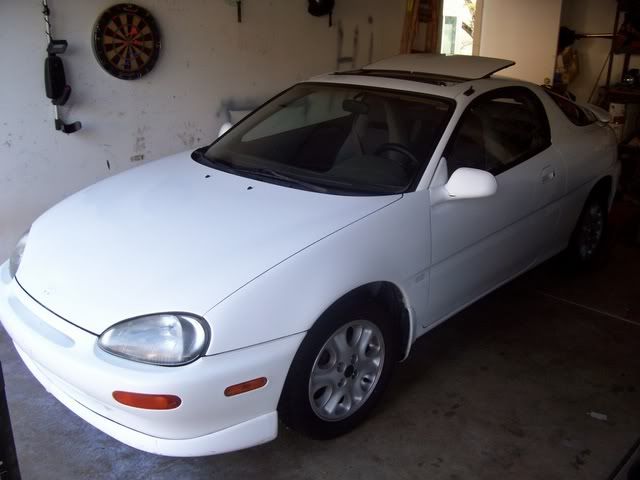
Current
after the swap and a few months of random things added to her, including:
-Accord Side Skirts
-black painted GS lip, mud flaps and side skirts
-black altezzas
-clear turn indicators
-grant steering wheel
-white face indigo gauges