


| AUDIO SYSTEM WIRING DIAGRAMS AND SCHEMATICS |
|
- The Below Schematics/Diagrams Are Courtesy Of Vaughn Nishimura.
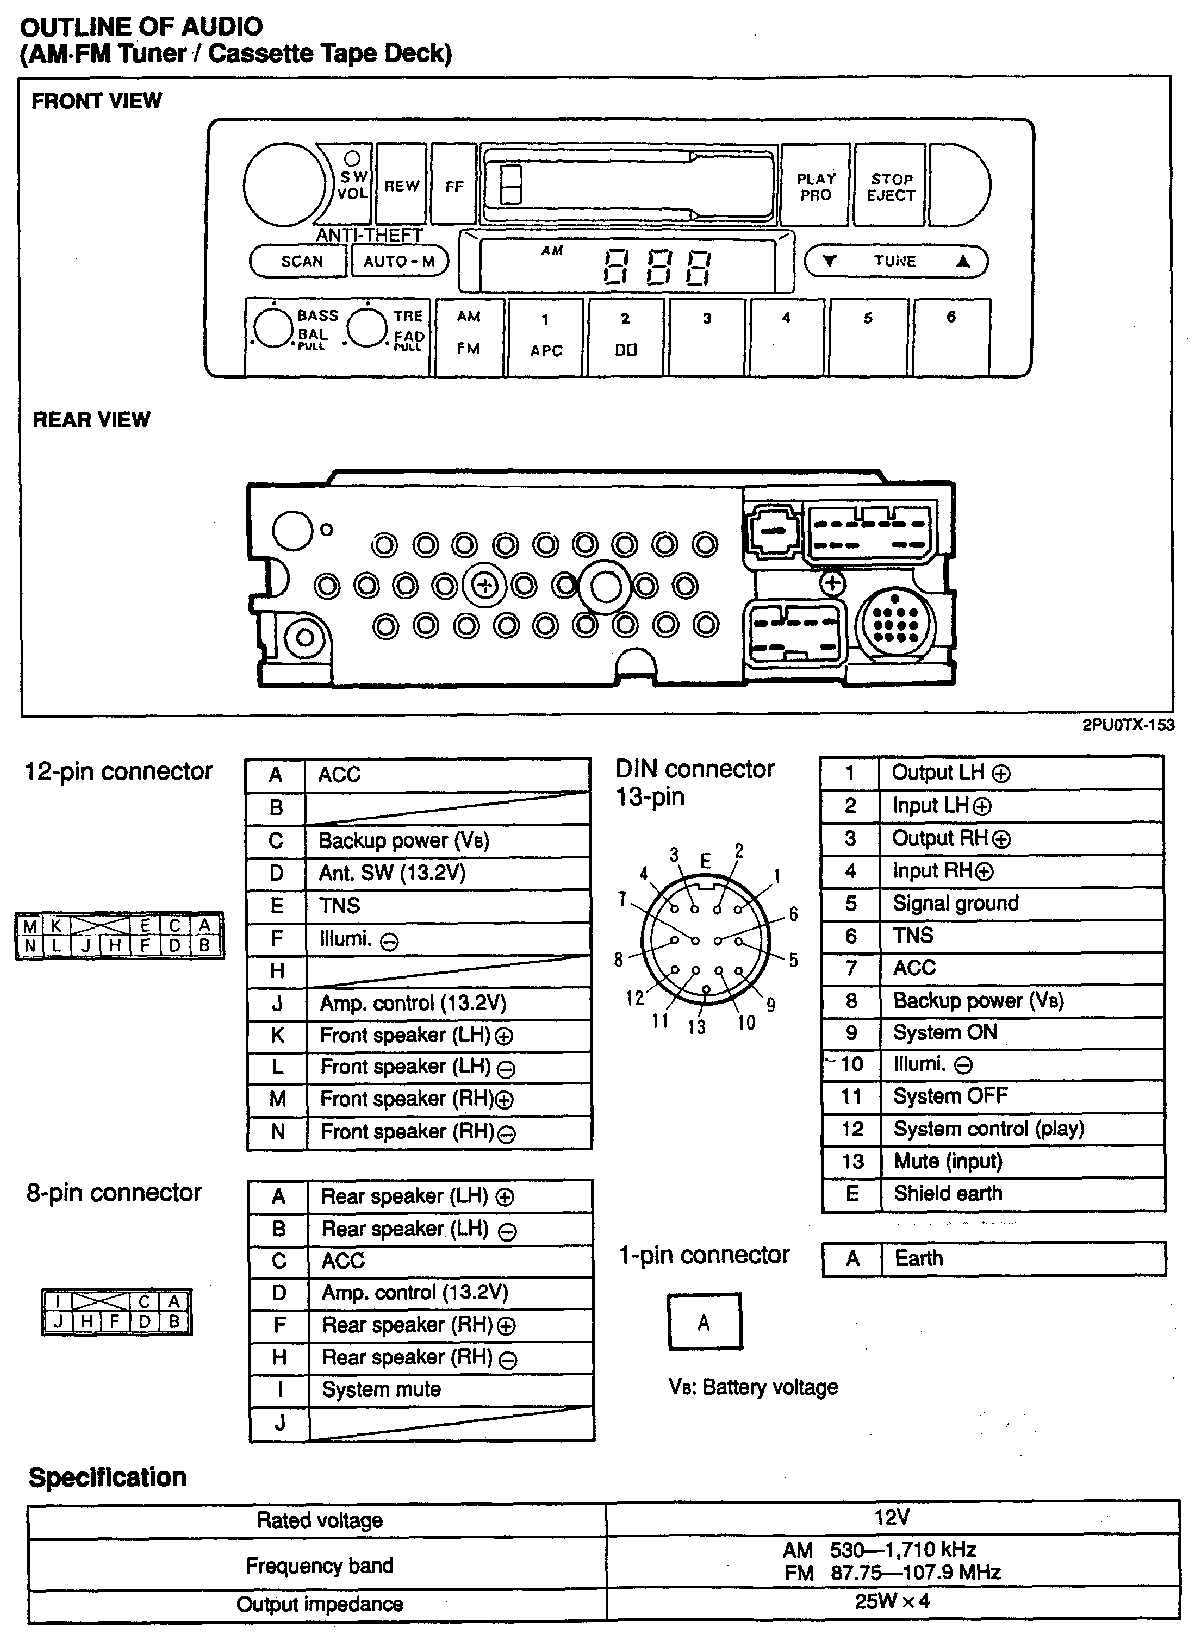
- Schematic of Audio System with AM/FM Tuner/Cassette Tape Deck, includes a diagram for each of the harnesses and their specific pin-outs. (Scanned from 1993 Mazda MX-3 Electrical Manual)
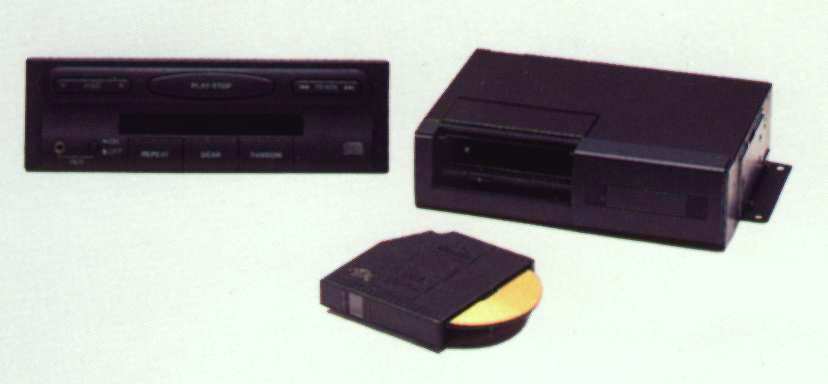
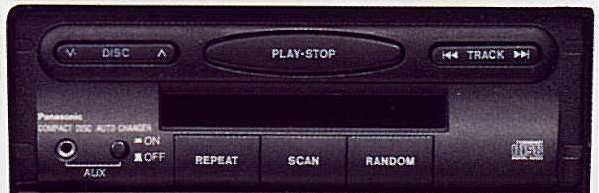
- Schematic of Optional CD Player, includes a diagram of the 13-Pin DIN connector and its specific pin-outs. (Scanned from 1993 Mazda MX-3 Electrical Manual.)
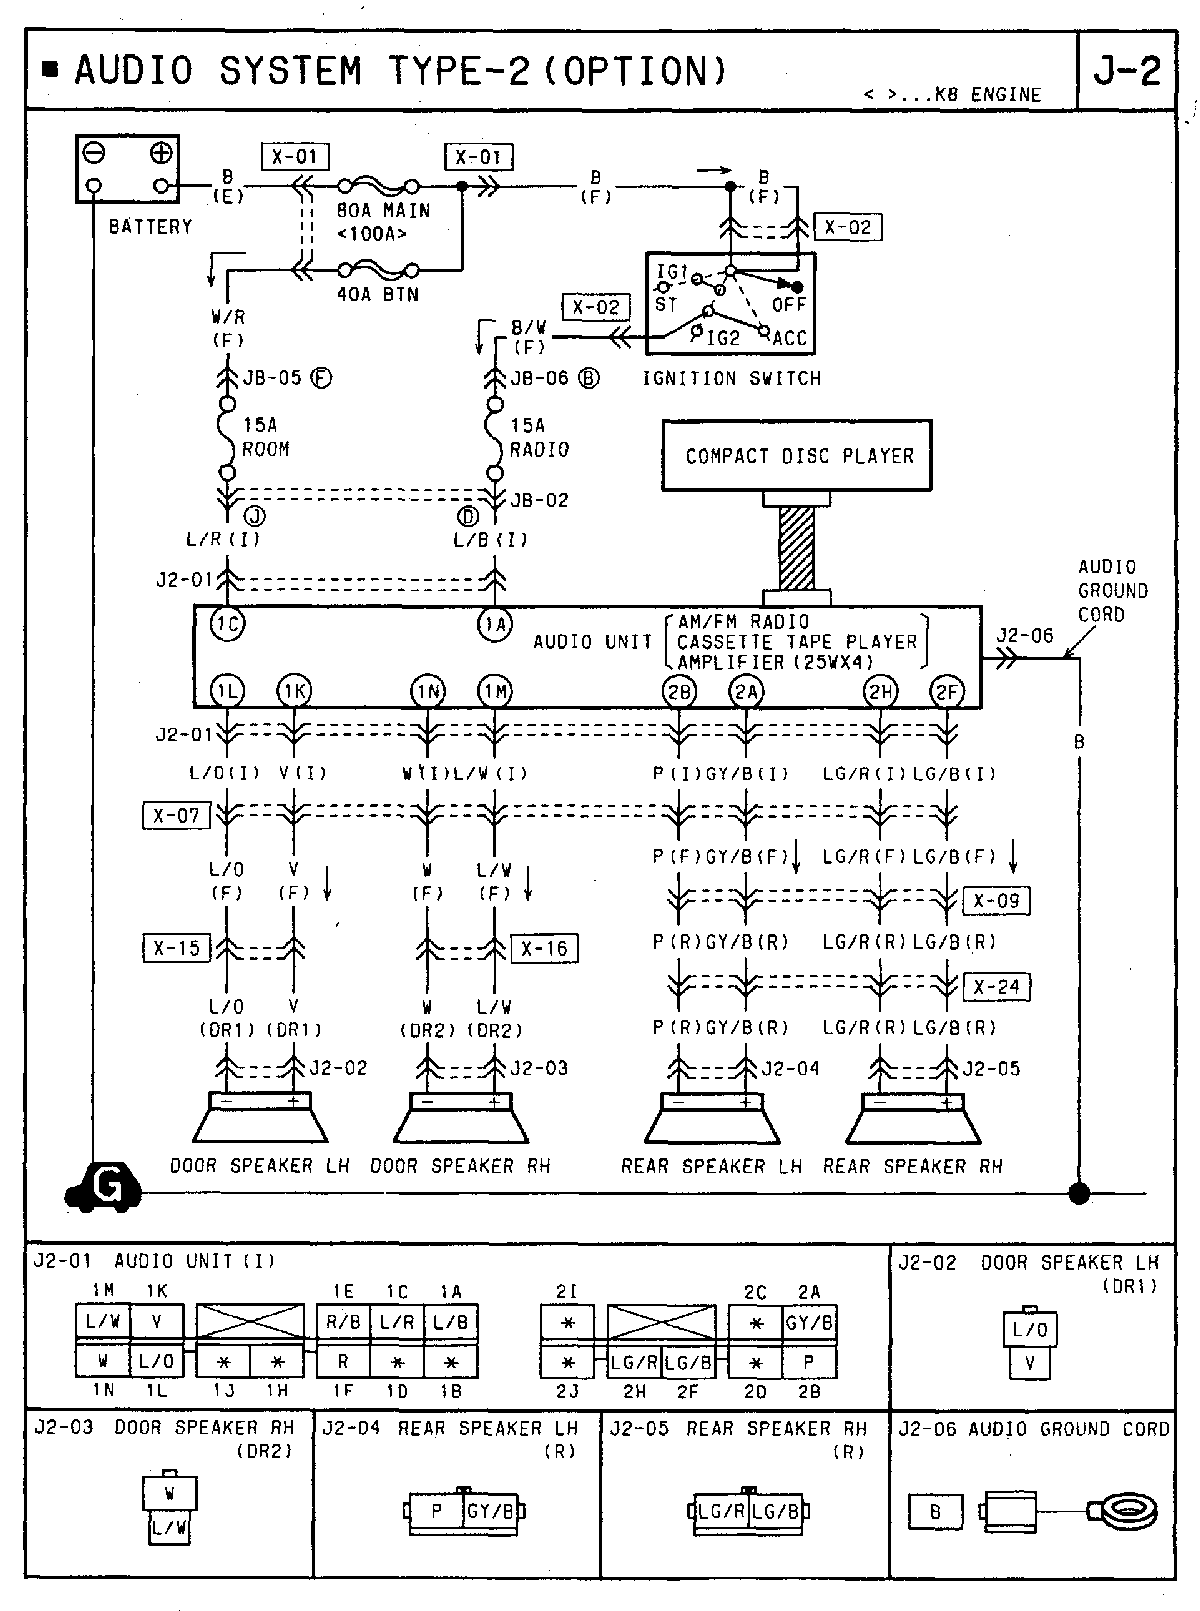
- Wiring Diagram for the audio system. (Scanned from 1993 Mazda MX-3 Electrical Manual.)
|
| REMOVAL OF STOCK STEREO COMPONENTS |
|
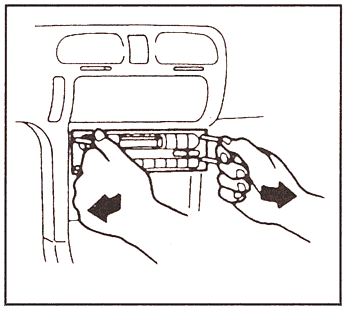
Procedure For Removal Of OEM Stereo Unit From Dash Console:
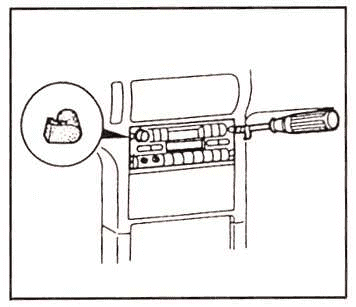
- The OEM stereo units that came with the MX-3 are held in place using spring type brackets. In order to remove them you can use a special Mazda Radio Puller Tool Part #49-UN01-050 or equivalent, but a simple piece of wire coat hanger will do.
- For the home made tool, cut two pieces of wire coat hanger about 8" long each and bend them both into a "U" shape.
- On the left and right sides of units, their are two rubber plugs. Remove the four rubber plugs.
- Place the Radio Puller Tool or your home made "U" shaped pieces of coat hanger into these holes.
- When inserting in the holes be sure to angle the ends towards the outside of the car to catch the clips.
- Once they have been inserted about an inch you should feel some pressure on them. This is because they are disengaging the springs holding the unit in place.
- Now while pushing the puller tool handles towards the outside of the car, simply pull the unit out from the dash, being sure not to pull any wires to hard.
- Unplug any harnesses or wires attached to the back of the unit, making sure not to lose them in behind the dash.
- For more information on installing an aftermarket head unit contact me, as I have not created that page yet.
|
|
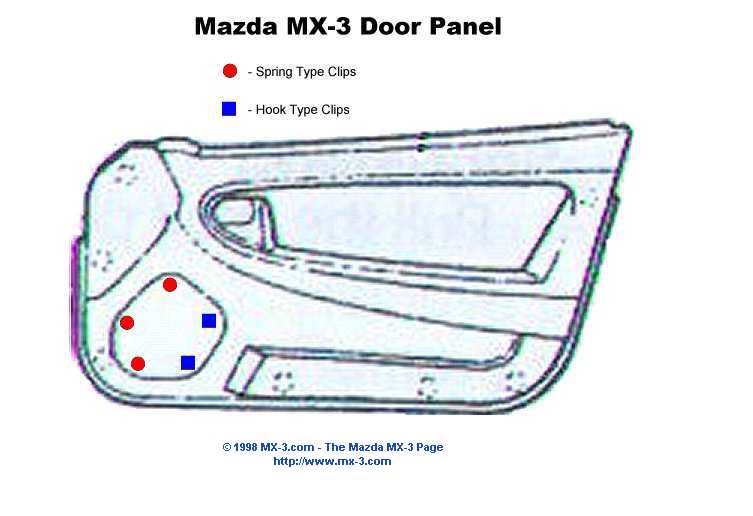
Procedure For Removal Of OEM Speaker Grill From Front Door Panels:
- The grill is held in place at 5 points, 2 hooks and 3 spring clips. (Refer to this Diagram while reading this procedure.)
- The 3 spring clips are shown with red circles, and the 2 hooks are shown with blue squares.
- Insert a small straight screwdriver in behind the speaker grill, where the spring clips are and gently pry outwards to disengage them.
(Be sure not to puncture the vinyl door panel with the screwdriver
- Next, carefully pull the speaker grill towards the front of the car and outwards to unhook the grill.
- To remove the OEM speakers, simply unscrew the three screws that hold the speaker in place. (Be careful not to let the screwdriver slip and puncture the speaker cone.)
- For more information on installing aftermarket speakers please contact me, as I have not created that page yet.
|
|
Procedure For Removal Of OEM Speaker From Rear Hatch Areas:
- The rear speakers are screwed onto the interior body panel in your hatch area.
- First remove the rear hatch Cargo cover.
- Unscrew two screws on the inner side of the rear speaker panel.
- Gently lift the interior panel upwards to disengage the spring clips that are holding it down towards the outside of the car. Be careful not to pull to hard as you might rip the speaker wires or harness.
- This should give you enough play to unscrew the stock speakers from the panel (3 screws hold it in place.)
- If you wish to remove the whole panel from the car, the seatbelt just slips through the opening in the panel.
- For more information on installing aftermarket speakers please contact me, as I have not created that page yet.
|
| AUDIO SYSTEM ANTI-THEFT CODE INSTRUCTIONS |
|
NOTE: The below sequences have not been personally verified by me, and may only work on some OEM MX-3 radio models. Use them at your own risk. I am not responsible for any damage that is done to your radio unit. If the code is attempted 3 times, you may be permanently locked out.
If you happen to forget your stereo anti-theft code, try one of the following procedures:
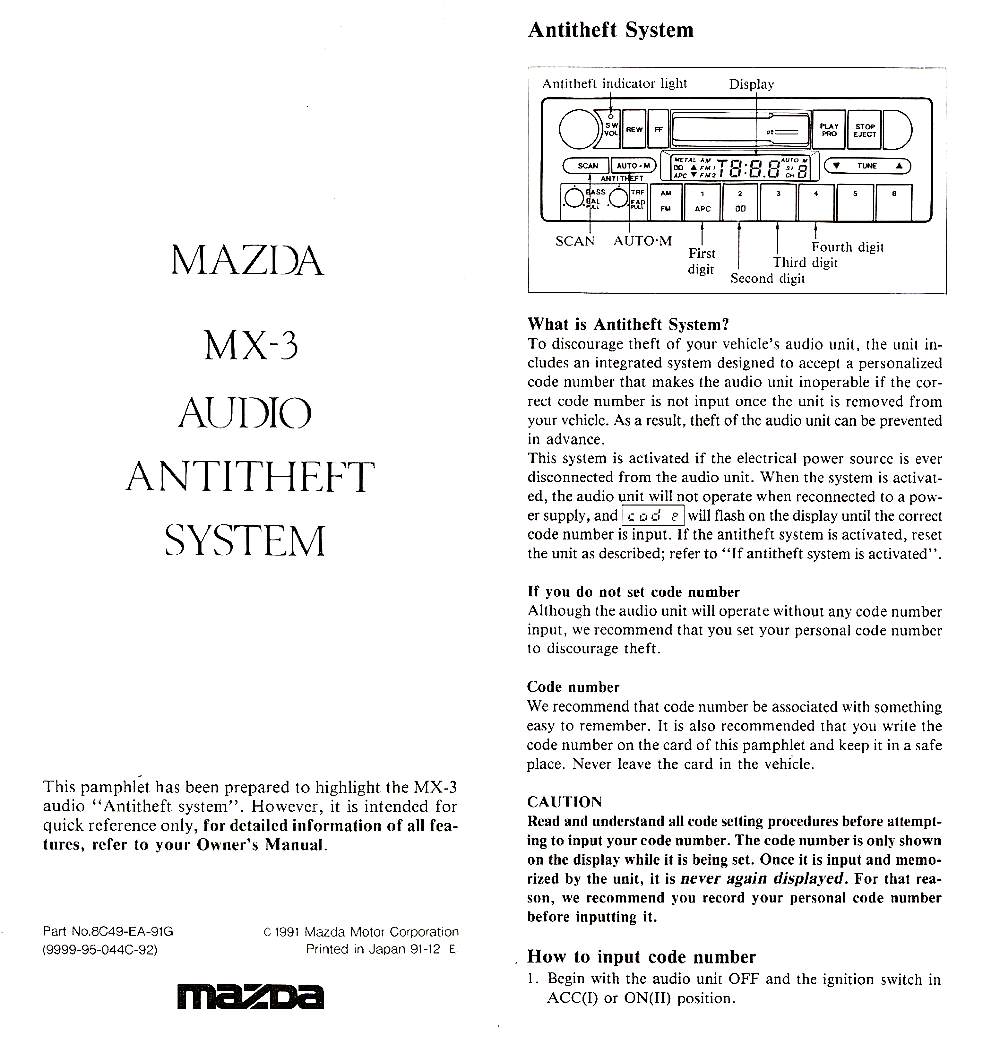
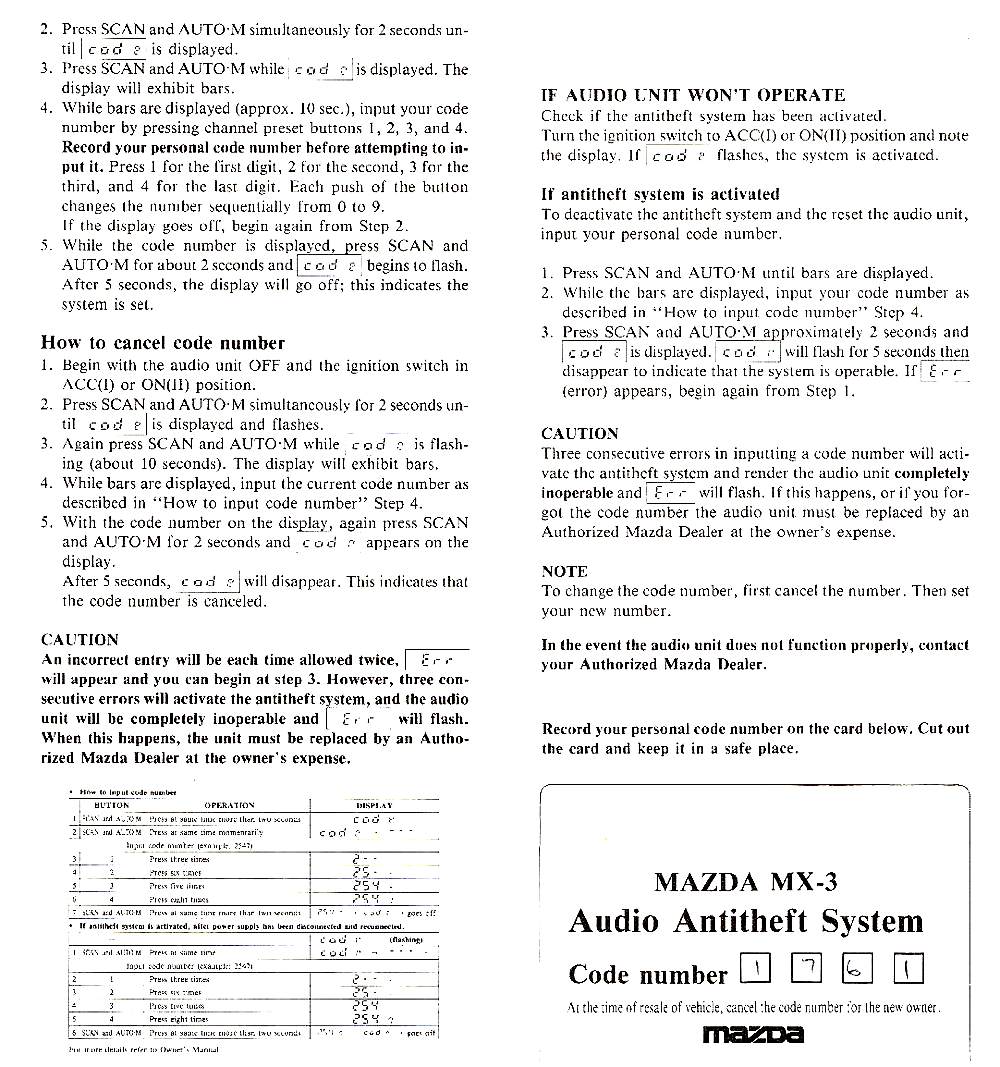
A. The following two images are from the Official Mazda MX-3 Audio Anti-theft System Pamphlet.
- Anti-Theft System Pages 1 & 2
- Anti-Theft System Pages 3 & 4
B.
- Press #1 button.
- Press Stop/Eject.
- Press AM/FM.
- Press clock button ---- will appear.
- Enter code 4989.
- Press Fast Forward & Reverse at the same time, hold for about 2-5 secs.
- Follow your OE code instructions in your service manuals.
C.
- Press "SCAN"
- Press "AM/FM"
- Press "AUTO-M"
- Press "TUNE-UP", "- - - -" appears on the display.
- Press "1414"(MX-3 Decks Only)
- Press both "SCAN/AUTO-M" simultaneously for 2 to 5 seconds.
D. To reset the Anti-theft code to your own code.
- Turn the key to the "Accessory" position.
- Press and hold "SCAN" and "AM/FM" for 3 seconds, "CODE" will appear on the display.
- Press "SCAN" and "----" will appear on the display.
- Using the first four "Memory Buttons" change the code digits. (You can enter "0000" to begin with, which will
reset the currently programmed code.)
- Turn the key to the "OFF" position and repeat this procedure, entering in your own code.
- Make sure you keep this code written down somewhere, or you'll have to start over again, hence the name RATS (Radio Anti-Theft System).
|
|
|


