Page 7 of 9
Re: Dark_Rider's Worklog- 1992 MX3 BP Swap Journal (Swap don
Posted: January 29th, 2011, 4:36 pm
by Ryan
I wouldn't say the epoxy repair was a bad option, but I'm curious what went wrong? People use liquid metal stuff to fill holes and stuff all the time. There was a memeber not too long ago that cracked an end cap for the cam, and used some sort of plastic/metal weld and it worked great.
Re: Dark_Rider's Worklog- 1992 MX3 BP Swap Journal (Swap don
Posted: January 29th, 2011, 5:24 pm
by Inodoro Pereyra
In a crack that's subject to stress, it's a bad idea.
My father used to tell that, when I was about to be born, he had a Rambler (don't know which year), and, one night, he hit something, and his oil pan cracked open. To make a long story short, a guy at a gas station helped him take the oil pan out, clean it up, and "fix" the crack with epoxy. He sold the car 5 years later, with the epoxy filled oil pan still on.
But when the crack is under stress, epoxy doesn't last. That's one of the many things people take from car races, not realizing it's a mistake. It's not the same to fix a crack in an engine that has to last 200 miles or less, than in a street engine, that's expected to perform for a long time.
Re: Dark_Rider's Worklog- 1992 MX3 BP Swap Journal (Swap don
Posted: January 29th, 2011, 5:41 pm
by Ryan
I'm actually starting to take classes on stress, so I can actually intelligently contribute to this. (Sorry John for cluttering your worklog)
If the correct type of epoxy is used, this should have worked fine. The majority of the internal stress caused by the cross threaded bolt was released when it cracked. If the bolt was left in while the epoxy cured, or the hole was tapped later, the epoxy should have been fine, as the head would be just subjected to the regular stresses after the crack, just now permanently deformed (weakened, but not too big a deal here).
The key thing here would be removing the constant stress caused by the bolt, and using the correct epoxy. With those two things, this should have worked perfectly. The correct epoxy would maintain the bond to the aluminum and deal with the thermal expansion and oily environment. Once the bolt issues was addressed, there would be no abnormal stress on the head or epoxy to cause further failures.
The thing here is, John made it sound like a gooey version of the epoxy plugged the strainer, which leads me to think think that it either wasn't the correct stuff, or it wasn't given long enough to cure for the amount/way it was applied. If it was a one part epoxy and it was jammed way down in the crack, it wouldn't have dried, and 40 PSI of oil pressure would easily blow it apart.
Re: Dark_Rider's Worklog- 1992 MX3 BP Swap Journal (Swap don
Posted: January 29th, 2011, 8:33 pm
by Daninski
One part epoxy is an air dry and two part is a chemical cure. Always use two part anyway it's better quality. Epoxy is used when they redo an oil pan. Rust is removed and metal cleaned then epoxied and as they say, Bob's yer Uncle. You need to use the correct epoxy as well. Some dry very hard and ridgid, some dry slightly pliable. 3m structural adhesive is very flexible where as Aeroepoxy or West sys. epoxy is very hard. I won't even go into hot cure and cold cure just don't use a hot cure expoy on anything foam.
Re: Dark_Rider's Worklog- 1992 MX3 BP Swap Journal (Swap don
Posted: January 30th, 2011, 1:24 am
by Inodoro Pereyra
I agree with you that we're hijacking this worklog, so this is my last post on the matter. As interesting as this discussion is, it doesn't belong here.
Ryan wrote:
If the correct type of epoxy is used, this should have worked fine.
And you just partially made my point.
IF the right epoxy had been used,
IF the surfaces had been properly prepped, and
IF there was no added stress to the crack, it should've been ok.
But reality is that it would've been easier, and probably cheaper, to have the crack tigged and the hole retapped, than to research for the right epoxy, find it, buy it, take the head off, degrease it to the point that the epoxy would stick properly, etc.
Besides that, IF the bolt was just there, sitting pretty, it wouldn't add any stress to the crack. But in reality, the act of torquing that bolt adds stress to the crack, and so does the inertia of the parts that bolt is holding, combined with the engine's vibration, not to mention temperature changes, for example.
Re: Dark_Rider's Worklog- 1992 MX3 BP Swap Journal (Swap don
Posted: January 30th, 2011, 11:19 am
by Dark_Rider2k3
I didn't mind this discussion at all. It was an interesting read.
I will add that the proper prep work was done. The outside of the engine, and inside, were properly cleaned up and ready for the epoxy. I forget the name of it but it's a metal epoxy... anyways we we very generous with the epoxy which is what leads me to believe caused the issue. It goes with what Ryan said.. not all of it cured, some of it blew off, and hence the reason I found chunks of it on the strainer.
Now, my goal here is to get the motor in as fast as possible. So here are my engine plans:
- Swap in the motor today. I'm not going to worry about cleaning her up, or swapping valve covers yet. It's the winter time and I don't think it matters.
- Get the mazda VC powder coated.
- In the spring/summer, I am going to give my engine bay a thorough cleaning. I'll clean the heck out of the engine, and try to clean this whole engine up as good as possible. During that time I will also swap over valve covers.
- After that, I'll install an adjustable FPR and walbro fuel pump. Then I will start collecting parts to turbo my car (and get megasquirt set up)
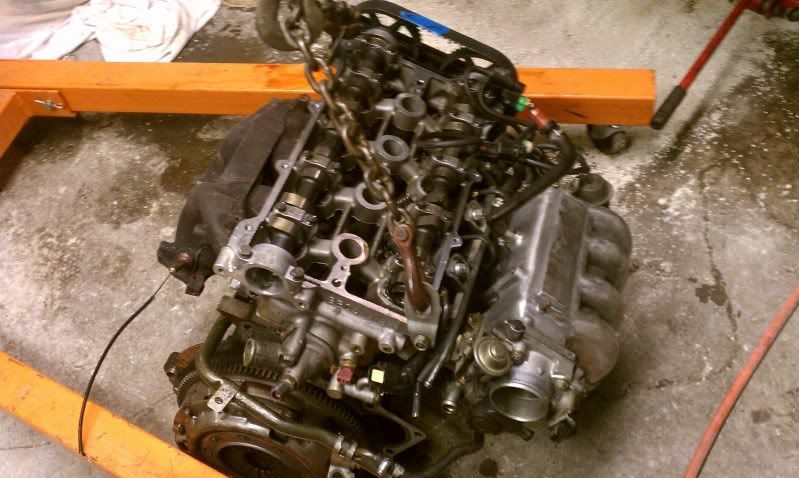
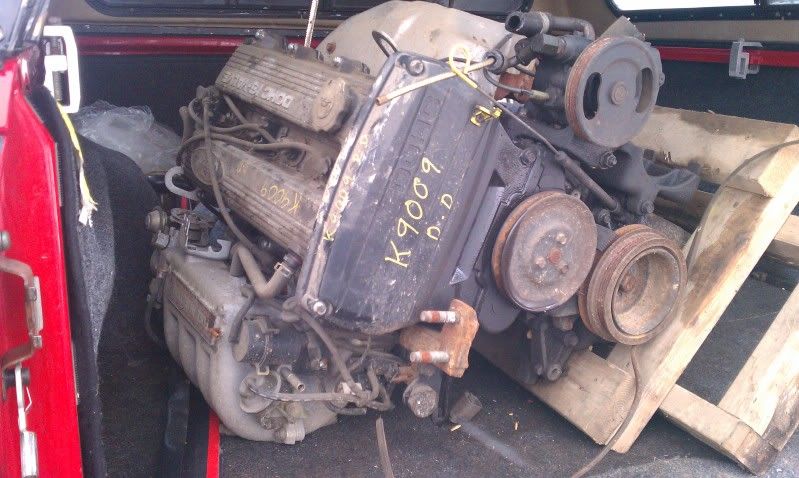
pic of new motor:
Re: Dark_Rider's Worklog- 1992 MX3 BP Swap Journal (Swap don
Posted: January 30th, 2011, 12:16 pm
by Inodoro Pereyra
Sounds good.

Don't forget to keep your camera ready...

Re: Dark_Rider's Worklog- 1992 MX3 BP Swap Journal (Swap don
Posted: January 30th, 2011, 12:34 pm
by Dark_Rider2k3
Inodoro Pereyra wrote:Sounds good.
Don't forget to keep your camera ready...
it's always ready
Re: Dark_Rider's Worklog- 1992 MX3 BP Swap Journal (Swap don
Posted: January 30th, 2011, 5:23 pm
by Dark_Rider2k3
Re: Dark_Rider's Worklog- 1992 MX3 BP Swap Journal (Swap don
Posted: January 30th, 2011, 7:45 pm
by Mi|<E
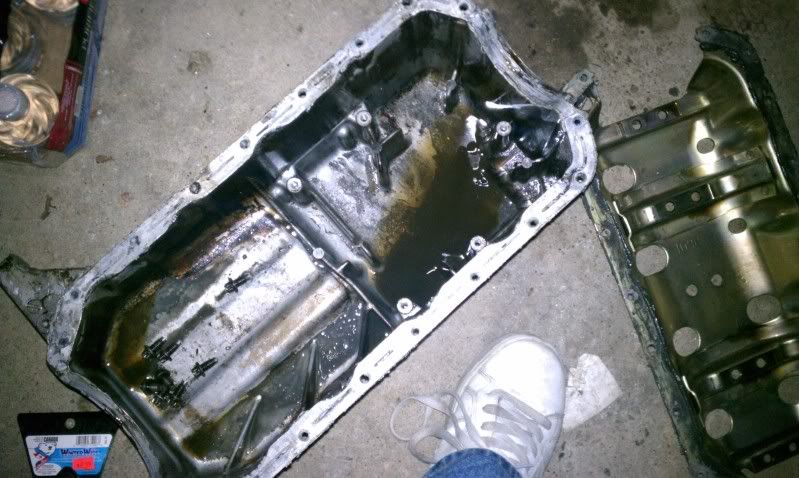
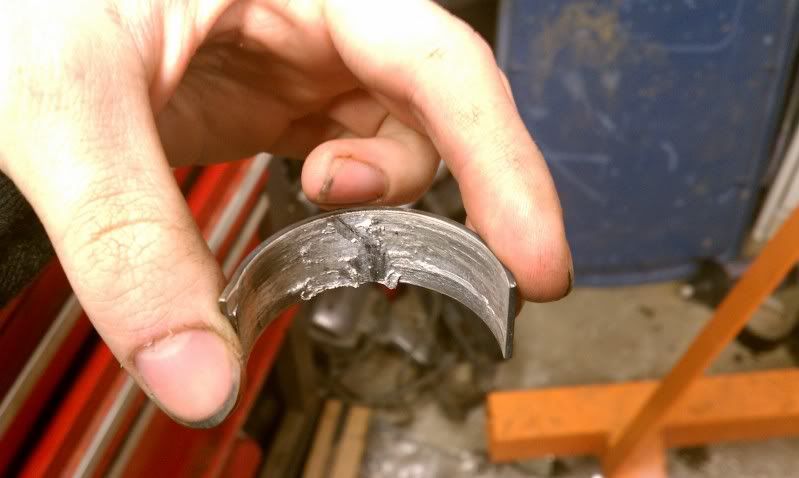
Whats in the bottom of the oil pan? Looks like gritty residue and almost like
moly caked on between the upper baffles?
Re: Dark_Rider's Worklog- 1992 MX3 BP Swap Journal (Swap don
Posted: January 30th, 2011, 10:16 pm
by Inodoro Pereyra
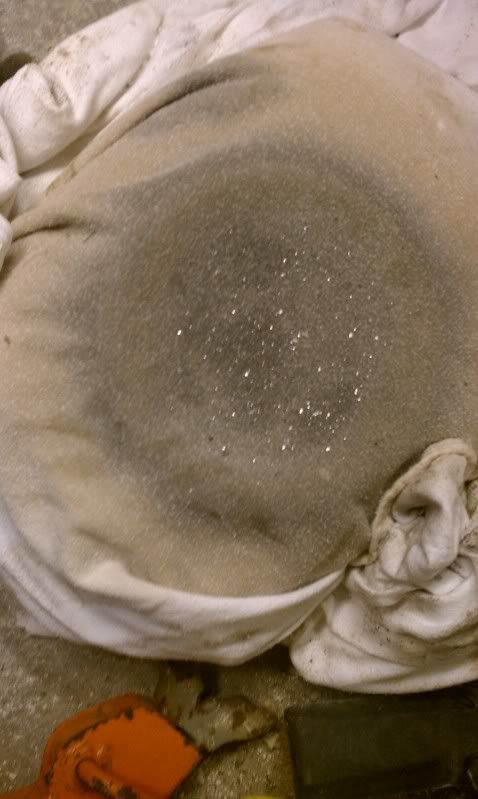
Hmmm...yummy...
The stars tell me there's a rebuild in your future...


Re: Dark_Rider's Worklog- 1992 MX3 BP Swap Journal (Swap don
Posted: January 31st, 2011, 6:53 pm
by Dark_Rider2k3
Mi|<E wrote:Whats in the bottom of the oil pan? Looks like gritty residue and almost like
moly caked on between the upper baffles?
mainly oil left.. some silvery oil and a bit of epoxy that i pulled off the strainer.
@ Inodoro: You think I should keep that motor?
Re: Dark_Rider's Worklog- 1992 MX3 BP Swap Journal (Swap don
Posted: January 31st, 2011, 11:04 pm
by Inodoro Pereyra
Dark_Rider2k3 wrote:
@ Inodoro: You think I should keep that motor?
Of course! Why not?
If there's no major damage, a good cleanup, a new set of bearings, and maybe a crankshaft machining, and you have a working engine.
If there IS major damage, it's still an iron block, the chances of it getting deformed to the point of being useless are slim. Overbore it, get a new set of pistons, bearings, and whatever else you may need, and you can end up with an engine as aggressive as you want to make it. And the experience you collect along the way is worth 1000 times more than the money spent on it.
Re: Dark_Rider's Worklog- 1992 MX3 BP Swap Journal (Swap don
Posted: January 31st, 2011, 11:06 pm
by Ryan
Be sure to get all the passages cleaned out then... last thing you need is the residual crap making its way back around.
Re: Dark_Rider's Worklog- 1992 MX3 BP Swap Journal (Swap don
Posted: February 1st, 2011, 9:58 pm
by Dark_Rider2k3
Update:
today we started swapping parts from the old motor over to the new motor. timing belt, tensioners, and water pump were the main ones.. the water pump on the new motor was definitely going out as we found...
also ran into a problem.. the EGT uses a V-belt for the alternator/water pump... which I don't have. So instead of trying to make something else work, I'm just going to get an escort GT alternator and V-belt.
other then that though everything else went smooth. Clutch/Flywheel are on, water pump is on, and some odds and ends are swapped over.
Tomorrow I will go get the alternator and V-belt, and then finish swapping crap over and hopefully drop the engine down in..
pics also to be posted tomorrow!!