Front Suspension Disassembly (sorry, not a lot of pictures in this one)
The front end is a lot easier than the rear. Some PB Blaster on the ball joint bolts will help. The worst part is the Anti-Sway bar end links again. This should only take a couple hours.
As with the rear suspension, begin by raising the car and supporting it on jack stands. Chock the rear wheels. Do not rely on the E-brake to hold the car. If the brake fails you want to have a physical back up. Over 1 person dies each year from cars falling on them. Seriously. True story.
First thing I do is cut the Anti-Sway bar end link. I just don't have the energy to try to remove them in one piece.
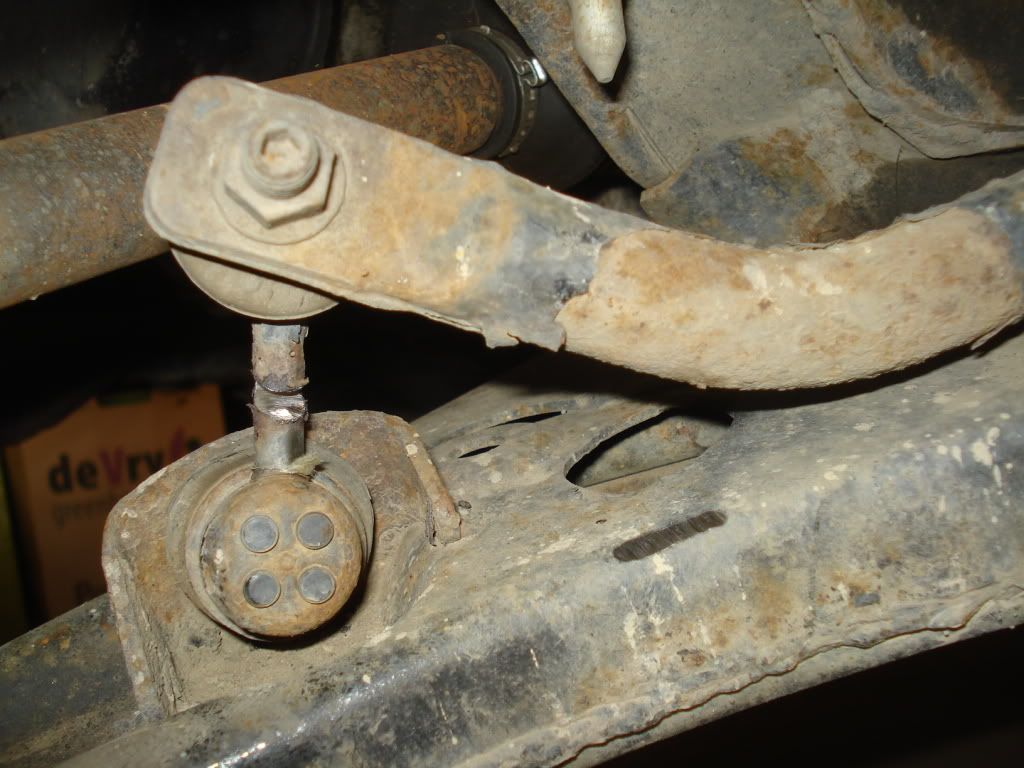
Next unbolt the lower Ball Joint from the Lower Control Arm. One stud and one through bolt. Once they're out I usually use my largest flat screwdriver to pry the ball joint away from the LCA.
I like to unbolt the front LCA pivot bolt first. Don't pull it out, just loosen it completely and leave it in. Then remove the (3) 14mm bolts that hold the rear LCA bushing bracket to the body. When you pull the front bolt out the LCA will be removed. That should take about 20 minutes.
Bushing Removal
Removing the old bushings is not as bad as you think. A press is nice and does make the job less messy and a lot faster, but burning them out is very effective as well. A bench vise is not quite mandatory, but you will need some sort of clamping system.
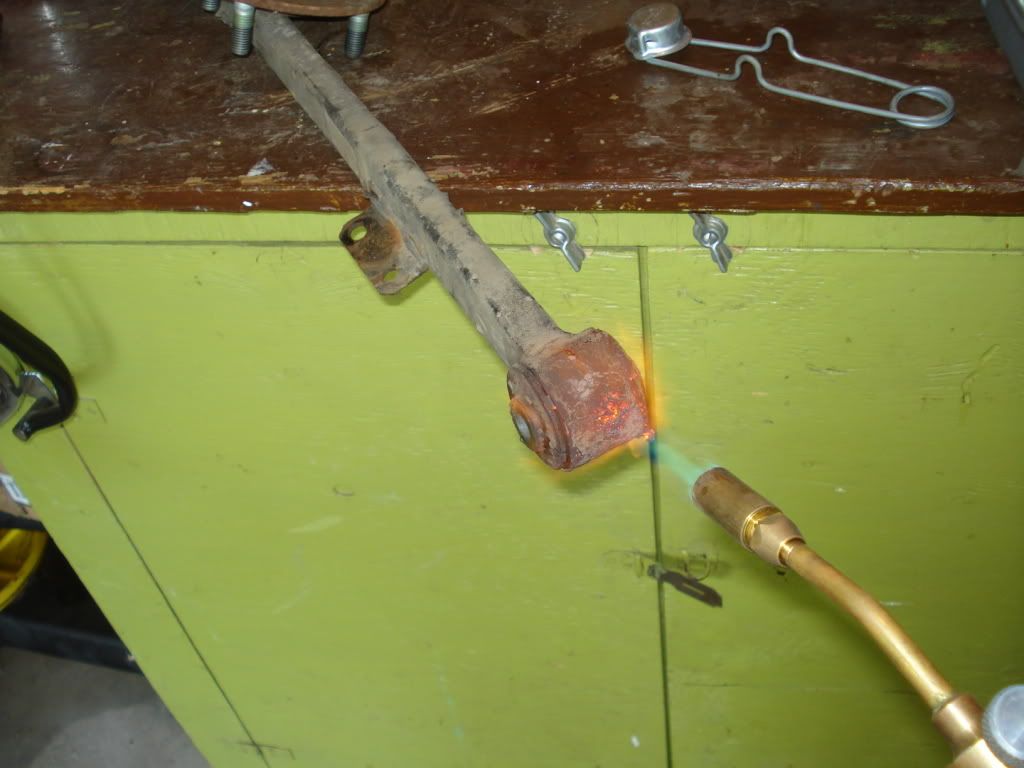
Except for the Trailing Arms, all of the stock bushings consist of a rubber bushing with a metal jacket. The rubber is bonded to the metal jacket and they are pressed into the housing of the control arm where they live. You want to get the metal housing that the bushing is pressed into really hot to melt the bond between the rubber and its metal jacket. Using a propane torch, heat the area around the perimeter of the bushing.
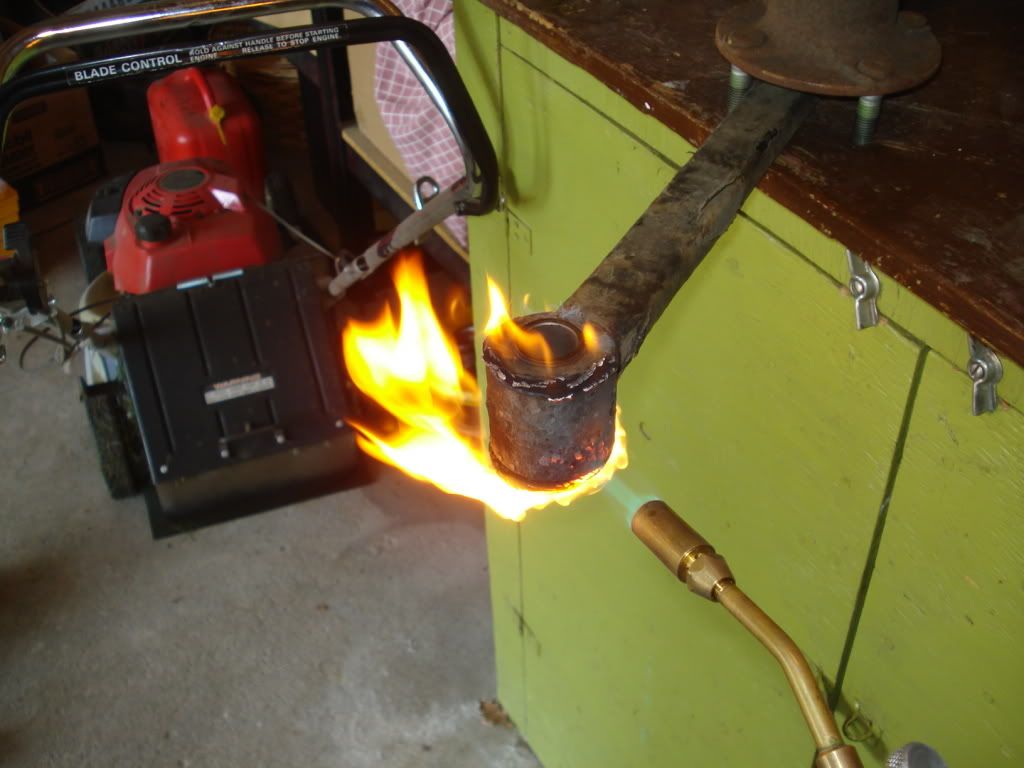
The rubber will start to burn and smoke and smell so make sure you have good ventilation. Better yet do this part outside. I spent about 1-2 minutes per bushing to make sure I cooked it good. While the bushing is still hot, use a socket or whatever impromptu pressing tool you can find and just push them out. Careful not to burn yourself.
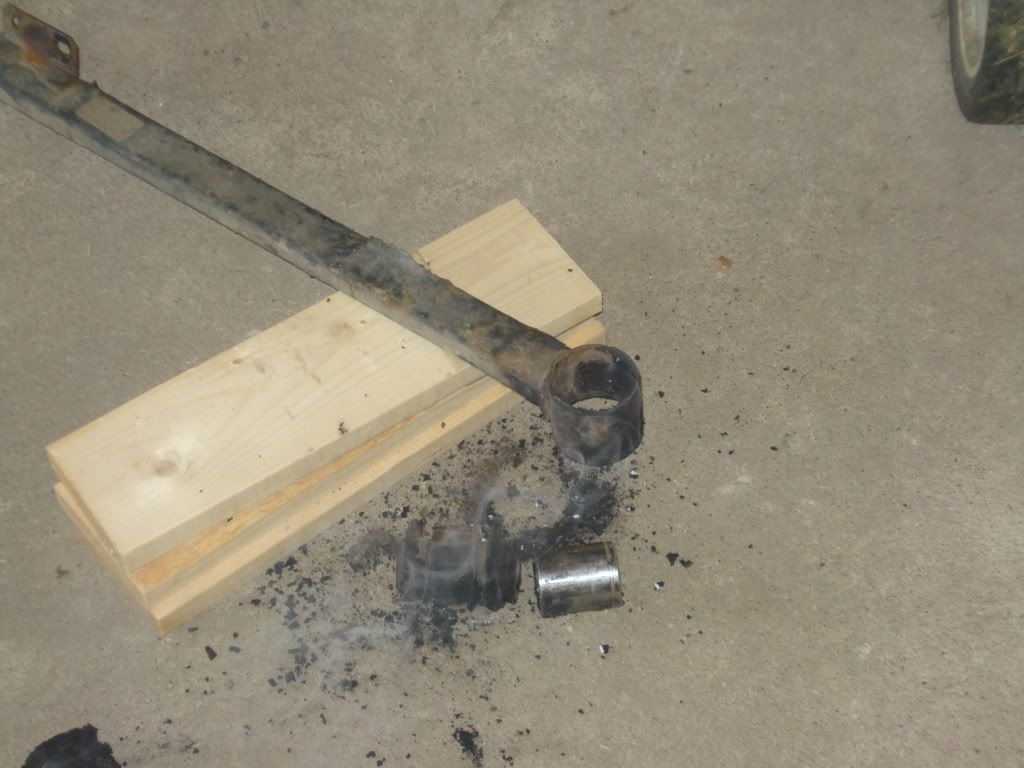
Now the rubber is out but (except for the Trailing Arms) the metal jacket is still in there. Take your hacksaw and remove the blade. Thread the blade through the bushing housing and reinstall it in the hacksaw frame. Then carefully cut through the jacket. You don't want to cut into the housing of the control arm. It should only take a small number of strokes to cut the jacket. Take a hammer and pin punch or small chisel and punch the jacket away from the housing of the control arm. Just work your way around punch, punch, punch until the jacket peels away from the control arm.
It's a little tedious but it works quite well if you don't have a press. The jacket on the Lateral Link bushings is pretty thin, but the jacket in the LCA rear bracket is quite thick. It might help to cut through the jacket in a few places around the circumference. Just take your time and don't get hasty.
If you're going to clean up the bores of the control arms with a dremel or some other grinding tool, be careful not to remove a lot of material. The new bushings need to be tight in their bores. You will likely find with the Trailing Arms that because there is no jacket the bores are very badly rusted. I am planning on replacing mine for this reason. I cleaned mine up with the dremel but the surface is still quite rough and I think it may wear the bushing prematurely. Whatever you do, be careful not to take too much material out of there when you're cleaning them up.
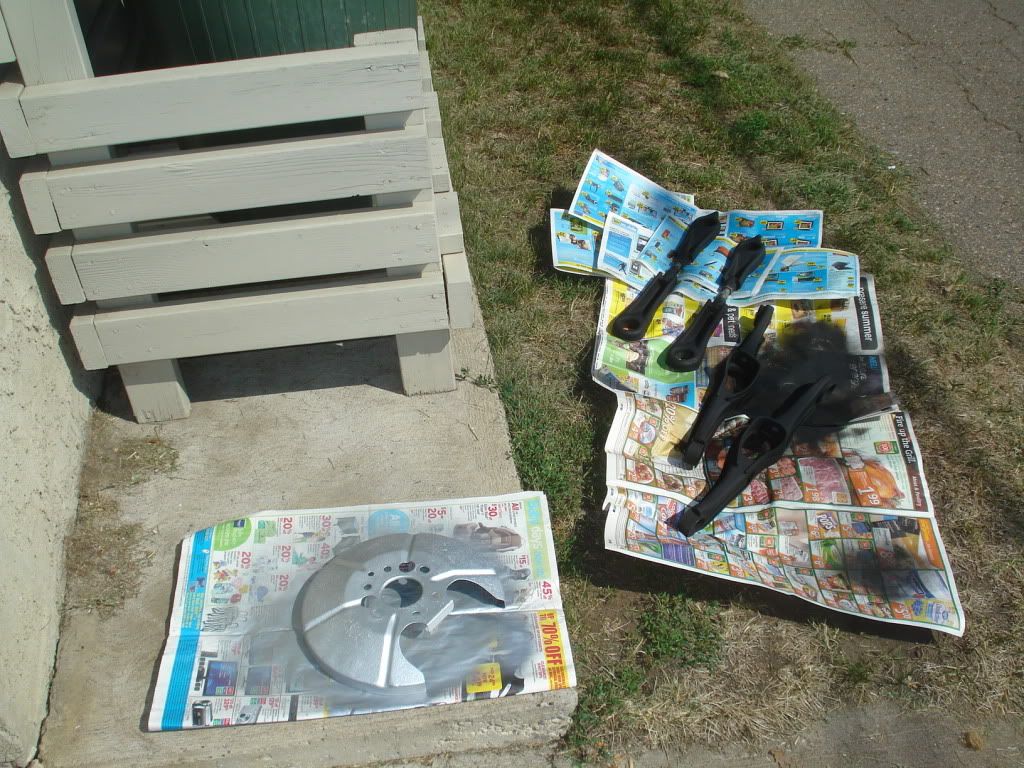
So now you have all the control arms off and the old bushings out. This would be a good time to go sandblast your parts and put a few coats of paint on them...or better yet get everything powder coated hot pink or something. Anyway, do what you like coating wise and now you're ready for installing the new bushings.
Installing the Polyurethane bushings
LUBE, LUBE, LUBE!!! It's really all about the lube. There are diagrams in each bag showing the locations of the various parts so all you need to do is apply lots of lube and follow the diagrams.
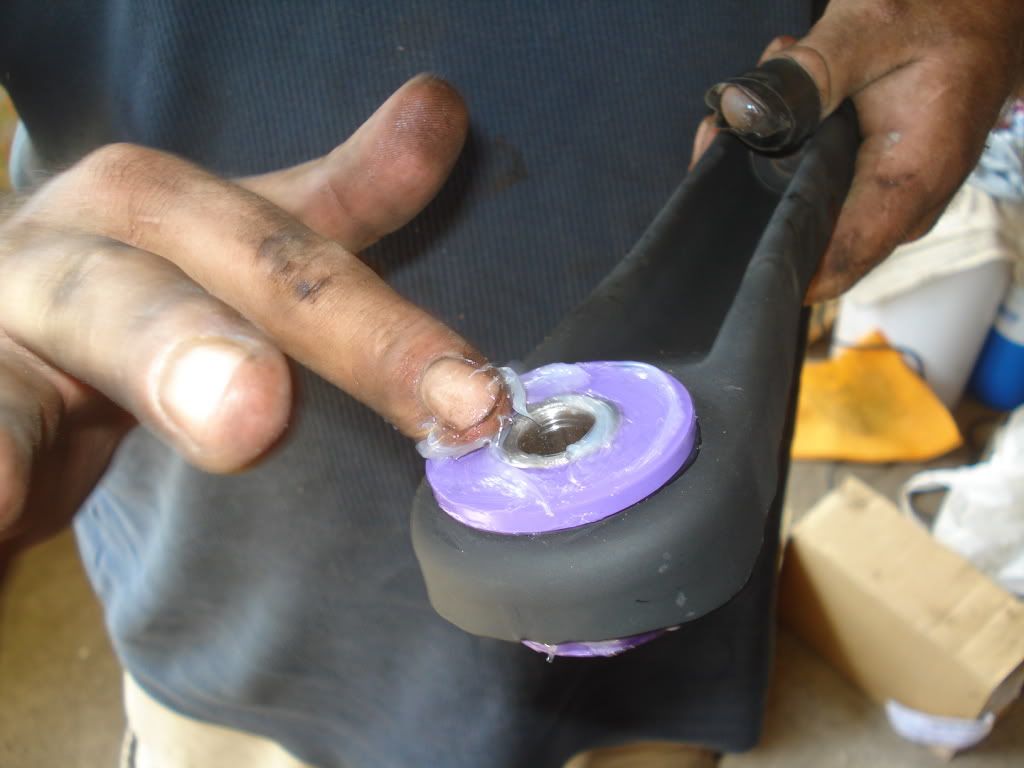
Take a bushing piece and a dab of the silicone lube on your finger. Lube the ID of the bushing first and make sure you use enough to fill the grooves. Then apply another big dab around the OD. Put that half in the control arm and then grease up the other half. They should be tight in the control arm but they are pliable so you can just work it in.
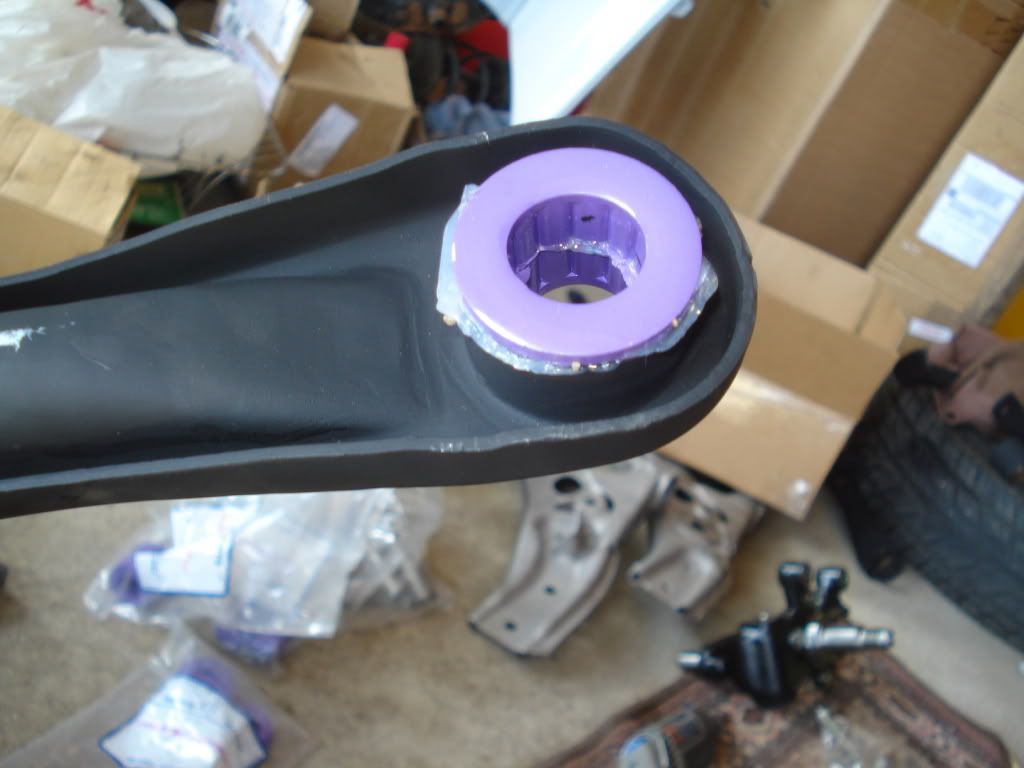
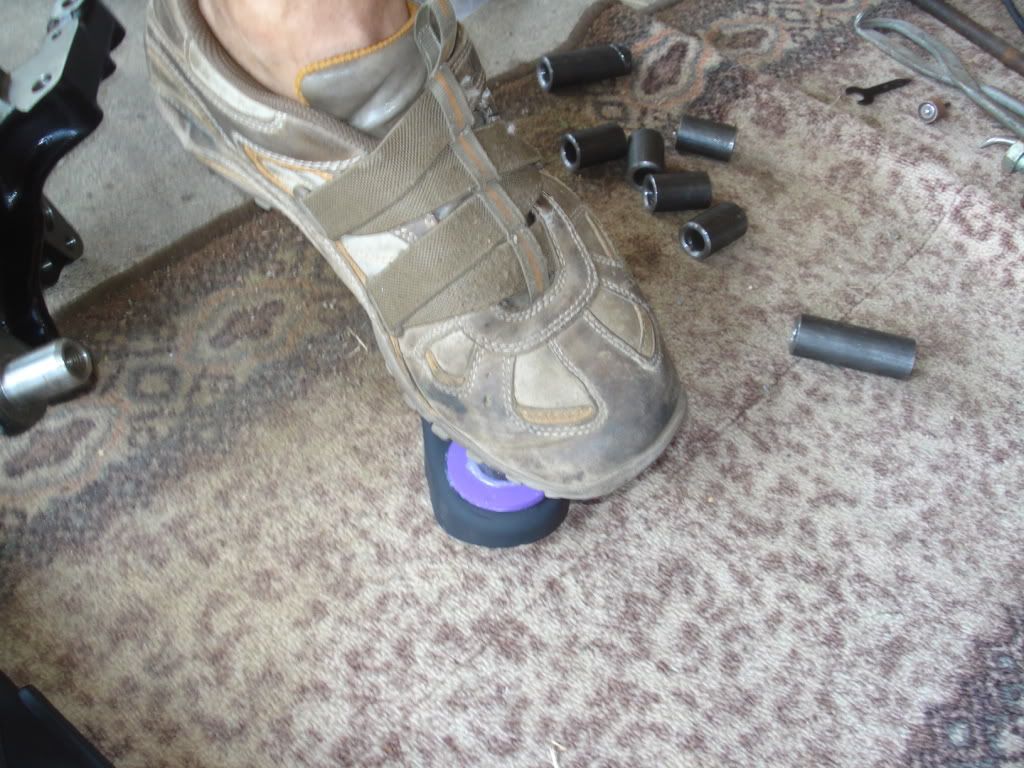
Once both halves of the bushing are in lube up the surface of the steel sleeve and push it into the center. This may be quite tight so you might need to tap it in with a hammer or use a bench vise to push it in. I just stood on them.
When you go to assemble the control arms make sure you apply lube to the sides of the bushings.
Anywhere that poly contacts metal should be thoroughly lubricated. All the washers you need will be in the bag with the bushings they belong with.
The crush sleeves are sized so that the bushings will be just slightly squished when you tighten the bolt down. So tighten the bolts tight. You may want to invest in some anti-seize compound like Kopr-Kote and use it on the bolts. They will be in direct contact with the crush sleeves so corrosion will eventually be an issue. Particularly with the long bolts on the rear suspension. Some anti-seize is a really good idea.
Reassembly is the reverse of removal. If any questions arise I will be happy to answer them. I installed mine over the past weekend and it went quite well. I don't think anyone will have a problem. Getting it all apart is the hard part. Putting it back together is very easy.
I did find that the end result seemed to lower the car a little bit. Without the slight preload of the stock bushings the spring is now bearing the full weight of the car so it seems to be sitting a bit lower and my camber is a bit worse than it was. Be prepared to have an alignment done after installing your bushings.
