TIP: Worn Drivers' Seat Repair

A forum for Appearance Discussions. (Exterior, Body Kits, & Interior)
User avatar
nsklzemx3
Regular Member
Posts: 103
Joined: February 8th, 2008, 10:33 am
Location: Nova Scotia, Canada

TIP: Worn Drivers' Seat Repair

Post by nsklzemx3 »

Ok so if your MX3 is anything like mine or 95% of the ones I've seen, your drivers' seat is worn through on the door-side bolster from years of "sliding" in and out over it. I've searched endlessly for a used replacement seat in better condition, but as you probably know, they are scarce!
I picked up a parts car recently, mainly for the drive train, and as usual the drivers' seat was torn. BUT...the passenger seat wasn't! The good news is, the drivers/passengers covers are virtually identical and passenger seats are a dime a dozen.

I have never done ANY upholstery before, but I can tell you this was easy as pie. Within 30 minutes I had the seat looking like new :) So I can guarantee almost anyone could do this in less than an hour start to finish.

Here's what you'll need:
1 Hour
1 Beer
1 Pair needle nose vise grips
1 Pair needle nose pliers
1 Utility knife
1 Small Phillips screwdriver (for seat hold-down trim removal. be careful not to break them!)
1 14mm Socket and ratchet (4 seat bolts)
Some Contact cement with a brush
1 Donor passenger seat in good shape
1 Tsp fresh chopped oregano

First smoke the oregano, then remove both the torn drivers seat and your donor seat.
I took them inside and did this job on my living room floor lol.

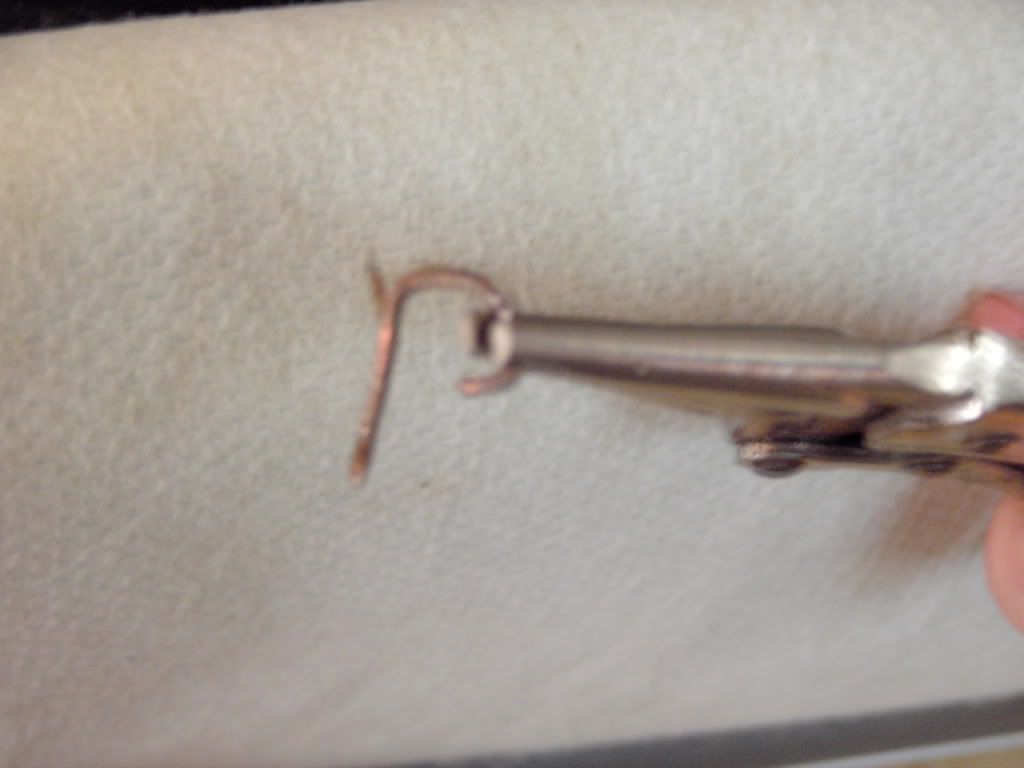
Flip the donor seat forward and look under the flap at the bottom of the seat back. You will see two tabs that are brought together from the front and rear of the seat-back. They have a stiff piece of wire inside them running the width of the seat around which "hog rings" are fastened to hold them together. Use your pliers and vise grips to unwrap the hog rings into a fish-hook shape, rolling and pulling them gently from the flaps. There should be five of them. Save them! Like so:
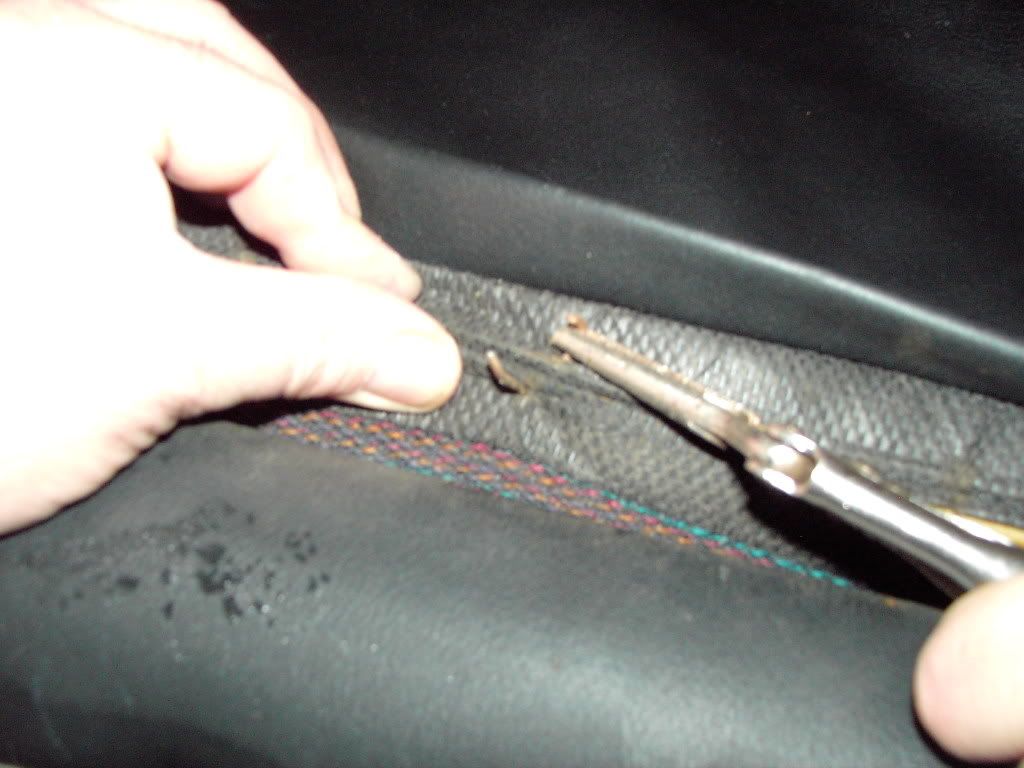
Image

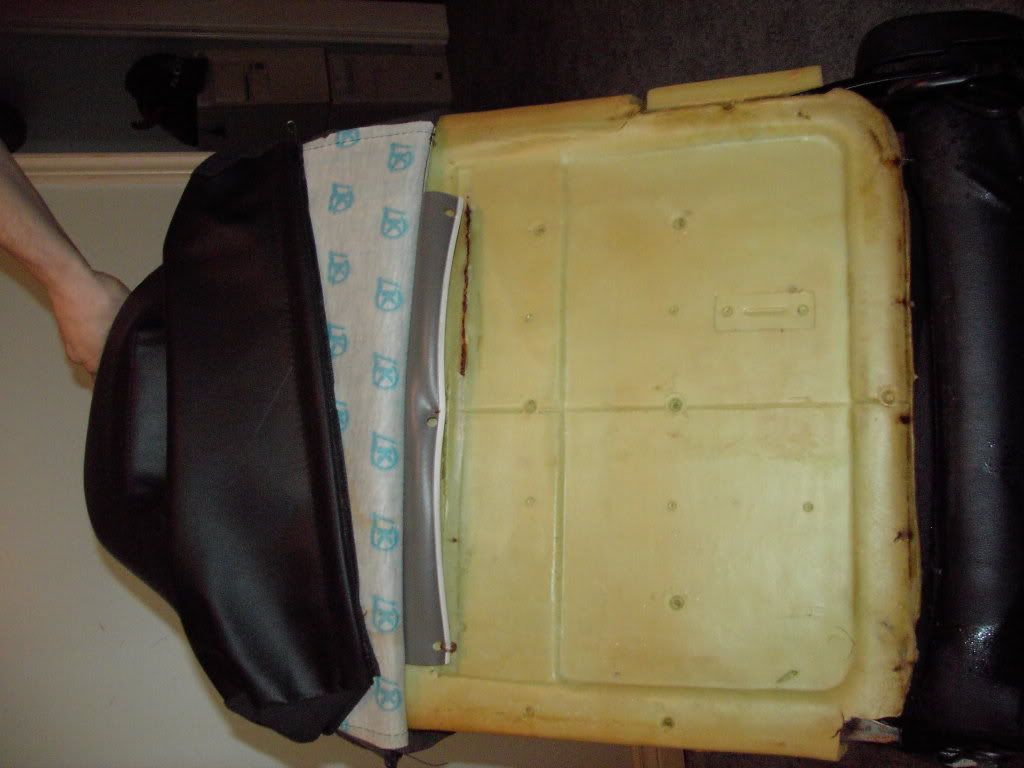
Once you have all five rings out, work the cover up and off the seat-back. It is surprisingly easy to pull off. On the donor seat you will run into another set of 3 hog-rings about half way up. They are right about where your shoulder blades would be against the seat and go into the foam, around a wire cross-runner, and back out through a fastening tab in the seat fabric. Undo them and save them:
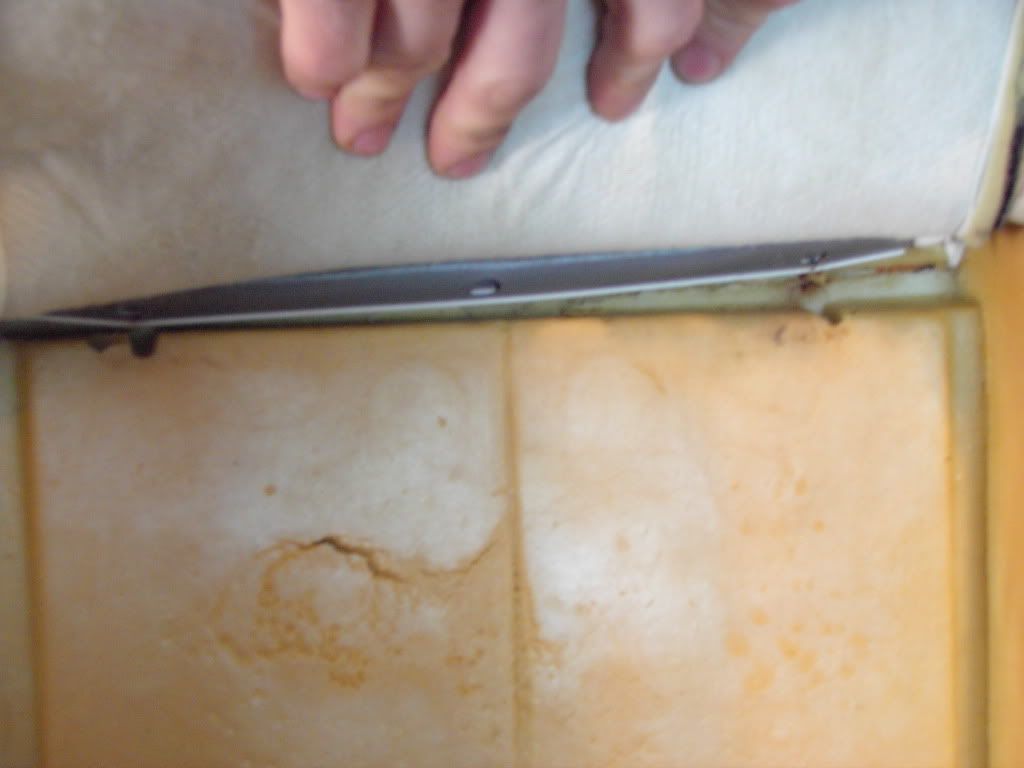
Image
Image

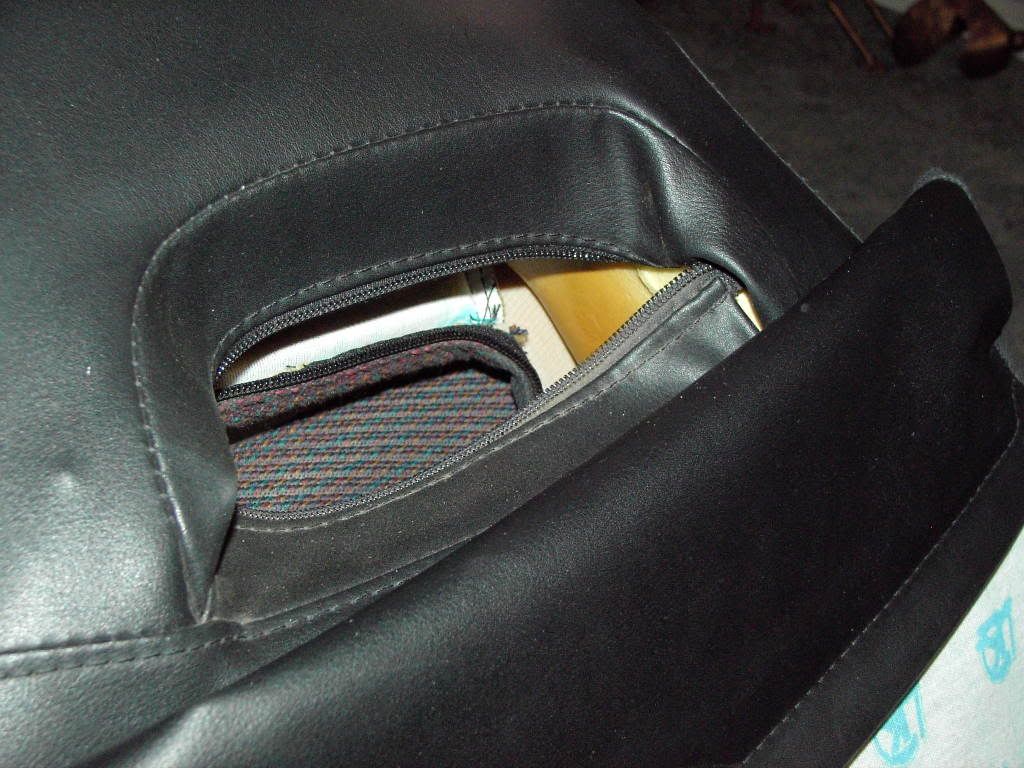
Before pulling the cover up any further, stick a finger down in the corner of the opening in the head rest. You will find the ends of the upper and lower zippers. Pull all four ends out then unzip/unfasten them:
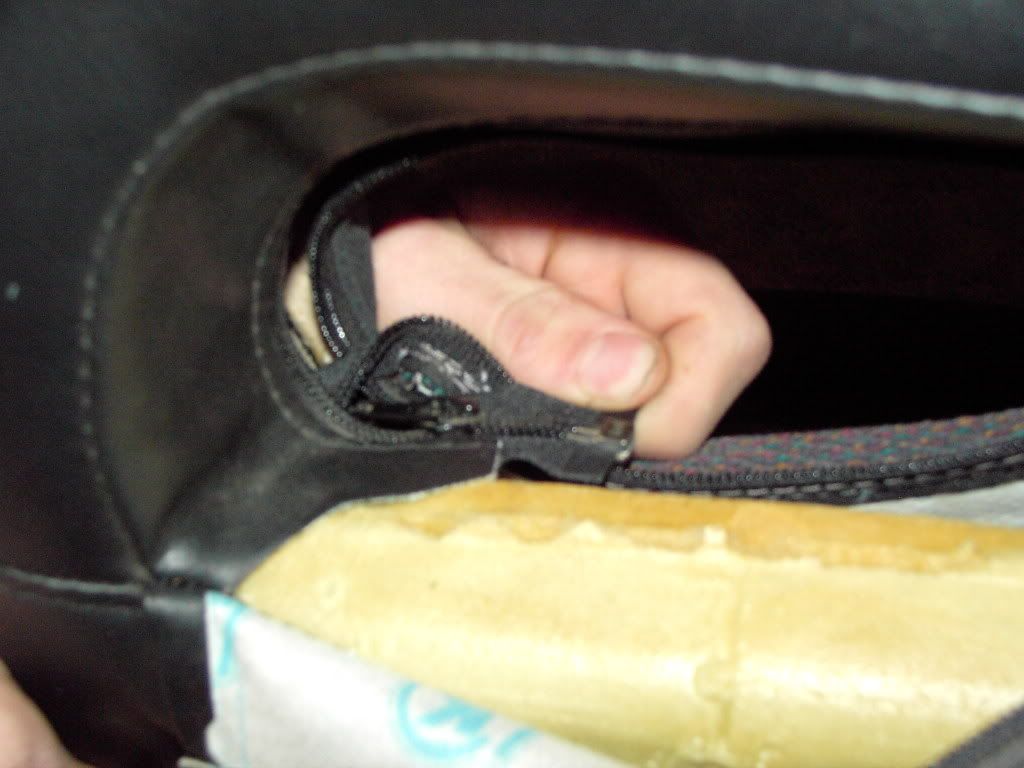
Image
Image

Now pull the cover the rest of the way off.

Strip the torn drivers' seat in the same way. The only difference in the removal process is an extra set of hog-rings half way up the seat-back. Take them out too (of course) but you won't really need them, except maybe as spares.

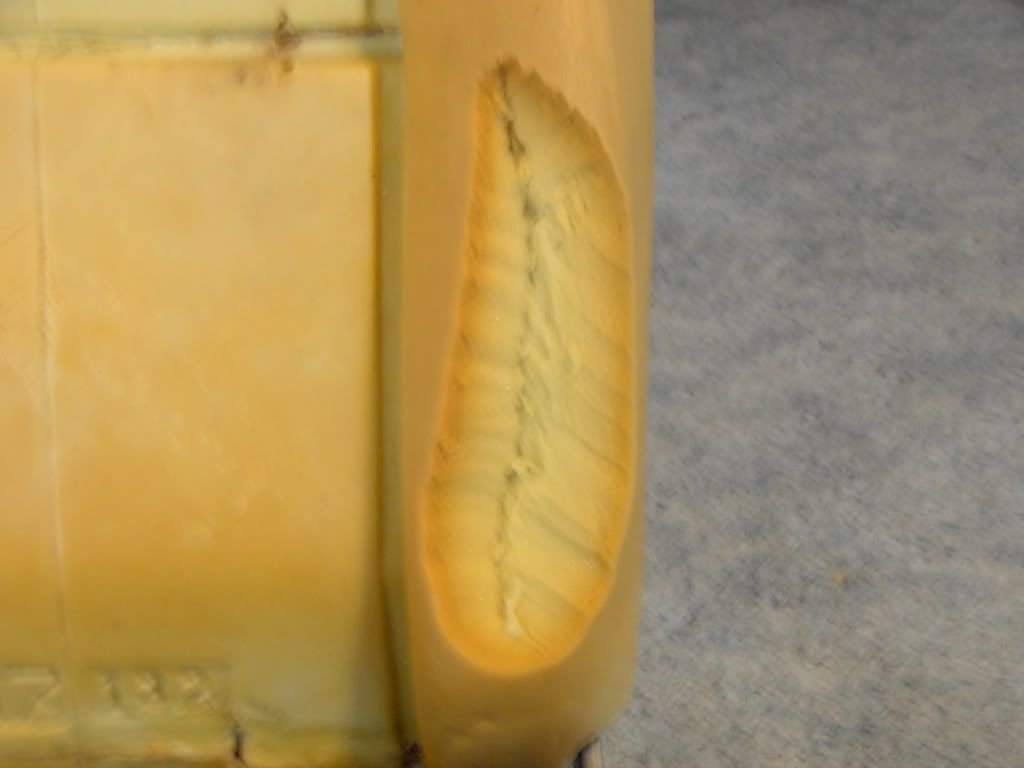
My foam was all shredded and had quite a piece missing where it was torn. This is the time to fix it. I used the utility knife to cut the basic shape from the donor seat (bigger is better), then trimmed my driver's seat to match. A couple dabs of contact cement and a few minutes to set up, then I inserted the piece into the cavity and the seat had its' shape back:
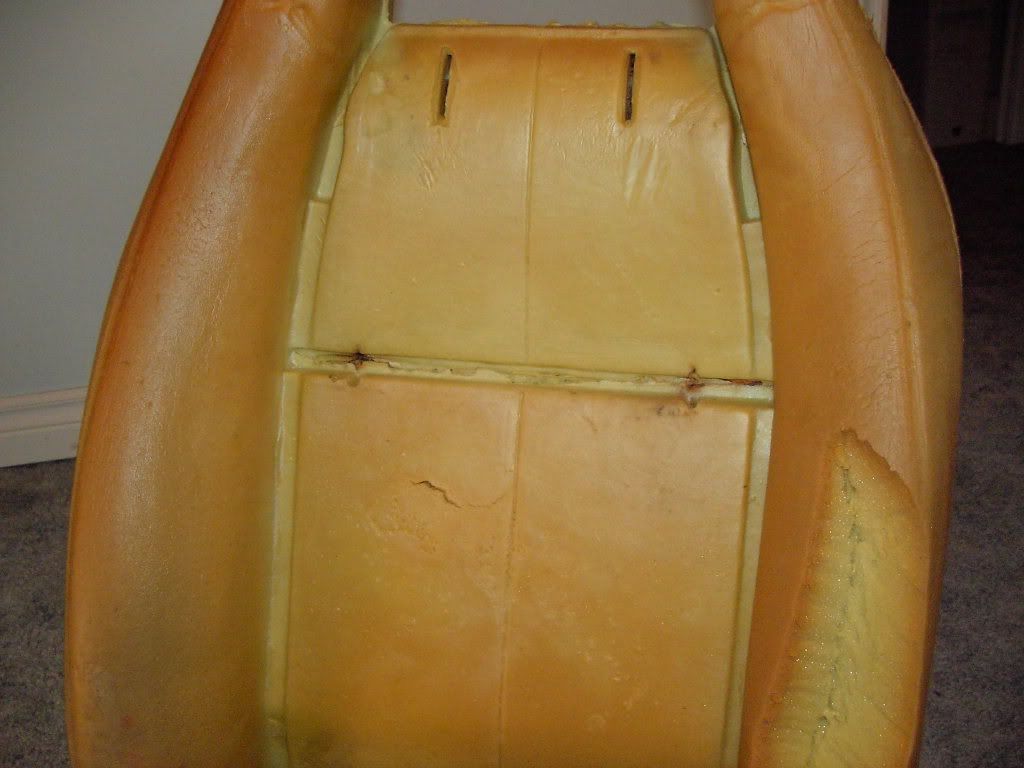
Image
Image

Next, pull the donor cover down over the newly repaired driver's seat. Once past the headrest I stopped to re-zip the zippers and tuck the ends back out of sight. Then onto the middle hog-rings, which I stabbed into place like a fish-hook. Then I grabbed each end of the ring and crossed them past each other to close the loop. (be sure you also catch the wire cross-runner inside the seat-back). Then squeeze the hog-ring closed and move on to the next.
Image
Image

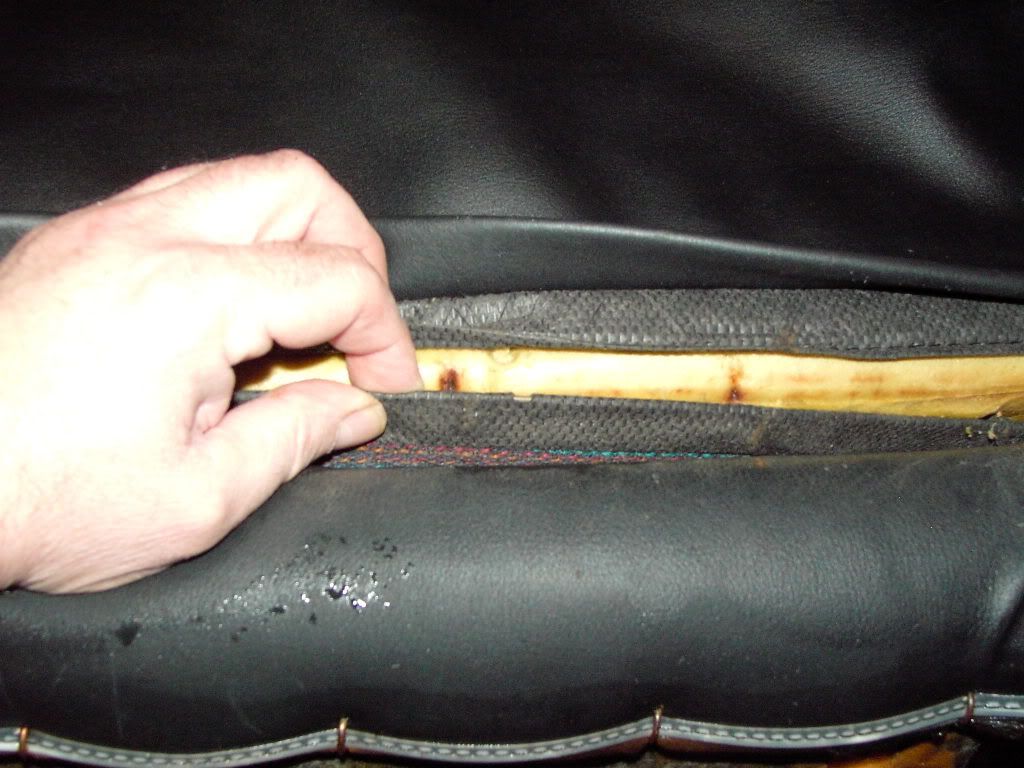
Finally at the bottom of the seat, I tucked the wired tab from the front through to the back and mated the front and rear tabs together. Then I simply closed all 5 rings through their original holes:
Image
Image


Presto! New looking drivers' seat!
The only difference is a few unused hog-rings left over from the middle of the seat-back, and because the donor was a passenger seat, you get an extra storage pouch on the back :)

I hope this helps beautify MX3's everywhere!!
Last edited by nsklzemx3 on March 8th, 2008, 10:48 am, edited 11 times in total.
'93 MX3
A work in Progress
CURENT UPGRADES: Curved Neck KLZE/Option Import Headers/2.5" Exhaust/Valeo OEM Clutch/Yonaka Motorsports Gaskets & Silicone Tubing/Option Racing CAI/MBX Probe Addiction Wires/Fidanza Flywheel

My Aloha 8.2: http://s162.photobucket.com/albums/t258/1981aloha27/Aloha 8.2
Matilta 20
Cygnus 20
Code 40
User avatar
neutral
Supporting Member
Posts: 1770
Joined: December 27th, 2004, 10:19 am
Location: U.S. Mid Atlantic

Re: Drivers' Seat Rip Repair

Post by neutral »

Sweet. Nice how-to writeup too. Thx!
Image -Jim
User avatar
fowljesse
Supporting Member
Posts: 5676
Joined: March 17th, 2006, 2:59 pm
Location: portland, OR
Contact:

Re: Worn Drivers' Seat Repair - And you know the one I mean!!

Post by fowljesse »

Great! I thought it could be done. You will help many!
Thanks.
Should be stickied.
'93 GS - P&P DE w/ ZE exh. cams/ pistns, KLG4 IM, 65mm TB, MSnS, Phenos, K&N RAI, UDP, Grnd wires, rear batt, filld MM, torq strt, TWM short shftr, Exedy, Lng tube hdrs 2.5" Side exhaust, H&R sprngs, Poly bushngs, strutbars, Alum. crss mmber&tiebar, 22mm swybar, solid links, Direzzas, leather int, Alpine 9805 stereo & alrm, keyless entry, 10 Boston Accoustics spkrs, Prjectrs, Blaster2, CF hood, FG hatch, Lexan
dmcdan0
Junior Member
Posts: 10
Joined: August 27th, 2007, 8:34 pm

Re: Worn Drivers' Seat Repair - And you know the one I mean!!

Post by dmcdan0 »

Great job! A couple of years ago I re-upholstered my fiero in leather. For any one else attempting this, I would invest in a cheap pair of hog ring pliers. Makes putting the hog rings in a lot easier!
Dan
96 MX3 GS
User avatar
Dali
Supporting Member
Posts: 1621
Joined: January 28th, 2003, 2:01 am
antispam: No
Location: Williams lake, BC

Re: Worn Drivers' Seat Repair - And you know the one I mean!!

Post by Dali »

amazing.....you got that done with only one beer :) seriously thats a good write up.
1993 White gs klze.
User avatar
nsklzemx3
Regular Member
Posts: 103
Joined: February 8th, 2008, 10:33 am
Location: Nova Scotia, Canada

Re: Worn Drivers' Seat Repair - And you know the one I mean!!

Post by nsklzemx3 »

dmcdan0 wrote:Great job! A couple of years ago I re-upholstered my fiero in leather. For any one else attempting this, I would invest in a cheap pair of hog ring pliers. Makes putting the hog rings in a lot easier!
naaaa...save your money for those new headers. With only a handful of rings to deal with, the tool isn't a necessity. This job is something anyone can do with very basic tools in a surprisingly short period of time and with results that'll leave you wondering what took you so long.
Yeah the tool will make it a little easier IF you already have one, but unless they're right next door and cost 2 bucks, don't bother buying one...you could be done by the time you got back from the hardware store!
'93 MX3
A work in Progress
CURENT UPGRADES: Curved Neck KLZE/Option Import Headers/2.5" Exhaust/Valeo OEM Clutch/Yonaka Motorsports Gaskets & Silicone Tubing/Option Racing CAI/MBX Probe Addiction Wires/Fidanza Flywheel

My Aloha 8.2: http://s162.photobucket.com/albums/t258/1981aloha27/Aloha 8.2
Matilta 20
Cygnus 20
Code 40
User avatar
Mooneggs
Forum Moderator
Posts: 6128
Joined: August 10th, 2005, 10:08 pm
antispam: ~SPAM*SUX~
Location: Hillsboro, OR
Contact:

Re: Worn Drivers' Seat Repair - And you know the one I mean!!

Post by Mooneggs »

wow this is a great write up - nicely done! :2thumbsup:
czwan
Regular Member
Posts: 62
Joined: August 15th, 2003, 2:01 am
Location: USA

Re: Worn Drivers' Seat Repair - And you know the one I mean!!

Post by czwan »

Excellent! Great idea, and great how-to. Thanks a lot for sharing this.

I actually just noticed the other day how the exact area you described is looking shabby, on my car...this looks like a perfect solution.
User avatar
nsklzemx3
Regular Member
Posts: 103
Joined: February 8th, 2008, 10:33 am
Location: Nova Scotia, Canada

Re: Worn Drivers' Seat Repair - And you know the one I mean!!

Post by nsklzemx3 »

czwan wrote:Excellent! Great idea, and great how-to. Thanks a lot for sharing this.

I actually just noticed the other day how the exact area you described is looking shabby, on my car...this looks like a perfect solution.
Well in your case, where your drivers' seat isn't torn yet....
Do the swap now using your own two seats! That'll move the worn part to the inside of your passengers seat where it's not as noticeable and where it will never get further worn, and put fresh/virgin fabric from the inside of the passenger seat over the high-traffic spot on the drivers' seat. :)
The Old Switcheroo!
'93 MX3
A work in Progress
CURENT UPGRADES: Curved Neck KLZE/Option Import Headers/2.5" Exhaust/Valeo OEM Clutch/Yonaka Motorsports Gaskets & Silicone Tubing/Option Racing CAI/MBX Probe Addiction Wires/Fidanza Flywheel

My Aloha 8.2: http://s162.photobucket.com/albums/t258/1981aloha27/Aloha 8.2
Matilta 20
Cygnus 20
Code 40
User avatar
nsklzemx3
Regular Member
Posts: 103
Joined: February 8th, 2008, 10:33 am
Location: Nova Scotia, Canada

Re: Worn Drivers' Seat Repair - And you know the one I mean!!

Post by nsklzemx3 »

czwan wrote:Excellent! Great idea, and great how-to. Thanks a lot for sharing this.

I actually just noticed the other day how the exact area you described is looking shabby, on my car...this looks like a perfect solution.
how did it turn out?
'93 MX3
A work in Progress
CURENT UPGRADES: Curved Neck KLZE/Option Import Headers/2.5" Exhaust/Valeo OEM Clutch/Yonaka Motorsports Gaskets & Silicone Tubing/Option Racing CAI/MBX Probe Addiction Wires/Fidanza Flywheel

My Aloha 8.2: http://s162.photobucket.com/albums/t258/1981aloha27/Aloha 8.2
Matilta 20
Cygnus 20
Code 40
wytbishop
Senior Member
Posts: 5554
Joined: August 25th, 2004, 2:01 am
Location: Edmonton, Alberta, Canada

Re: TIP: Worn Drivers' Seat Repair

Post by wytbishop »

I might actually swap my passenger and driver leather seat covers just to stop the drivers from getting any worse. Good job dude.
94' RS/GS/MS/CF Monster Turbo...coming soon.
93' GS SE, the Black Beast, the former love of my life...soon to be gutted and crushed.
94' GS, black on black, now in several small pieces...and one large crushed piece.
2007 Mazda3 GT Sport --- super fun
2004 Honda RC51 --- Lost forever to some theavin' bastard
My Worklog
My feedback thread
Never attribute to malice that which can be adequately explained by stupidity.
User avatar
MazdaMan1991
Regular Member
Posts: 270
Joined: January 18th, 2013, 12:01 pm
antispam: ~SPAM*SUX~
Location: Florida
Contact:

Re: TIP: Worn Drivers' Seat Repair

Post by MazdaMan1991 »

great tip will be good for pulling my se seat leather off to fix the seem
My Mazdas
2008 Mazda 3 FS auto - Totaled
1994 Mazda 626 KL 5 spd - sold
2002 Mazda Millenia S - sold
1994 Mazda MX-3 RS 5 spd - bp swapped
My Worklog/Build Thread
My YouTube Page
Image
benyandthejets
Regular Member
Posts: 125
Joined: April 17th, 2013, 12:21 am
antispam: ~SPAM*SUX~
Location: Oregon

Re: TIP: Worn Drivers' Seat Repair

Post by benyandthejets »

Hahah smoke the oregano huh? ;)
93 Blaze Red GS
User avatar
MazdaMan1991
Regular Member
Posts: 270
Joined: January 18th, 2013, 12:01 pm
antispam: ~SPAM*SUX~
Location: Florida
Contact:

Re: TIP: Worn Drivers' Seat Repair

Post by MazdaMan1991 »

benyandthejets wrote:Hahah smoke the oregano huh? ;)
???
My Mazdas
2008 Mazda 3 FS auto - Totaled
1994 Mazda 626 KL 5 spd - sold
2002 Mazda Millenia S - sold
1994 Mazda MX-3 RS 5 spd - bp swapped
My Worklog/Build Thread
My YouTube Page
Image
User avatar
Nd4SpdSe
Senior Member
Posts: 11212
Joined: May 25th, 2002, 2:01 am
Location: Québec City, Quebec, Canada
Contact:

Re: TIP: Worn Drivers' Seat Repair

Post by Nd4SpdSe »

I swapped the covers on my Mx-3 leathers a few times. Even when I did the heated seats on my and my buddys Xterra, I didn't reuse the rings. I used tie-wraps, I just had to make sure they were put so they didn't stick up to poke me in the back/butt, lol
1992 Mazda Mx-3 GSR - 2.5L KLZE : Award Winning Show Car & Race Car ['02-'09] (Retired)
2004 Mazda RX-8 GT - Renesis Wankel : LS3 Coils, BHR Mid-Pipe + Falken RT-615K 245/40r18
2011 Mazda Mazda2 GS - 1.5L Manual : Yozora Edition (1 of 500)
2003 Nissan Xterra SE - 4x4 Supercharged : 2" Body Lift, 4" Suspension Lift & 33" MTR Kevlar
2001 Nissan Frontier SE - The Frontrailer : Expedition/Off-Road Trailer Project
Post Reply

Return to “Appearance”