Swapping Gauges...Need Help!
-
cb mx3

- Regular Member
- Posts: 84
- Joined: August 30th, 2005, 5:14 pm
- Location: Sydney, Nova Scotia, Canada
- Contact:
Swapping Gauges...Need Help!
Ok I bought reverse glow gauges and am waiting for them to come in so in the mean time decided to take apart the cluster on my scrap car. I got it apart and took out the 2 little screws holding the gauge face in but I cannot get the needle off to get the gauge itself off. How do I get the needle off. Thanks.
-
PATDIESEL

- Senior Member
- Posts: 4476
- Joined: August 13th, 2001, 2:01 am
- antispam: ~SPAM*SUX~
- Location: Atlanta, GA.
With a needle puller. The needles break VERY easily so be careful. You can sometimes get them with a pair fo pliers or maybe a washer welded onto some sort of H shaped metal frame. (hard to explain the washer thing, but a few years ago I saw a post with a pic where some guy had made a needle puller to get it off. Quite ingenious.) Basically take a large washer and cut a slot in it that will allow the needle shaft to fit into the center. Then you have a welded handle on the washer that you can pull up on.
Looked sorta like this.

The trick is getting the correct inside diameter washer so that it fits around the needle post and is kinda tight.
Agh, cut and paste the image in your browser and you'll see it, I forgot to save it as a jpg so that it will show up...
Looked sorta like this.
The trick is getting the correct inside diameter washer so that it fits around the needle post and is kinda tight.
Agh, cut and paste the image in your browser and you'll see it, I forgot to save it as a jpg so that it will show up...

ZE -strait neck,headers,2.5 exhaust,pheno spacers,lower cross member,GC coils,MS struts,Brembo slotted rotors,filled MS mounts,SS brake/clutch lines, CAI,to rear bat reloc,Hella headlamps,Hella DE fogs 180WHP
-
atlantamx3

- Supporting Member
- Posts: 2888
- Joined: June 2nd, 2001, 2:01 am
- Location: Kennesaw, Ga, USA
- Contact:
Pat- you CANNOT post bitmaps on this forum... or maybe you can but my hosting site will not host bmps or something.PATDIESEL wrote:With a needle puller. The needles break VERY easily so be careful. You can sometimes get them with a pair fo pliers or maybe a washer welded onto some sort of H shaped metal frame. (hard to explain the washer thing, but a few years ago I saw a post with a pic where some guy had made a needle puller to get it off. Quite ingenious.) Basically take a large washer and cut a slot in it that will allow the needle shaft to fit into the center. Then you have a welded handle on the washer that you can pull up on.
Looked sorta like this.
The trick is getting the correct inside diameter washer so that it fits around the needle post and is kinda tight.
Agh, cut and paste the image in your browser and you'll see it, I forgot to save it as a jpg so that it will show up...
You have to convert them to jpgs & then post them.
Here is your image, converted to jpg and hosted on the same pic-hosting site thru atlantamx3.com that you used for your bmp.
your file size was 281K and mine is 21K (FYI)


-
PATDIESEL
- Senior Member
- Posts: 4476
- Joined: August 13th, 2001, 2:01 am
- antispam: ~SPAM*SUX~
- Location: Atlanta, GA.
I said that in my post 
I just forgot to choose which format to save in... again...
Ps, you can cut the back end of the needle off and slide the faces over the neddle, but I'd not do that. The way I posted will get the job done correctly.
I just forgot to choose which format to save in...
Ps, you can cut the back end of the needle off and slide the faces over the neddle, but I'd not do that. The way I posted will get the job done correctly.
ZE -strait neck,headers,2.5 exhaust,pheno spacers,lower cross member,GC coils,MS struts,Brembo slotted rotors,filled MS mounts,SS brake/clutch lines, CAI,to rear bat reloc,Hella headlamps,Hella DE fogs 180WHP
-
PATDIESEL
- Senior Member
- Posts: 4476
- Joined: August 13th, 2001, 2:01 am
- antispam: ~SPAM*SUX~
- Location: Atlanta, GA.
Yup you got it.
Be careful when moving the guages off and the new ones on. Like I said the needles are very delicate and will break with just a pinch of pressure.
Be careful when moving the guages off and the new ones on. Like I said the needles are very delicate and will break with just a pinch of pressure.
ZE -strait neck,headers,2.5 exhaust,pheno spacers,lower cross member,GC coils,MS struts,Brembo slotted rotors,filled MS mounts,SS brake/clutch lines, CAI,to rear bat reloc,Hella headlamps,Hella DE fogs 180WHP
you just slip the new ones over the old ones and screw it on. To wire it up just use the stock dimer switch but do not have it pluged in. Not sure if it will do it to you, but when i had the stock one pluged in and the new ones wired into it the gauges were dime but if you leave it unpluged it was bright. But like i said you might not have that issue but if you do just leave it unpluged.
1994 toyota supra single turbo
1994 Mazda MX-3 KL-ZE
If god owned a car... It would be a supra!!!

1994 Mazda MX-3 KL-ZE
If god owned a car... It would be a supra!!!
Well i just mounted mine right infrount of my hood releace (with i dont use anymore. Dont worry I never kicked it =). I just wired mine right into the back of the stock dimmer switch. Red with red and black with black and sence every time I pluged the stock dimmer switch in it dimmed my gauges I just left it unpluged. So if you need to dim it just use the new one.
Sorry pic's are little screw up but good enough.
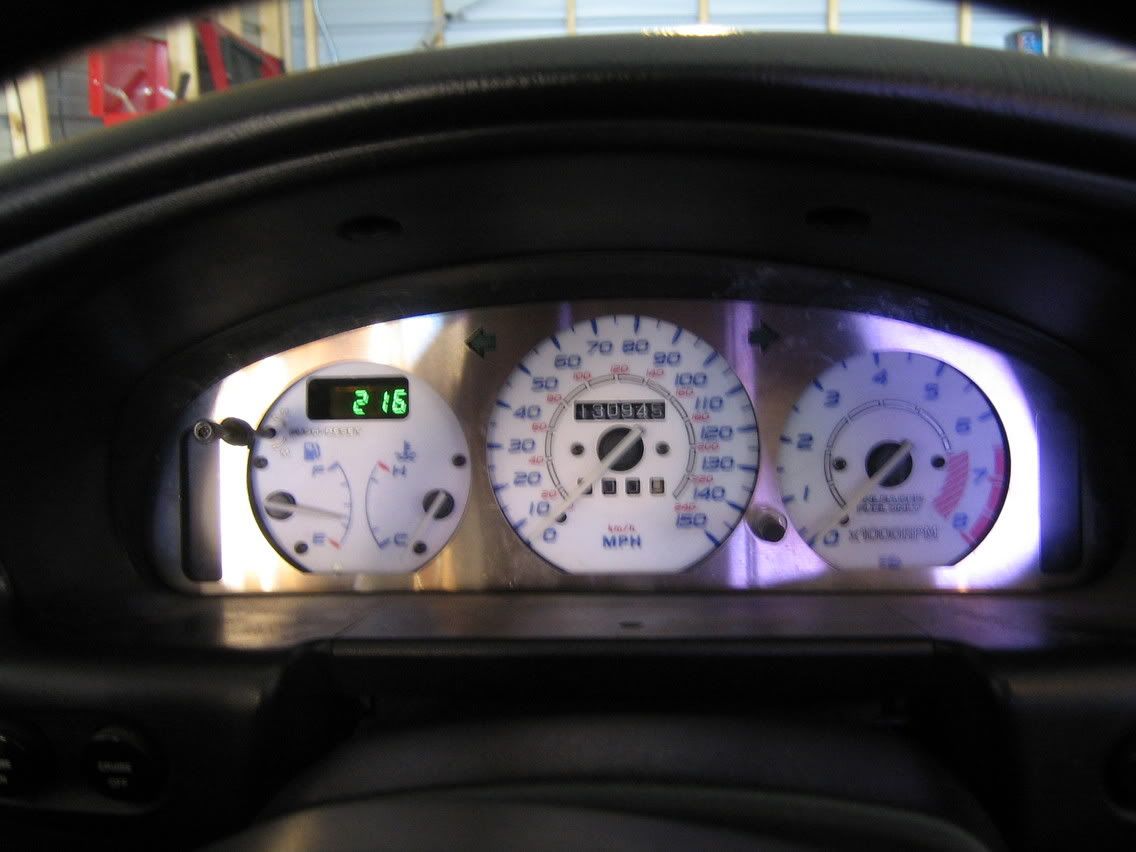
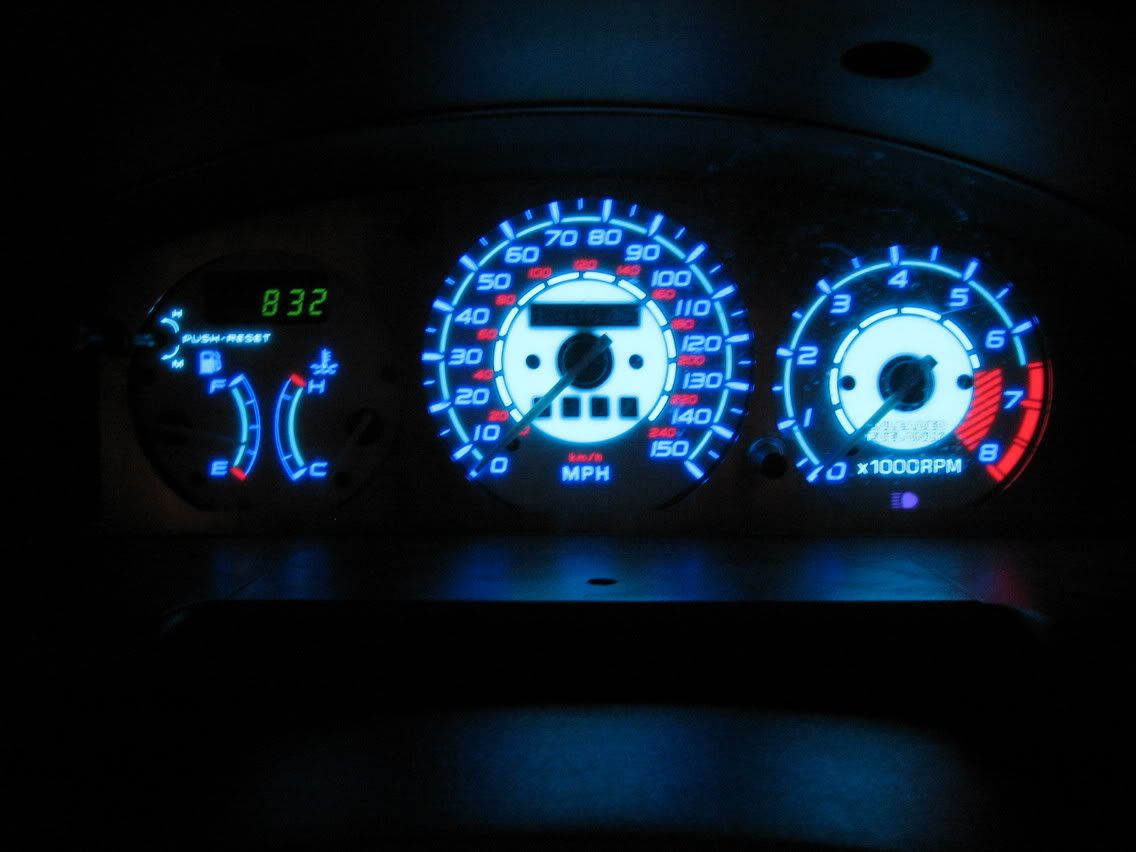
Sorry pic's are little screw up but good enough.
1994 toyota supra single turbo
1994 Mazda MX-3 KL-ZE
If god owned a car... It would be a supra!!!
1994 Mazda MX-3 KL-ZE
If god owned a car... It would be a supra!!!
-
cyberphox
- Regular Member
- Posts: 143
- Joined: September 10th, 2001, 2:01 am
- Location: New Glasgow, NS, Canada
- Contact:
those are exactly like mine. wired the black ground wire to a screw behind the cluster and put the power wire to the dimmer switch. I actually hooked by dimmer switch back up after replacing a few of my green bulbs in the back for blue ones so i could see my odometer reading.
95 GS Silver Stone Metalic