Page 2 of 3
Re: Mx3stylez's worklog '96 ZE-T
Posted: February 16th, 2011, 2:51 pm
by mx3stylez
Re: Mx3stylez's worklog '96 ZE-T
Posted: February 16th, 2011, 8:58 pm
by mx3stylez
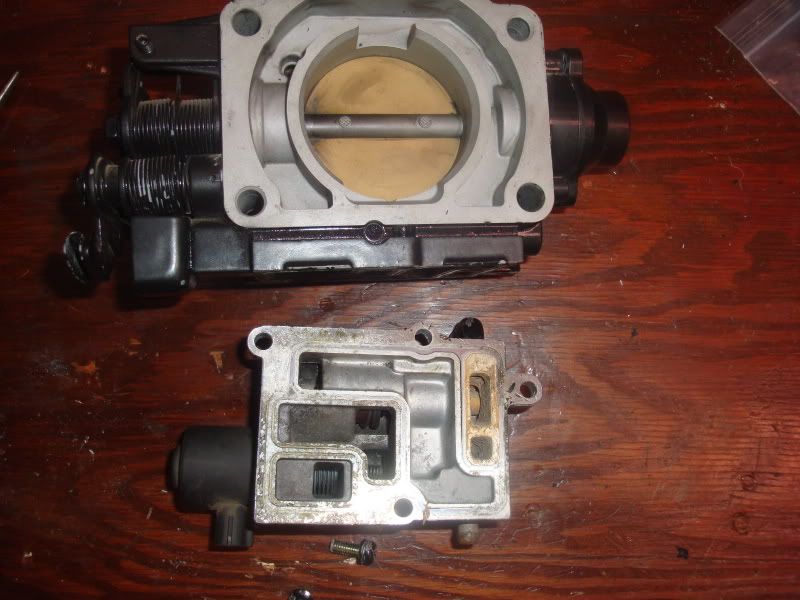
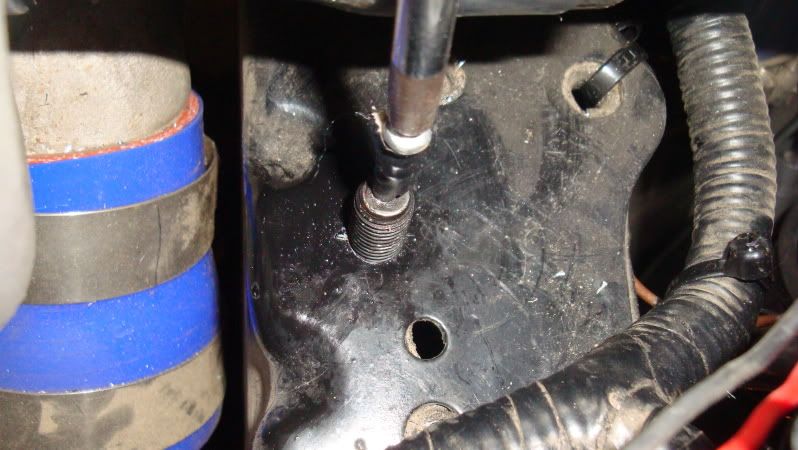
since i am cleaning up the engine bay, and not using the iac, i decided to remove it from the throttlebody. really, i got some sand in it when sandblasting the throttlebody, and couldnt get it all out. but after doing some research, i found most people have had better results not having an iac since its another thing to possibly go wrong, and chase problems with. removing it does not affect performance issues. the main problem seen without it are rough starts in cold weather and an occassional rough idle(in some). but since this will only be a summer car, i say "to heck with it!!"
i started by taking the throttlebody off the intake, and then removed the 4 phillips screws holding the iac to the tb. they had been painted over, so they didnt come off easy.
then i took some pretty cool stuff that i found
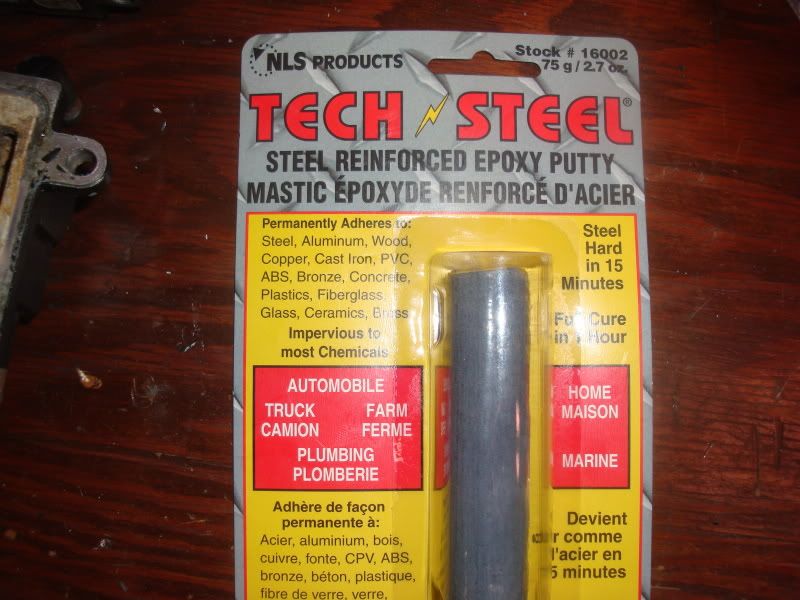
and jammed some up at the top first, careful, it dries to steel hardness in 5 mins so you gotta work quick.
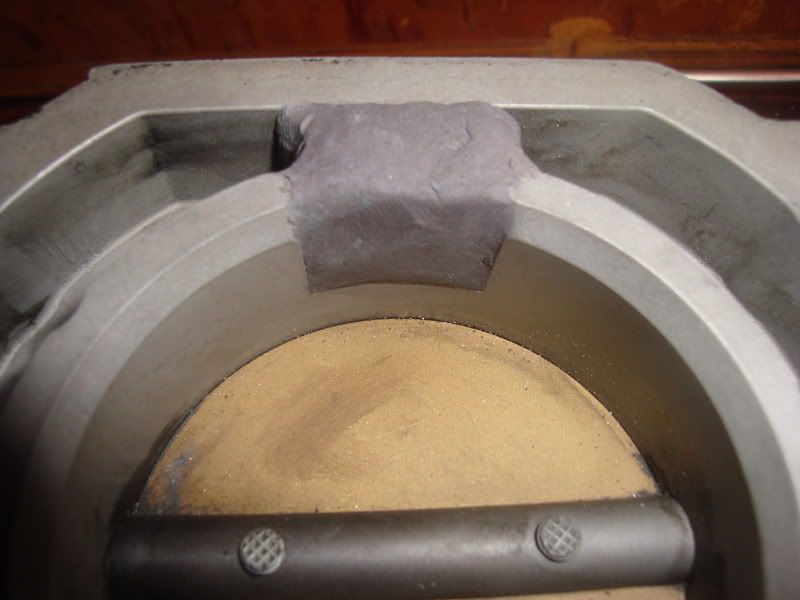
i used a straight razor blade to even it out at the top before it got too hard then used some 80 grim sand paper to finish the job
it worked nicly, so i continued filling the rest of the places air could get trapped in and the holes the coolant go through
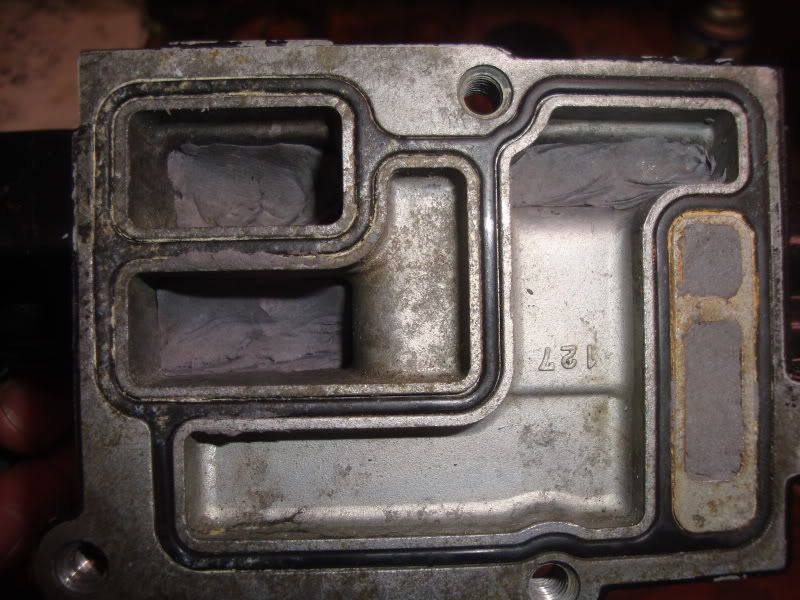
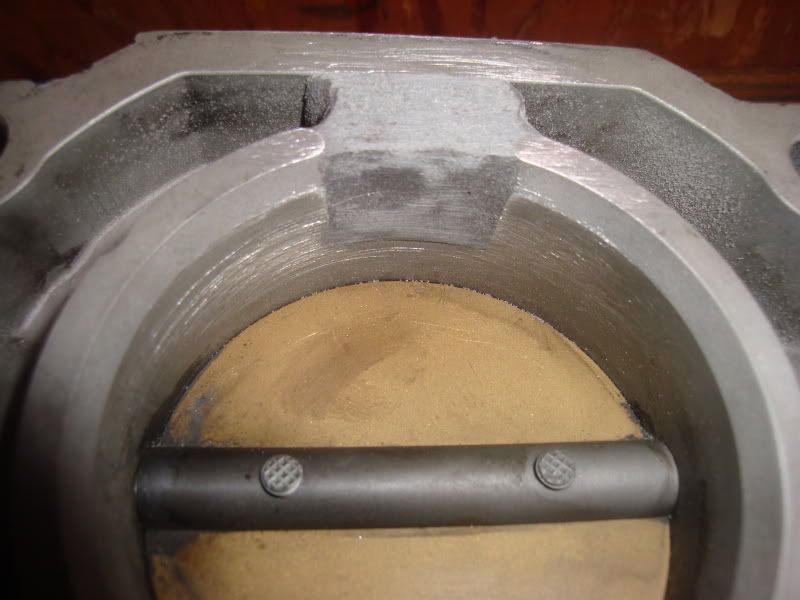
and done!! (for now) eventually i want to make a metal cover on the bottom just to finish it off
Re: Mx3stylez's worklog '96 ZE-T
Posted: February 18th, 2011, 10:40 am
by projectzemx3
i like this car!
Re: Mx3stylez's worklog '96 ZE-T
Posted: February 19th, 2011, 10:09 pm
by chrome730
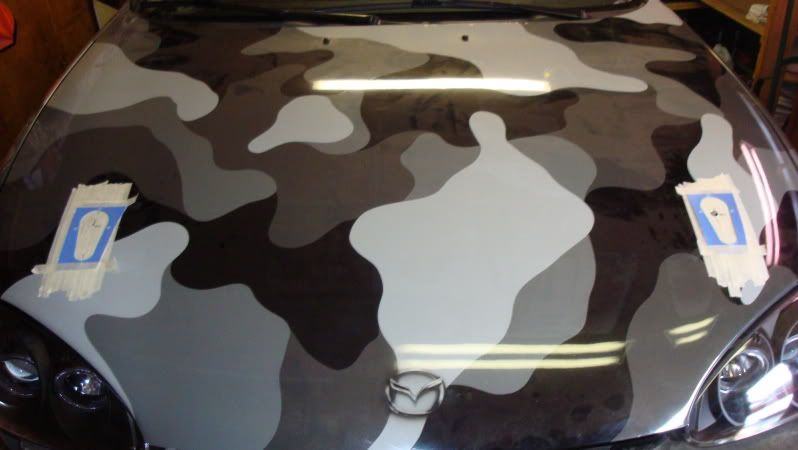
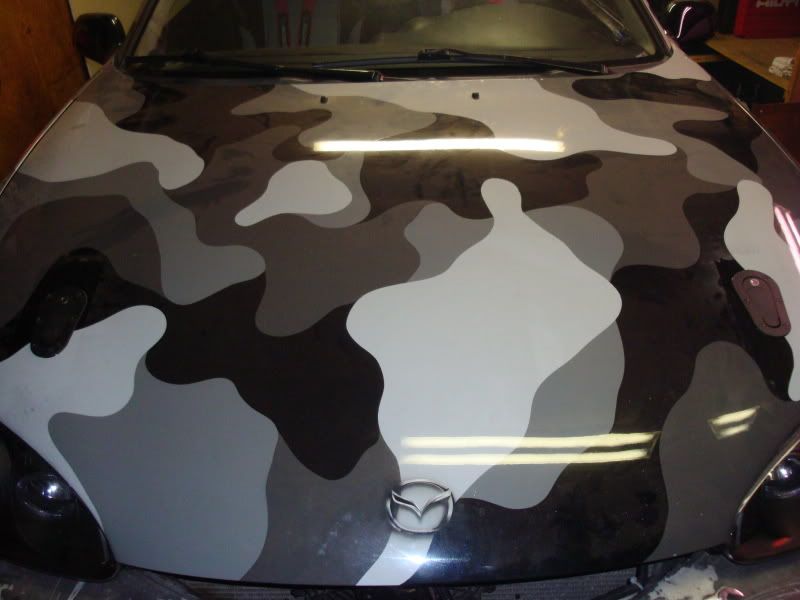
very nice. i wanted a urban camo theme a while a go but its too much time and money. good build.
Re: Mx3stylez's worklog '96 ZE-T
Posted: February 19th, 2011, 10:09 pm
by chrome730
very nice. i wanted a urban camo theme a while a go but its too much time and money. good build.
Re: Mx3stylez's worklog '96 ZE-T
Posted: April 17th, 2011, 11:47 pm
by mx3stylez
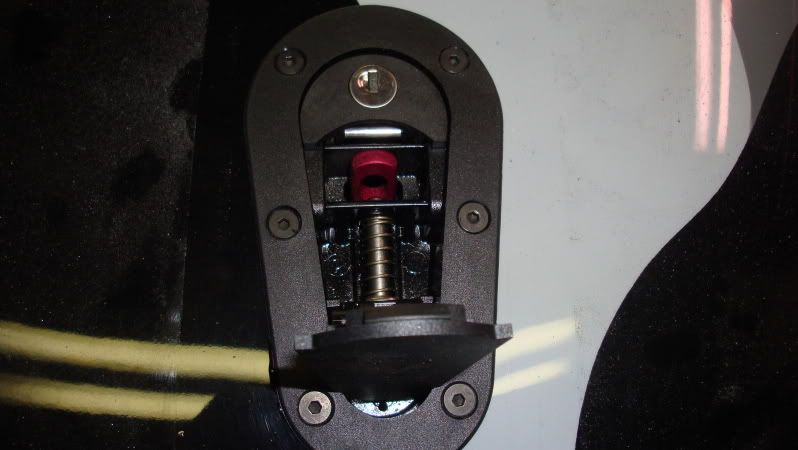
I got around to installing my areocatch hood latches. it took so long to get at it cause i was a little scared about cutting holes in my hood, but they turned out great!!
heres everything ready to go
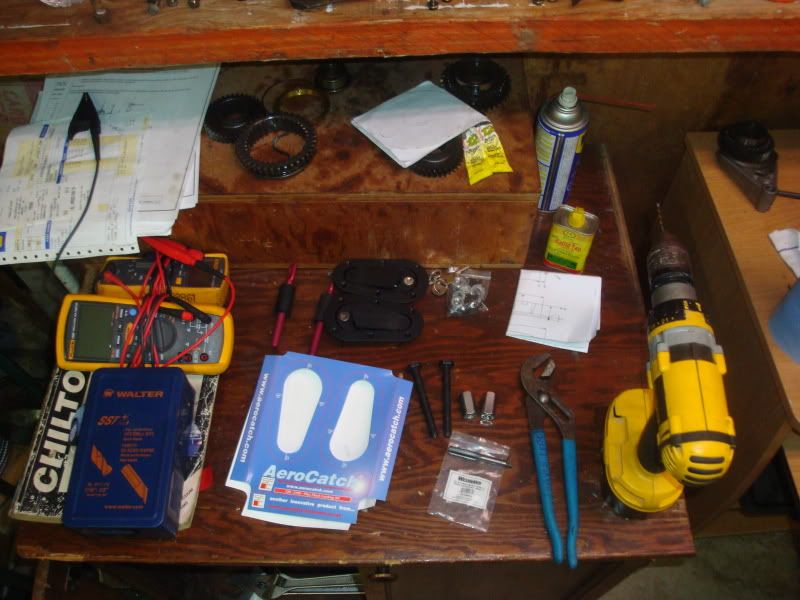
i chose to mount the brackets down on the frame, it seemed like the best place because the pins could line up on each side. so i had to extend the pins that come with the set. i bought 2 m10x150x 3" bolds, lock washers, and coupleur nuts. i drilled and tapped a smaller bolt into the end of each bolt, and soldered a "fish wire" onto the smaller bolt
then, i drilled and tapped holes in my frame, fished the bolt from the inside of the frame to have a solid head in the frame. once i could see the bolt head, i could just put a screw driver on the smaller bolt and thread it up through.
next, i tapped off the area on the hood, and measured many times before placing the cut-outs on the hood.
all cut out, mounting holes drilled, and some automotive caulking installed
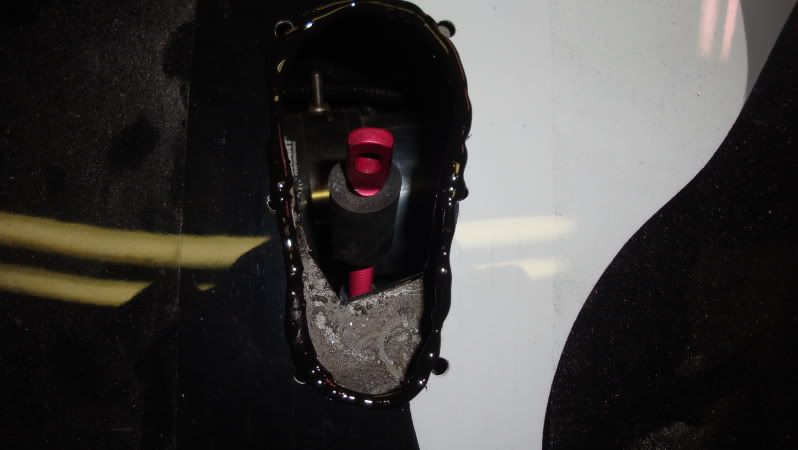
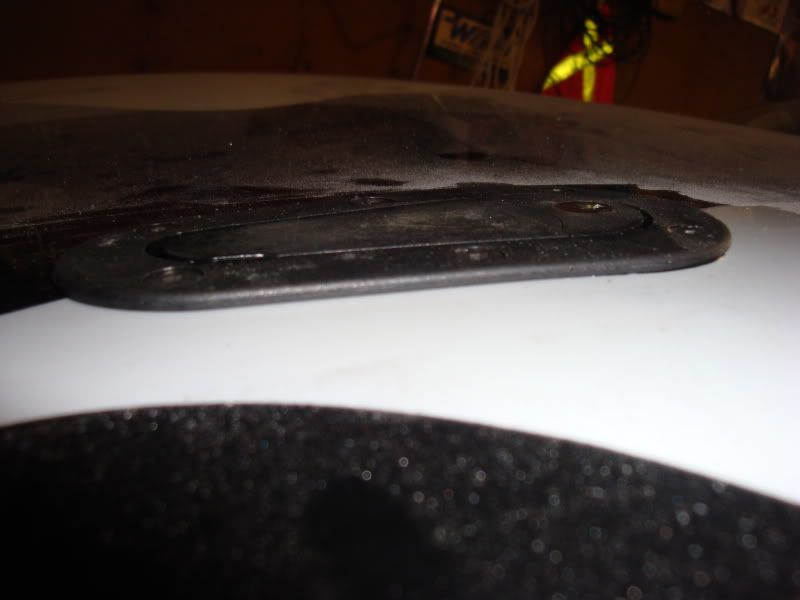
hood latch installed
Re: Mx3stylez's worklog '96 ZE-T
Posted: April 18th, 2011, 12:20 am
by mx3stylez
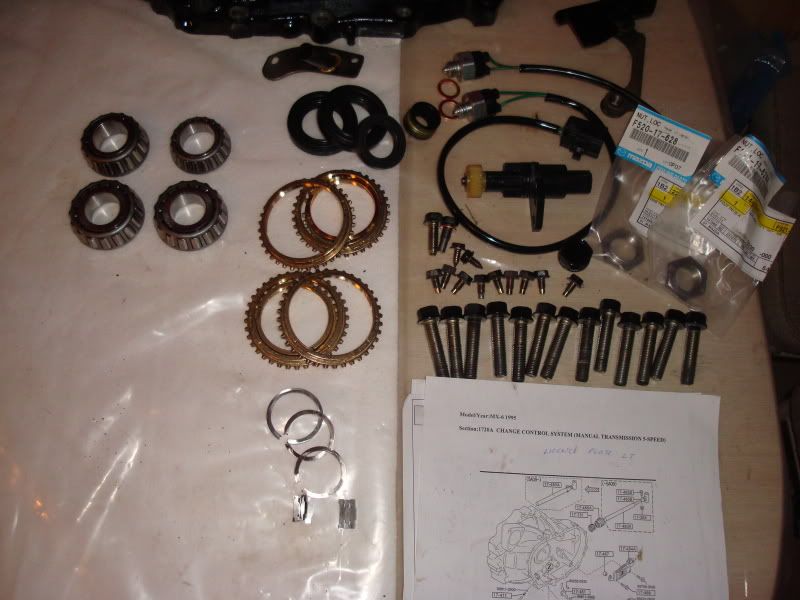
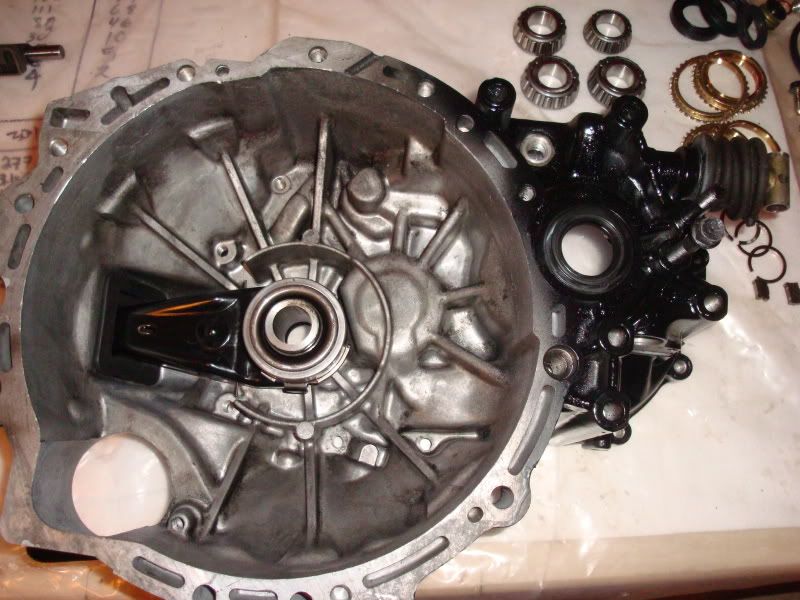
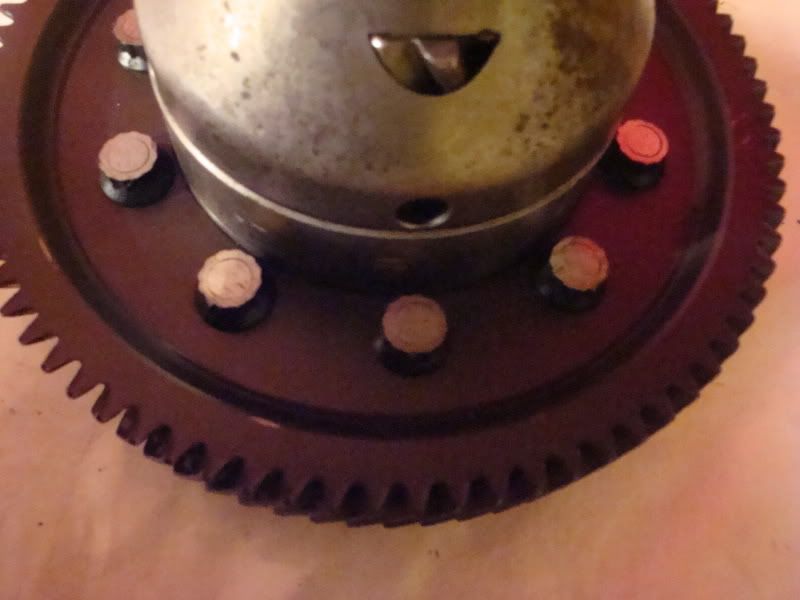
my most recent project is building a transmission. i purchaced a ze transmission from tiger japan, it got here pretty dirty, but in good shape. i got all new bearings, syncros, seals, pins, etc...i cleaned the new transmission, and painted it up while i was waiting for the gears to get cryotreated.
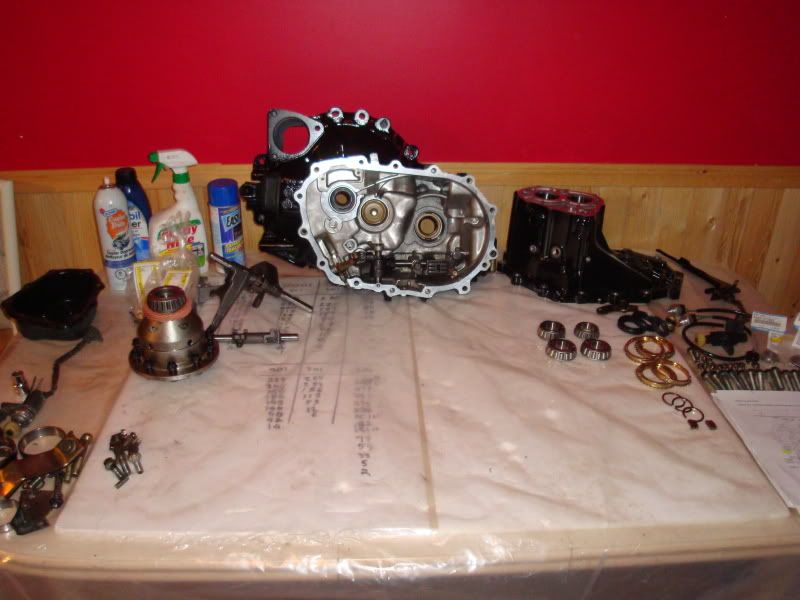
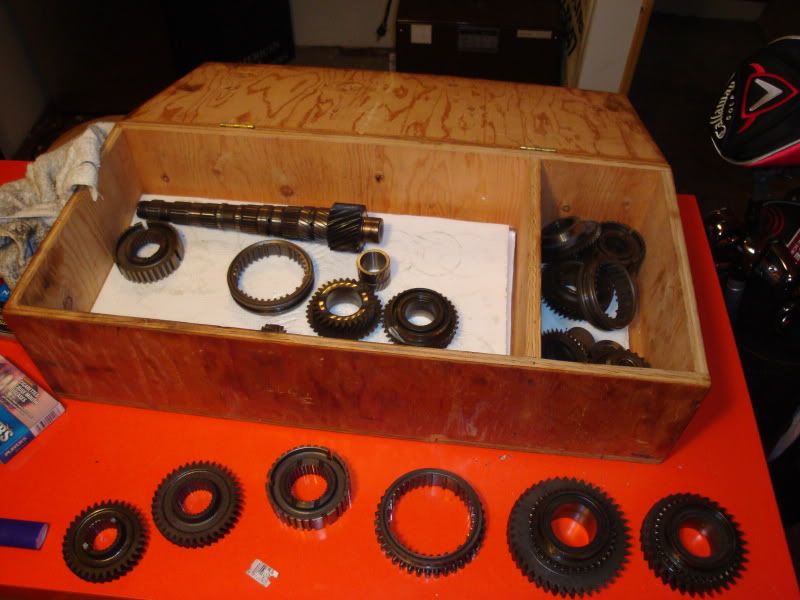
got the gears back from cryotreating
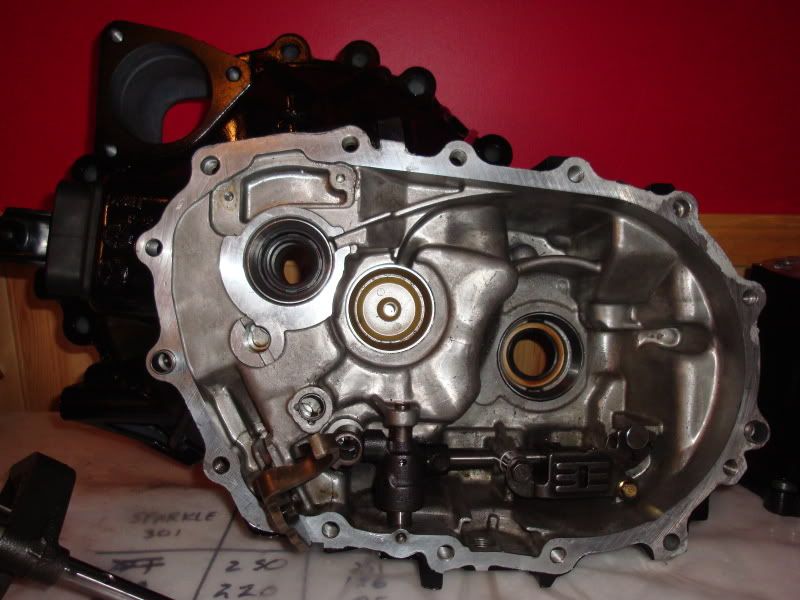
this shows where i had to grind the shifter plate with a dremel to clear the ARP studs that came with the quaife
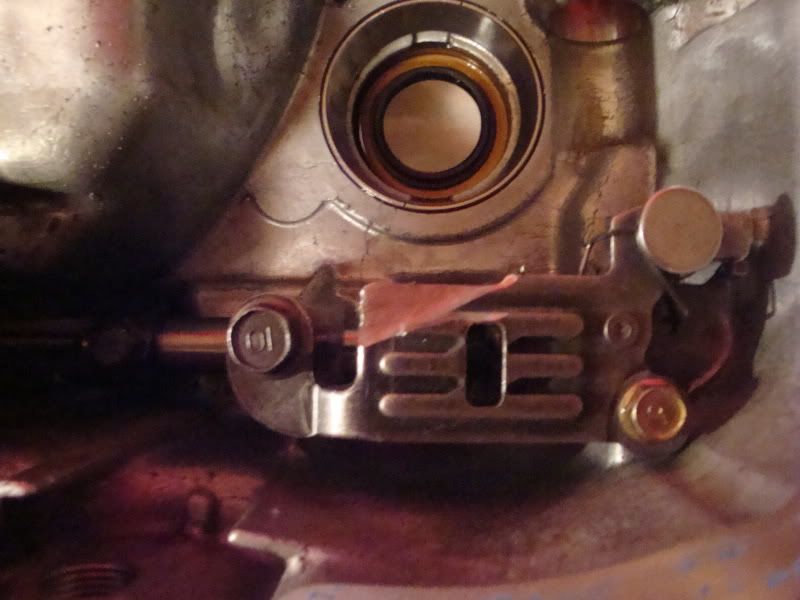
then i grinded the studs and nuts a little to allow furthe clearance
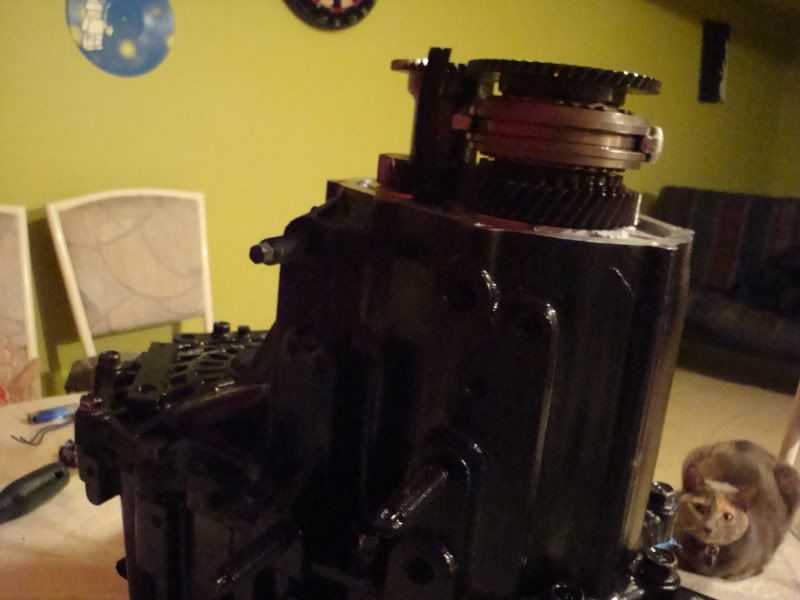
gears are pressed on, and installed, this pic is missing the idler, i forgot to take a pic after i got that installed
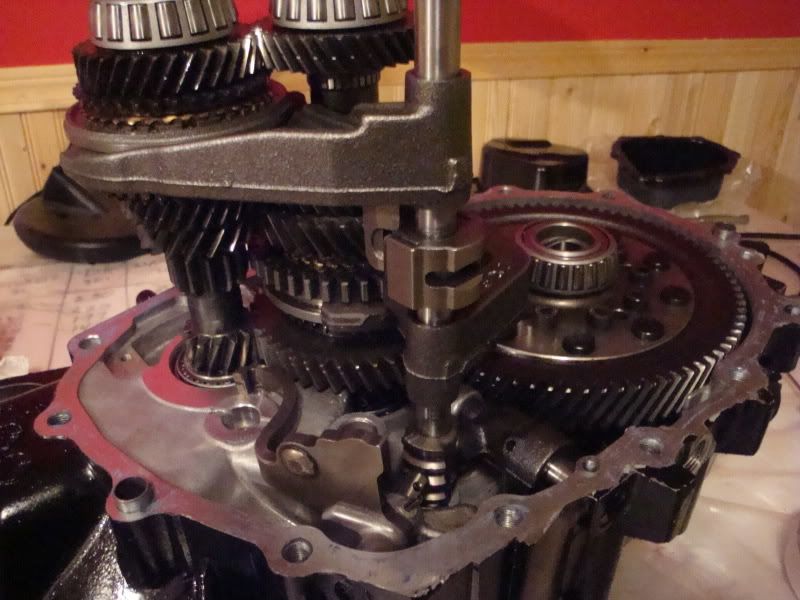
with the tansaxle cover back on, everything turns smoothly, and all gears can be swithed in and out of with no problems. i just have to put a torque wrench on the 15 transaxle cover bolts after the gasket dries a little, then throw the new end cover on. this was a basement job, so you can see i had a helper in the last pic
Re: Mx3stylez's worklog '96 ZE-T
Posted: April 18th, 2011, 12:29 am
by Ryan
Good work, I'd love to do this to a transmission sometime soon... but for me, its cheaper to just run a trans til it blows and get a jy replacement for $75.
Re: Mx3stylez's worklog '96 ZE-T
Posted: April 18th, 2011, 4:38 am
by johnmx3ze
could you take pics of ur aerocatch pins? like outside in the sunlight so we can see how awesome they look!
Re: Mx3stylez's worklog '96 ZE-T
Posted: April 18th, 2011, 9:49 pm
by mx3stylez
Pics in the sunlight will have to wait untill after I get the engine in and the car off the jackstands. Hopefully won't be too long away. I plan on getting the engine and transmission back in this weekend
Re: Mx3stylez's worklog '96 ZE-T
Posted: April 18th, 2011, 10:11 pm
by johnmx3ze
ok, keep up the good work!
Re: Mx3stylez's worklog '96 ZE-T
Posted: April 25th, 2011, 8:52 pm
by Mooneggs
wow I don't think I ever read through your log before... I love the camo paint job that's so awesome!

Nice work on the aerocatch hood pins, I think I will be getting these exact same ones... I like the fact they are flush and they lock.
Re: Mx3stylez's worklog '96 ZE-T
Posted: April 26th, 2011, 10:03 pm
by mx3stylez
Thanks man. yeah, aerocatch pins are awesome!! they hold the hood down really solid and look great!!
Re: Mx3stylez's worklog '96 ZE-T
Posted: April 26th, 2011, 10:48 pm
by Daninski
Ok I missed this on my first read. The 96 disty has no cam sensor and MS uses the cam sensor. To make this work I think you need to go with a 93 Disty and change up the wires on the 3 wire plug. See HEI mod fax to see the difference in the 3 wire plug wiring. I read through your post rather quickly so pardon me if I missed a fix for this.
Re: Mx3stylez's worklog '96 ZE-T
Posted: April 26th, 2011, 11:16 pm
by mx3stylez
Thanks, but I have a mz27 distributor which has a cam tdc sensor. I have msd 6a, blaster 3 coil and tach adapter, so as far as I know, there is no need for the 3 pin connector. All I need my distributed for is for cam signal and the cap and rotor to send out spark. I have disabled everything else in the distributed and modified the cap with the msd power tool. From all the research I have done, this is the setup I figure will work best for me. If anyone is absolutely sure that I am wrong, I appreciate your input