Project Jay-Spec Mazda 323 KLZE
Re: Project Jay-Spec Mazda 323 KLZE
Is the "Precidia" logo in the rear hatch a sticker or is it part of the glass? I've never seen such a logo so can I assume it's Canadian only?
95 RS
-
IMACHU2
- Regular Member
- Posts: 559
- Joined: September 25th, 2008, 4:11 pm
- Location: Guelph Ontario Canada
Re: Project Jay-Spec Mazda 323 KLZE
Yep I only payed $500.00 for it. It has 340000KM on it, it burned oil and the body is shot, but I drove it homeSavin wrote:And you paid how much for that car? $500 was it? Not bad at all.
Can't wait to see your project come together!
Since you got that for 500, there's no way I'm paying more than 400 for one with a blown motor, and rust...
I'm gonna use you/your cheap mx as a reference to knock down the guy's price, if that's alright? lol
(2 hours home) without any problems. It actually drove quite nice and nobody tailgated me all the way home. (James bond style smoke screen)
I used kijiji for the adds. I got many stupid responses, but it was worth it.
Dominic Toretto's whip is a MaZda and his cell phone number starts in "(323)"
My work log http://mx-3.com/phpBB3/viewtopic.php?f=46&t=72471
My work log http://mx-3.com/phpBB3/viewtopic.php?f=46&t=72471
-
IMACHU2
- Regular Member
- Posts: 559
- Joined: September 25th, 2008, 4:11 pm
- Location: Guelph Ontario Canada
Re: Project Jay-Spec Mazda 323 KLZE
As far as I know yes.miessau0 wrote:Is the "Precidia" logo in the rear hatch a sticker or is it part of the glass? I've never seen such a logo so can I assume it's Canadian only?
The MX-3 in Canada was called the "MX-3 Precidia".
The MX-6 in Canada was called the MX-6 "MX-6 Mystere".
The Millenia in Canada was called the "Millennium Falcon"
No it wasn't, now I am just &*^%$#@ with you.
The "Precidia" logo is a decal. I told my friend in the US that I bought a Precidia, that is when I learned the truth. HeHe. "You bought a what, for how much". he said.
Dominic Toretto's whip is a MaZda and his cell phone number starts in "(323)"
My work log http://mx-3.com/phpBB3/viewtopic.php?f=46&t=72471
My work log http://mx-3.com/phpBB3/viewtopic.php?f=46&t=72471
-
IMACHU2
- Regular Member
- Posts: 559
- Joined: September 25th, 2008, 4:11 pm
- Location: Guelph Ontario Canada
Re: Project Jay-Spec Mazda 323 KLZE
The door panels come with free doors for $100.00. The car parts are at my secret IMACHU2 layer in an un-disclosed location. (kinda like the Bat Cave but with more rusty parts on the floor). If you want the pair of doors complete let me know, and I can bring them to Guelph. The P/W, P/L and all the controls are in good working order. The store is only open until 8:00PM Thursday and Friday (for the winter). Thanks Jason. My Lawyer advises That the used MX-3 parts are being sold by me (Jason), and have nothing to do with the Performance Improvements Chain Of Storesmx3autozam wrote:hey man..later in the week i wanna buy thsoe door panels from ya from this mx3. i'll come by P.I and see ya. I work in Guelph.
Dominic Toretto's whip is a MaZda and his cell phone number starts in "(323)"
My work log http://mx-3.com/phpBB3/viewtopic.php?f=46&t=72471
My work log http://mx-3.com/phpBB3/viewtopic.php?f=46&t=72471
-
fowljesse

- Supporting Member
- Posts: 5676
- Joined: March 17th, 2006, 2:59 pm
- Location: portland, OR
- Contact:
Re: Project Jay-Spec Mazda 323 KLZE
You can buy that sticker on the main MX-3.com page.miessau0 wrote:Is the "Precidia" logo in the rear hatch a sticker or is it part of the glass? I've never seen such a logo so can I assume it's Canadian only?
I got one.
'93 GS - P&P DE w/ ZE exh. cams/ pistns, KLG4 IM, 65mm TB, MSnS, Phenos, K&N RAI, UDP, Grnd wires, rear batt, filld MM, torq strt, TWM short shftr, Exedy, Lng tube hdrs 2.5" Side exhaust, H&R sprngs, Poly bushngs, strutbars, Alum. crss mmber&tiebar, 22mm swybar, solid links, Direzzas, leather int, Alpine 9805 stereo & alrm, keyless entry, 10 Boston Accoustics spkrs, Prjectrs, Blaster2, CF hood, FG hatch, Lexan
-
IMACHU2
- Regular Member
- Posts: 559
- Joined: September 25th, 2008, 4:11 pm
- Location: Guelph Ontario Canada
Re: Project Jay-Spec Mazda 323 KLZE
The decal has no glue, you have to use Canadian Maple Syrup eh??

Once the decal is applied you will get the pussy!

Once the decal is applied you will get the pussy!
Dominic Toretto's whip is a MaZda and his cell phone number starts in "(323)"
My work log http://mx-3.com/phpBB3/viewtopic.php?f=46&t=72471
My work log http://mx-3.com/phpBB3/viewtopic.php?f=46&t=72471
-
IMACHU2
- Regular Member
- Posts: 559
- Joined: September 25th, 2008, 4:11 pm
- Location: Guelph Ontario Canada
Re: Project Jay-Spec Mazda 323 KLZE
Bought a mountain of MX-323 parts today: 
-Eibach Pro kit
-KYB GR2 struts and boots
-ACT Clutch PP,disc,RB,PB and the alignment tool.
-Rear Brake Rotors
-Vibrant Muffler (Flat black one)
-Energy Suspension Lateral link bushings
-Piaa Xtreme White headlight bulbs and super Silicone Wiper blades
-Pacesetter headers
-Magnaflow Highflow Cat
-Two trimline Flex-a-lite electric fans
Now I just need to get to the garage! It will likely be a week before I make it there. Being an adult blows
Dominic Toretto's whip is a MaZda and his cell phone number starts in "(323)"
My work log http://mx-3.com/phpBB3/viewtopic.php?f=46&t=72471
My work log http://mx-3.com/phpBB3/viewtopic.php?f=46&t=72471
Re: Project Jay-Spec Mazda 323 KLZE
Lol Jay, one hell of a discount I assume.
-
IMACHU2
- Regular Member
- Posts: 559
- Joined: September 25th, 2008, 4:11 pm
- Location: Guelph Ontario Canada
Re: Project Jay-Spec Mazda 323 KLZE
10% Over cost and our in house 12 month no interest financing! G.E Finance built my other hot rod tooSwanny wrote:Lol Jay, one hell of a discount I assume.
I have reached the end of my available credit today with 5" Hella driving lights, a Grant steering wheel and adapter, A Mothers power ball and a container of plastic polish (going to polish the crap out of all the lights). I am in no position to complain, but our one warehouse used to have a full line of O.E.M. replacement parts (looks like they gave up on it). Access to ball joints and tie rod ends, clutch slave cylinder, timing belt ect would have been helpful. I have an account at another local parts store, so I will still get a discount / hook-up on that stuff too, but unfortunately I will need to come up with money to pay for it first
Dominic Toretto's whip is a MaZda and his cell phone number starts in "(323)"
My work log http://mx-3.com/phpBB3/viewtopic.php?f=46&t=72471
My work log http://mx-3.com/phpBB3/viewtopic.php?f=46&t=72471
-
IMACHU2
- Regular Member
- Posts: 559
- Joined: September 25th, 2008, 4:11 pm
- Location: Guelph Ontario Canada
Re: Project Jay-Spec Mazda 323 KLZE
I cut a hole in the rad support and welded some new nuts in it, then I welded the hole shut. I also cut a hole in the passenger rear frame rail and welded a new nut in there too, then I welded that hole shut. When you type it just does not sound like a 9 hour day at the garage does it?? 
Dominic Toretto's whip is a MaZda and his cell phone number starts in "(323)"
My work log http://mx-3.com/phpBB3/viewtopic.php?f=46&t=72471
My work log http://mx-3.com/phpBB3/viewtopic.php?f=46&t=72471
-
IMACHU2
- Regular Member
- Posts: 559
- Joined: September 25th, 2008, 4:11 pm
- Location: Guelph Ontario Canada
Re: Project Jay-Spec Mazda 323 KLZE
I repaired some rust holes in the right rear inner fender. 
Dominic Toretto's whip is a MaZda and his cell phone number starts in "(323)"
My work log http://mx-3.com/phpBB3/viewtopic.php?f=46&t=72471
My work log http://mx-3.com/phpBB3/viewtopic.php?f=46&t=72471
-
IMACHU2
- Regular Member
- Posts: 559
- Joined: September 25th, 2008, 4:11 pm
- Location: Guelph Ontario Canada
Re: Project Jay-Spec Mazda 323 KLZE
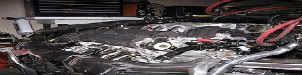
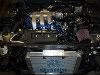
Got a couple of disposable cameras developed today.
The MX-3 parts car before it was towed away.


The repair of the rad support bolts:
The problem: Freakin bolts rusted-in.

Step 1: Mark the hole

Step 2: cut the hole. (I used a grinder with a cutting wheel)

Step 3: pry the metal up.

Step 4: Remove the broken nut-certs. I used a chisel and a hammer.

Step 5: Clean the area.

Step 6: Weld in some nuts and paint everything. Note:
Trying to weld a nut to the tin foil thick metal is like trying to weld a
dew drop to a snow flake! i nailed the fist one, the second took a few
nuts and a few tries. I recycled proper size nuts from my maZda bolt bucket.

Step 7: Fold the metal back over the repair and weld it shut.
I used a patch panel which i drilled full of holes and welded to the rad support.

Rear sub frame nut cert repair
Step 1: Cut a hole in the side of the frame.

Step 2: remove the old nut cert. Mine was easy it removed itself
when I was trying to remove the rear sub frame:)
Step 3: Weld a nut into place. I used a bolt to hold the nut in the proper place.


Step 4: Weld the hole shut. I used a patch panel which
I drilled holes into and spot welded it to the frame.

Left "Bottle hole" The bottom of the inner fender was holding water and rusted away.
here are some photos of the repair.
The huge hole!

Step 1: Cut out the bad metal.

Step 2: Make a fiberglass mold using adhesive bonding strips (duct tape)
and tree fiber sheeting (bristle board


Step 3: Cut out a bunch of fiberglass. I usually pre cut a whole bucket
of different sizes and shapes. (It is difficult to cut out new pieces when
your covered in fiberglass resin). Then I mix up a batch of fiberglass resin
and hardener in a large coffee can. Then dip the pieces of fiber glass into
the resin and place them on the mold. Don't try to cover a hole this big
with a single sheet. Fiberglass in much easier to deal with in 3" square
pieces (overlapped). When your finished remove the bristle board and
tape. Some will be stuck to your repair which you can simply sand off.


The MX-3 parts car before it was towed away.
The repair of the rad support bolts:
The problem: Freakin bolts rusted-in.
Step 1: Mark the hole
Step 2: cut the hole. (I used a grinder with a cutting wheel)
Step 3: pry the metal up.
Step 4: Remove the broken nut-certs. I used a chisel and a hammer.
Step 5: Clean the area.
Step 6: Weld in some nuts and paint everything. Note:
Trying to weld a nut to the tin foil thick metal is like trying to weld a
dew drop to a snow flake! i nailed the fist one, the second took a few
nuts and a few tries. I recycled proper size nuts from my maZda bolt bucket.
Step 7: Fold the metal back over the repair and weld it shut.
I used a patch panel which i drilled full of holes and welded to the rad support.
Rear sub frame nut cert repair
Step 1: Cut a hole in the side of the frame.
Step 2: remove the old nut cert. Mine was easy it removed itself
when I was trying to remove the rear sub frame:)
Step 3: Weld a nut into place. I used a bolt to hold the nut in the proper place.
Step 4: Weld the hole shut. I used a patch panel which
I drilled holes into and spot welded it to the frame.
Left "Bottle hole" The bottom of the inner fender was holding water and rusted away.
here are some photos of the repair.
The huge hole!
Step 1: Cut out the bad metal.
Step 2: Make a fiberglass mold using adhesive bonding strips (duct tape)
and tree fiber sheeting (bristle board
Step 3: Cut out a bunch of fiberglass. I usually pre cut a whole bucket
of different sizes and shapes. (It is difficult to cut out new pieces when
your covered in fiberglass resin). Then I mix up a batch of fiberglass resin
and hardener in a large coffee can. Then dip the pieces of fiber glass into
the resin and place them on the mold. Don't try to cover a hole this big
with a single sheet. Fiberglass in much easier to deal with in 3" square
pieces (overlapped). When your finished remove the bristle board and
tape. Some will be stuck to your repair which you can simply sand off.
Dominic Toretto's whip is a MaZda and his cell phone number starts in "(323)"
My work log http://mx-3.com/phpBB3/viewtopic.php?f=46&t=72471
My work log http://mx-3.com/phpBB3/viewtopic.php?f=46&t=72471
-
IMACHU2
- Regular Member
- Posts: 559
- Joined: September 25th, 2008, 4:11 pm
- Location: Guelph Ontario Canada
Re: Project Jay-Spec Mazda 323 KLZE
I used the same fiberglass mold techniques for the other side.


I also used the same technique on the rear "bottle hole"


Right now I am working on the drivers quarter panel.


.....and the passenger inner fender


I thought I was about done but, I discovered a few more holes.


The front an rear shock towers are going to need some patch and weld. The rest of the
holes are very small and non structural so I will patch them with glass. Oddly the floor is
in mint shape......from what I can tell so-far.
This stuff is going to have to wait a while.

I also used the same technique on the rear "bottle hole"
Right now I am working on the drivers quarter panel.
.....and the passenger inner fender
I thought I was about done but, I discovered a few more holes.
The front an rear shock towers are going to need some patch and weld. The rest of the
holes are very small and non structural so I will patch them with glass. Oddly the floor is
in mint shape......from what I can tell so-far.
This stuff is going to have to wait a while.
Last edited by IMACHU2 on January 5th, 2009, 1:20 am, edited 1 time in total.
Dominic Toretto's whip is a MaZda and his cell phone number starts in "(323)"
My work log http://mx-3.com/phpBB3/viewtopic.php?f=46&t=72471
My work log http://mx-3.com/phpBB3/viewtopic.php?f=46&t=72471
-
fowljesse
- Supporting Member
- Posts: 5676
- Joined: March 17th, 2006, 2:59 pm
- Location: portland, OR
- Contact:
Re: Project Jay-Spec Mazda 323 KLZE
Good job. It makes me less intimidated about making a fiberglass hood. While you're in there, you might as well put a few more welds on the seams, since it's going to have to withstand more power than it was built for.
'93 GS - P&P DE w/ ZE exh. cams/ pistns, KLG4 IM, 65mm TB, MSnS, Phenos, K&N RAI, UDP, Grnd wires, rear batt, filld MM, torq strt, TWM short shftr, Exedy, Lng tube hdrs 2.5" Side exhaust, H&R sprngs, Poly bushngs, strutbars, Alum. crss mmber&tiebar, 22mm swybar, solid links, Direzzas, leather int, Alpine 9805 stereo & alrm, keyless entry, 10 Boston Accoustics spkrs, Prjectrs, Blaster2, CF hood, FG hatch, Lexan
Re: Project Jay-Spec Mazda 323 KLZE
thats a lot of metal/glass work. Great job! Makes me feel confident about putting in my core support myself. you can't learn unless you try I guess. Again, good job sir.
93SE-KLDE Theres a big peice of metal inside my other peice of metal now...weird???