How to: Sound-deaden \ Rattle-proof your ride - Affordable
Posted: September 8th, 2010, 9:59 pm
So I am renovating this thread. As I have found out more information since doing the install and I would like to share this information with all of you. The first thing I wanna say is Dynamat (I used Peel and Seal) and products like it are NOT really sound deadener's, but more of a "rattle proofing" product. It has some sound deadening properties to it, but lacks the density to really make a difference. It is however an excellent way of reducing rattles and amplifying sound quality as well as being wonderful to work in tight spaces.
So lets get on with it.
>>>
There are two types of sound deadening:
MASS LOADING - Involves adding weight to a particular panel of the vehicle to inhibit vibration/rattle. Somewhat effective in defeating ambient soundwaves, great for bass improvement. Pads and liquid deadeners work best for this application.
BARRIER LOADING - Involves adding an acoustical absorber as to absorb sound waves from ambient noise (road, engine, wind, etc.). Great for ambient noise, somewhat effective in improving midbass. Foams work best for this application.
It is very important to understand how these two work and what is needed for your vehicle. If you are looking to improve sound quality from your stereo then using something like Peel and Seal (or dynamat, rammatt, brown bread etc) would be a good choice as that is considered "Mass Loading". If you want to kill road/engine/wind noise you need to look at creating a barrier between the cabin and where the sound is coming from. As stated above a closed cell foam works great for this. Stuff this inbetween your panels (especially in the rear) to reelect and absorb the sounds invading your mx3.
>>>
Now there is different types of product you can use:
BUTYL PADS - Butyl Rubber & Asphalt pads such as Dynamat, Brown Bread, Peel and Seal etc. Need to be applied to metal. The thicker the pad the better. However, you are looking at more money for a thick pad. A good solution is to use a thinner material like what I used below (Peel and Seal) and then cover your floor pans and firewall with a thick butyl rubber mat (1/3" or thicker). They can simply be cut to shape and taped into place below your carpet. This is the best way to kill rattles AND help kill noise as well.
A product that I found that is very inexpensive is called Peel and Seal. It is a roof flashing product that is similar in compostion to Dynamat and all the other overpriced brands. Instead of paying 7-10$ per square foot I am paying $1 per square foot. Here is a video that explains in abit:
http://www.youtube.com/watch?v=d3KdEHoq2l4
Also,
http://www.youtube.com/watch?v=tuZvFwV7xDo
Problem is (at least for the Canadian folks) that they only sell it at Lowes, which is only in the US. Here is a link to the product on thier website:
http://www.lowes.com/pd_154017-81326-PS ... dentifier=
FOAM - Closed cell foam, acoustical foam, etc. Stuff these behind ALL the panels behind the front seating area. This alone will eliminate ALOT of road noise as the foam simply absorbs the sound trying to penetrate through to the car. This will also help with acoustic quality in the car as it will not allow the sound to escape as easily. Think about how a recording studio works, there is always foam walls there, that is to absorb the sound and increase clarity.
LIQUID - Undercoating and other roll on or rubberized spray sound deadening material. Works for both mass and barrier loading. Can be applied on top of plastics and metal. Works well alone or over asphalt pads. The thicker the better. I have read in numerous places that it works well up to 2-3mm in thickness. Exceeding this may cause issues, but 3mm seems to be the magic number.
>>>
Once you have the products you want to use then you want to make sure you are prepping the surfaces properly. like with paints, you too must take measures to ensure proper adhesion of your deadener. A highly regarded practice is to first wipe the area down thoroughly with a degreaser to remove any oils that might lie on the surface. This is to be followed with a second wipe down of acentone to make sure the surface is bone dry. It is important to do this especially with adhesive butyl rubber pads (like Peel and Seal, Dynamat etc) as proper adhesion may not occur, you may get lifts or bubbles in the material in hot or cold weather.
>>>
Here is a list of products and what areas I would use them in:
Peel and Seal (Rattles/Deadening/Acoustics):
Roof
Doors
A+B Pillars
Top section of hatch
Spare tire area
Firewall
Underneath rear seat
Underbody Spray (Deadening/Rust protectant):
Under the car - 3mm layer
Butyl rubber matting (Sound deadening):
Front and rear floor pan
Closed cell foam (Sound deadening/Sound insulation/Acoustics):
Entire rear hatch area behind panels
Behind rear armrest cards
>>>
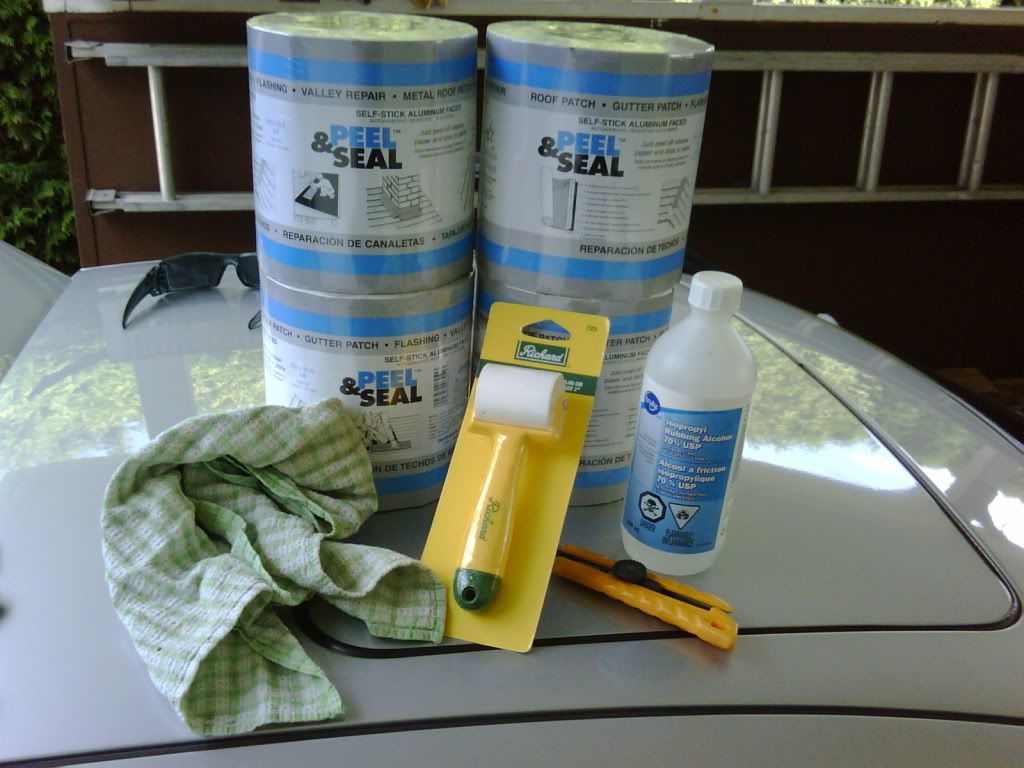
Here are some photos and details on the Peel and Seal job that I did on my car and what tools I used:
1x Seam Roller (rubber roller would work better)
1x Bottle of De-natured alcohol
1x Roll of "Shop Rags" or any type of clean rag to wipe up any mess
1x Exacto knife
1x Vacuum cleaner
1x Hair dryer or heat gun
>>>
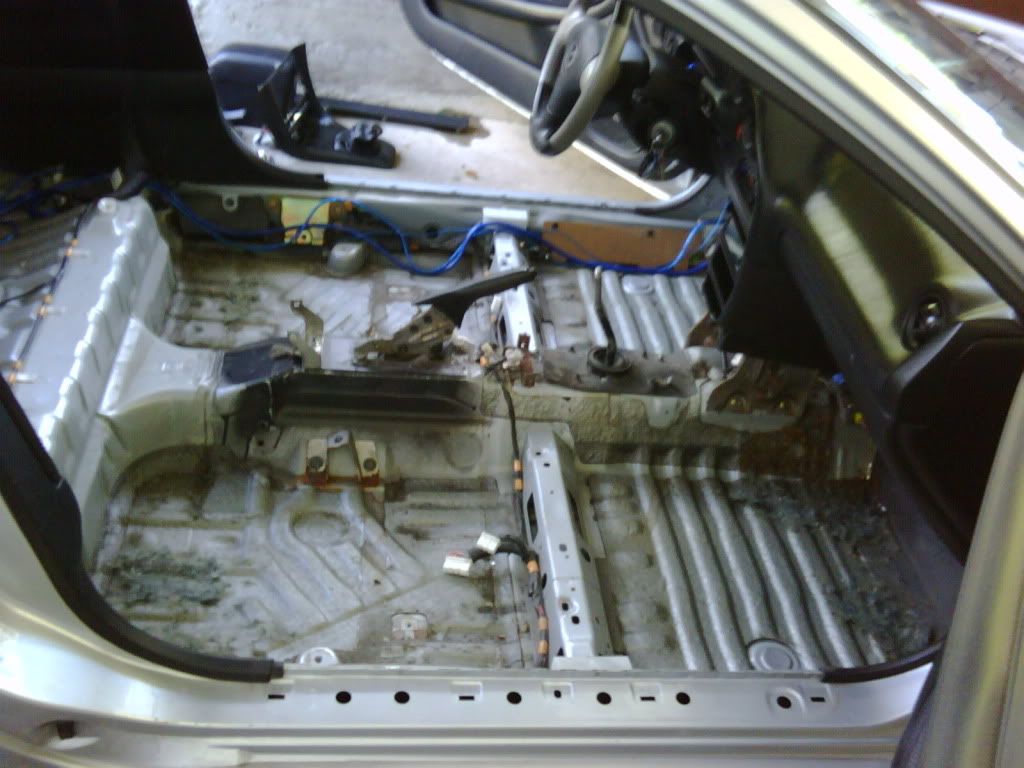
The first thing I did was the floor pans. Front and rear. It took me about 13 minutes to remove all the seats and the carpet:
When you are ready to apply the material simply roll it out and cut the piece to size. I usually cut them slightly longer then what it layed out on top as you will be able to roll and press the material into indetations on the floor pan and that takes up length on the material. Here is a pic of the first strip:
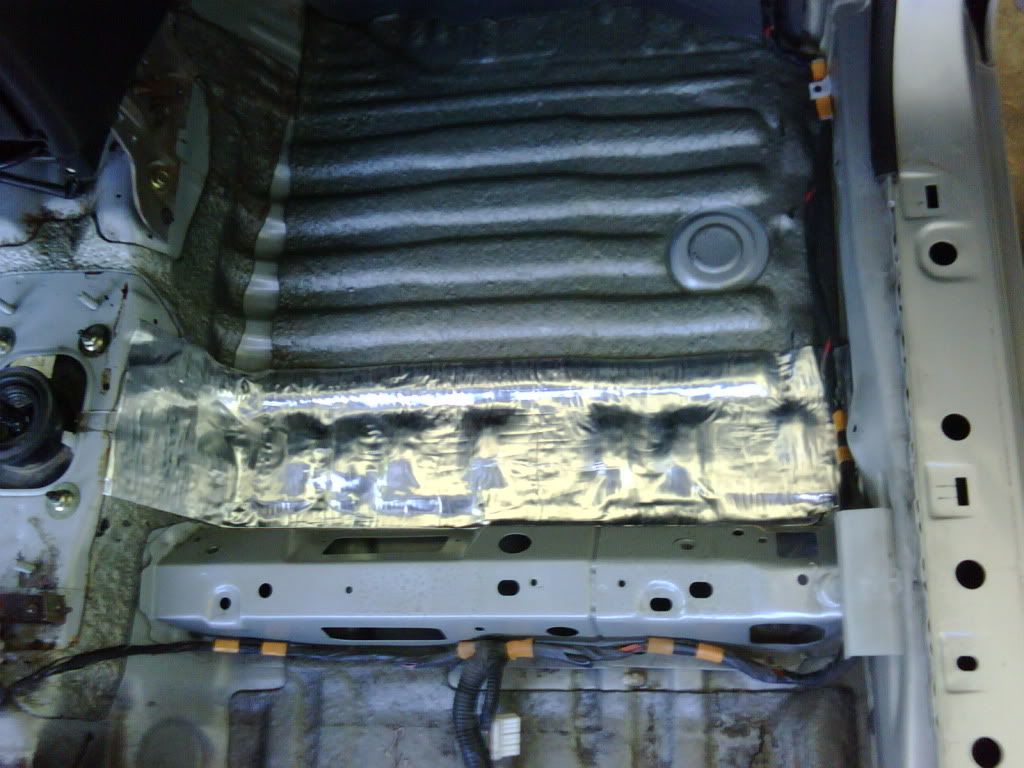
I found that using a combination of my fingers and the roller worked the best as the roller cannot get into all the small divits that the floorpan has. I also found that partially pulling the wax paper back while working directly infront of it was the best way to apply it. I say this because if you ripped all the wax paper off and applied it you couldn't really unstick it to make up for mistakes or if you needed slack for a depression. Here is a pick of the finished PS foot area:
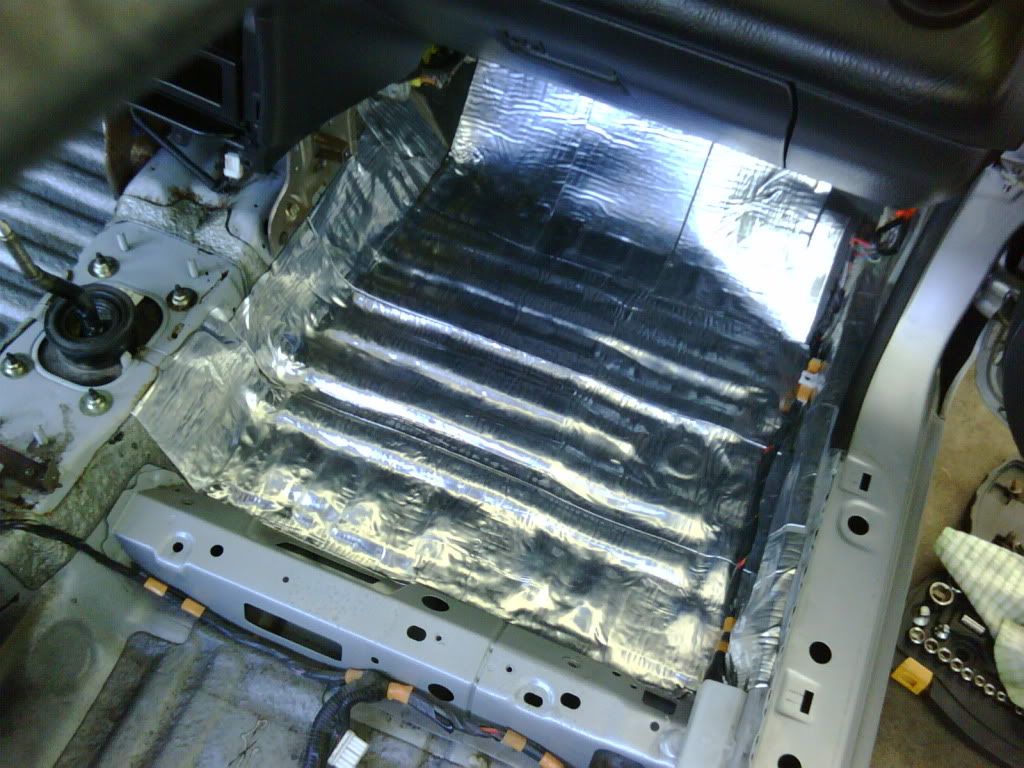
Note the fact I went upwards towards the top of the firewall. This stuff sticks so well it even bonded well to the rubber matting that is in that firewall area. Here is a pic of the finished floor pan area:
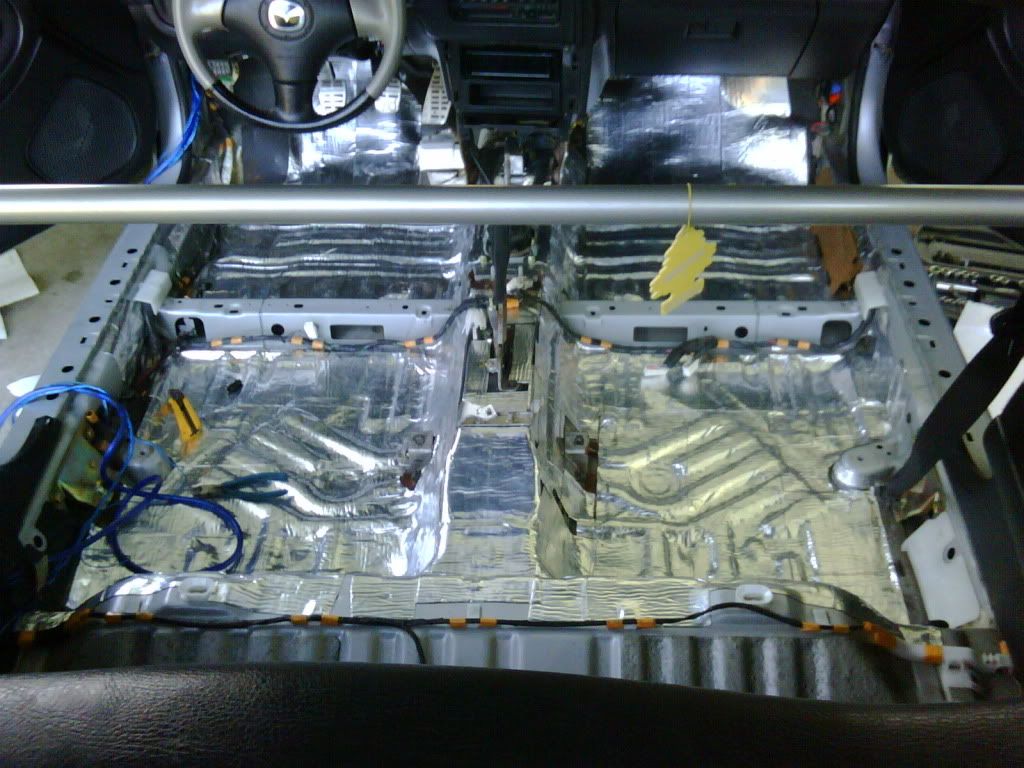
That was enough for one day. I used a total of exactly 2 rolls for the floor pan (about $32). I noticed abit of road noise reduction, but considering the whole floor is already dampened I didnt expect much. However, placing Butyl mats ontop of these areas would help in decreasing the sound alot more.
>>>
For the doors I did some reading online and I found the best combination was to apply a layer inside the door and outside as well. This was the best way to reduce noise as the doors do leak quite abit of sound and wind noise. Interestingly enough, the 6" width was PERFECT for the bottom half of the inside of the door (I did not do the top as I do not believe it is needed). The first thing I did was remove the door cards and the old plastic weather seal. Then I removed as much of that tar/sealer crap along the edge of the door as I could. I basically used a plastic scraper. As for some of the wiring, I found that undoing the clips and flipping them to the other side of the door freed up space for me to run a continuous sheet. Overlap the sheets slightly as well to form a proper seal. I also went over all the holes for the door card and just punched through with a screwdriver afterwards.
Here is a pic of the inside of the door done:
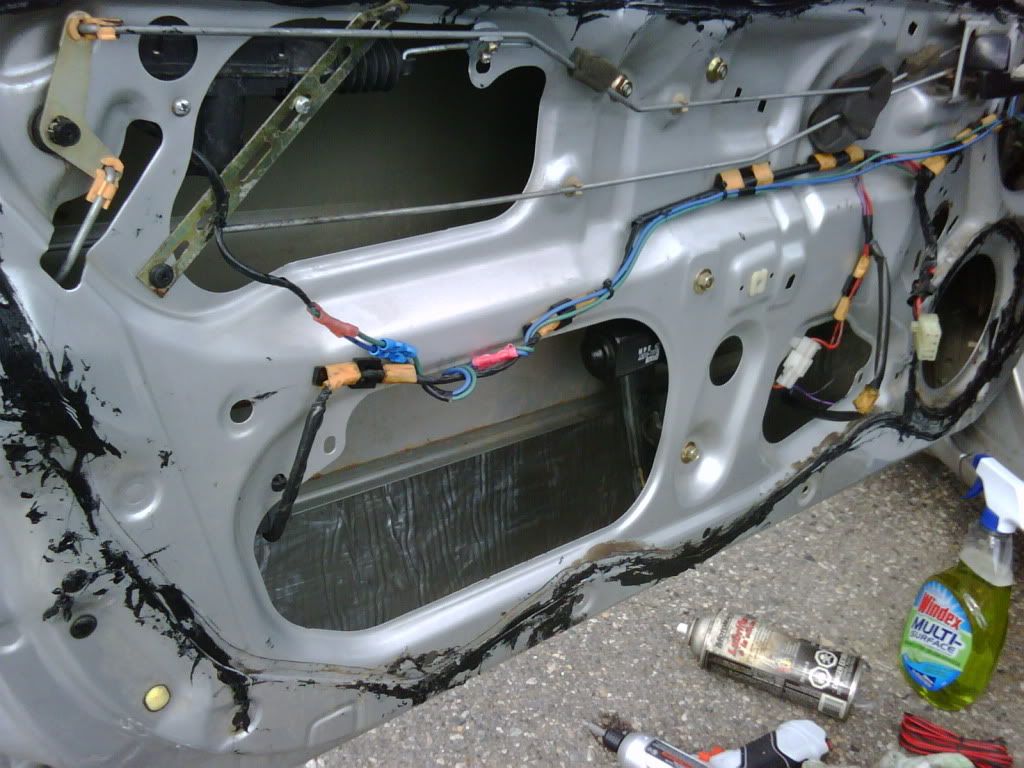
It is vital to clean the inside of the door really well as this is an area that is prone to moisture and dirt. I cleared out alot of dust and grime inside the door. Here is a pick of the completed door:
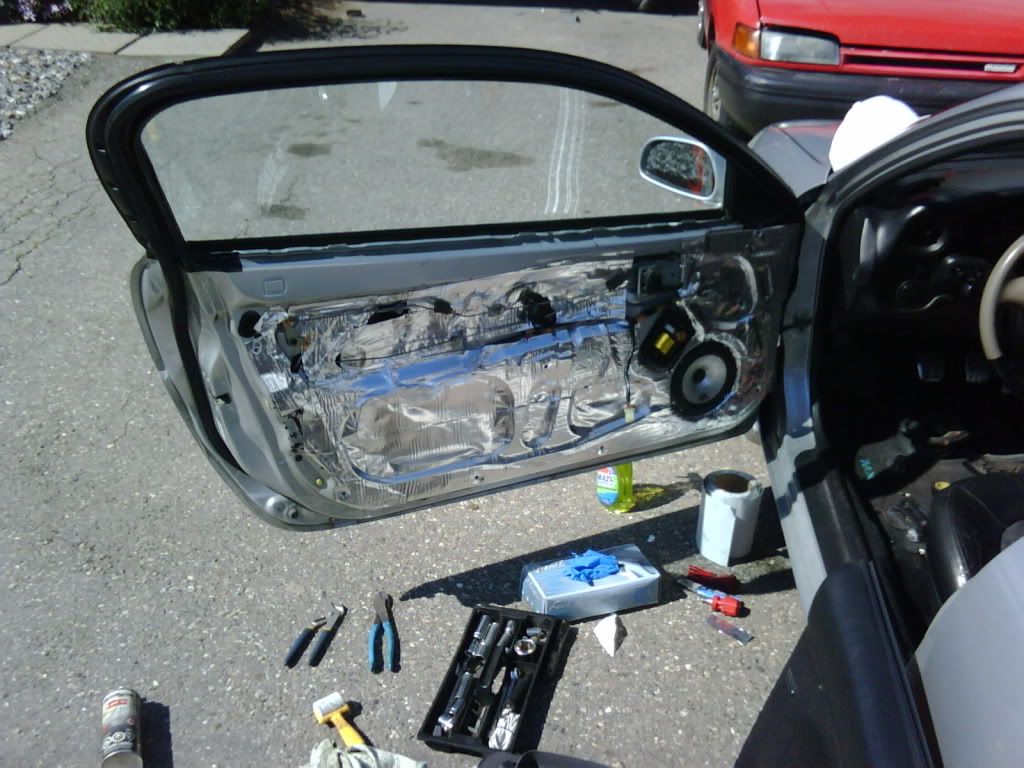
What is great is that you are covering any holes that normally allow sound to easily pass through. It also created a great seal for speakers. As you can see I have components and it helped bring out the mids abit more. This was a 1 roll job, I was able to do both doors with abit of material left over. I would say if you had one roll and you wanted the best bang for the buck, do the doors.
>>>
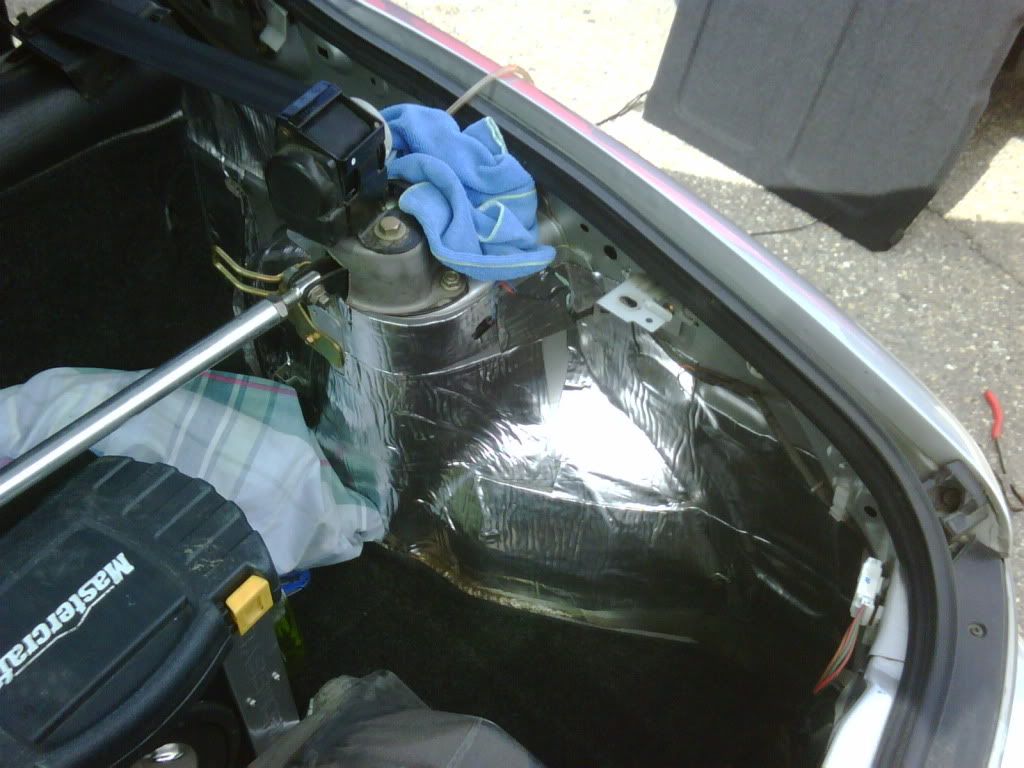
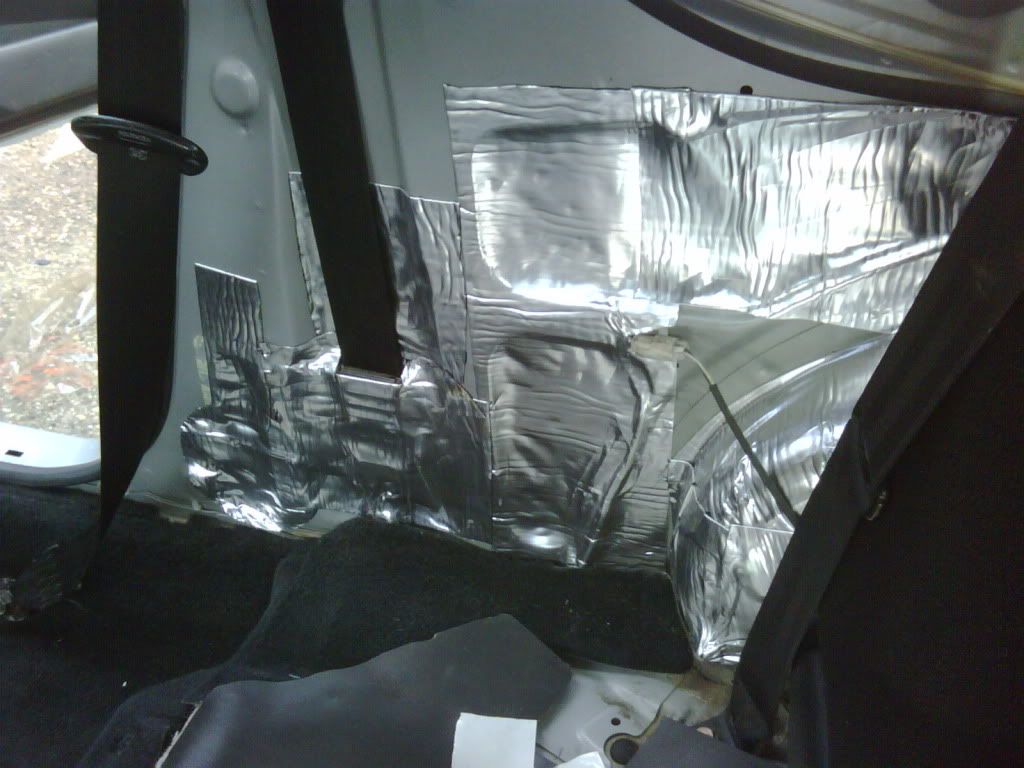
The day after that I decided to do the rear card/hatch area, I had one roll left so I left the very rear for another day. After the removal of the plastics (and the rotting rear wiper fluid reservoir) here is what I ended up with:
>>>
In conclusion, not one single thing will make a difference for sound deadening. I believe that a combination of ALL the above products will yield the best improvement for your MX3 and make it a much more driveable and comfortable space.
So lets get on with it.
>>>
There are two types of sound deadening:
MASS LOADING - Involves adding weight to a particular panel of the vehicle to inhibit vibration/rattle. Somewhat effective in defeating ambient soundwaves, great for bass improvement. Pads and liquid deadeners work best for this application.
BARRIER LOADING - Involves adding an acoustical absorber as to absorb sound waves from ambient noise (road, engine, wind, etc.). Great for ambient noise, somewhat effective in improving midbass. Foams work best for this application.
It is very important to understand how these two work and what is needed for your vehicle. If you are looking to improve sound quality from your stereo then using something like Peel and Seal (or dynamat, rammatt, brown bread etc) would be a good choice as that is considered "Mass Loading". If you want to kill road/engine/wind noise you need to look at creating a barrier between the cabin and where the sound is coming from. As stated above a closed cell foam works great for this. Stuff this inbetween your panels (especially in the rear) to reelect and absorb the sounds invading your mx3.
>>>
Now there is different types of product you can use:
BUTYL PADS - Butyl Rubber & Asphalt pads such as Dynamat, Brown Bread, Peel and Seal etc. Need to be applied to metal. The thicker the pad the better. However, you are looking at more money for a thick pad. A good solution is to use a thinner material like what I used below (Peel and Seal) and then cover your floor pans and firewall with a thick butyl rubber mat (1/3" or thicker). They can simply be cut to shape and taped into place below your carpet. This is the best way to kill rattles AND help kill noise as well.
A product that I found that is very inexpensive is called Peel and Seal. It is a roof flashing product that is similar in compostion to Dynamat and all the other overpriced brands. Instead of paying 7-10$ per square foot I am paying $1 per square foot. Here is a video that explains in abit:
http://www.youtube.com/watch?v=d3KdEHoq2l4
Also,
http://www.youtube.com/watch?v=tuZvFwV7xDo
Problem is (at least for the Canadian folks) that they only sell it at Lowes, which is only in the US. Here is a link to the product on thier website:
http://www.lowes.com/pd_154017-81326-PS ... dentifier=
FOAM - Closed cell foam, acoustical foam, etc. Stuff these behind ALL the panels behind the front seating area. This alone will eliminate ALOT of road noise as the foam simply absorbs the sound trying to penetrate through to the car. This will also help with acoustic quality in the car as it will not allow the sound to escape as easily. Think about how a recording studio works, there is always foam walls there, that is to absorb the sound and increase clarity.
LIQUID - Undercoating and other roll on or rubberized spray sound deadening material. Works for both mass and barrier loading. Can be applied on top of plastics and metal. Works well alone or over asphalt pads. The thicker the better. I have read in numerous places that it works well up to 2-3mm in thickness. Exceeding this may cause issues, but 3mm seems to be the magic number.
>>>
Once you have the products you want to use then you want to make sure you are prepping the surfaces properly. like with paints, you too must take measures to ensure proper adhesion of your deadener. A highly regarded practice is to first wipe the area down thoroughly with a degreaser to remove any oils that might lie on the surface. This is to be followed with a second wipe down of acentone to make sure the surface is bone dry. It is important to do this especially with adhesive butyl rubber pads (like Peel and Seal, Dynamat etc) as proper adhesion may not occur, you may get lifts or bubbles in the material in hot or cold weather.
>>>
Here is a list of products and what areas I would use them in:
Peel and Seal (Rattles/Deadening/Acoustics):
Roof
Doors
A+B Pillars
Top section of hatch
Spare tire area
Firewall
Underneath rear seat
Underbody Spray (Deadening/Rust protectant):
Under the car - 3mm layer
Butyl rubber matting (Sound deadening):
Front and rear floor pan
Closed cell foam (Sound deadening/Sound insulation/Acoustics):
Entire rear hatch area behind panels
Behind rear armrest cards
>>>
Here are some photos and details on the Peel and Seal job that I did on my car and what tools I used:
1x Seam Roller (rubber roller would work better)
1x Bottle of De-natured alcohol
1x Roll of "Shop Rags" or any type of clean rag to wipe up any mess
1x Exacto knife
1x Vacuum cleaner
1x Hair dryer or heat gun
>>>
The first thing I did was the floor pans. Front and rear. It took me about 13 minutes to remove all the seats and the carpet:
When you are ready to apply the material simply roll it out and cut the piece to size. I usually cut them slightly longer then what it layed out on top as you will be able to roll and press the material into indetations on the floor pan and that takes up length on the material. Here is a pic of the first strip:
I found that using a combination of my fingers and the roller worked the best as the roller cannot get into all the small divits that the floorpan has. I also found that partially pulling the wax paper back while working directly infront of it was the best way to apply it. I say this because if you ripped all the wax paper off and applied it you couldn't really unstick it to make up for mistakes or if you needed slack for a depression. Here is a pick of the finished PS foot area:
Note the fact I went upwards towards the top of the firewall. This stuff sticks so well it even bonded well to the rubber matting that is in that firewall area. Here is a pic of the finished floor pan area:
That was enough for one day. I used a total of exactly 2 rolls for the floor pan (about $32). I noticed abit of road noise reduction, but considering the whole floor is already dampened I didnt expect much. However, placing Butyl mats ontop of these areas would help in decreasing the sound alot more.
>>>
For the doors I did some reading online and I found the best combination was to apply a layer inside the door and outside as well. This was the best way to reduce noise as the doors do leak quite abit of sound and wind noise. Interestingly enough, the 6" width was PERFECT for the bottom half of the inside of the door (I did not do the top as I do not believe it is needed). The first thing I did was remove the door cards and the old plastic weather seal. Then I removed as much of that tar/sealer crap along the edge of the door as I could. I basically used a plastic scraper. As for some of the wiring, I found that undoing the clips and flipping them to the other side of the door freed up space for me to run a continuous sheet. Overlap the sheets slightly as well to form a proper seal. I also went over all the holes for the door card and just punched through with a screwdriver afterwards.
Here is a pic of the inside of the door done:
It is vital to clean the inside of the door really well as this is an area that is prone to moisture and dirt. I cleared out alot of dust and grime inside the door. Here is a pick of the completed door:
What is great is that you are covering any holes that normally allow sound to easily pass through. It also created a great seal for speakers. As you can see I have components and it helped bring out the mids abit more. This was a 1 roll job, I was able to do both doors with abit of material left over. I would say if you had one roll and you wanted the best bang for the buck, do the doors.
>>>
The day after that I decided to do the rear card/hatch area, I had one roll left so I left the very rear for another day. After the removal of the plastics (and the rotting rear wiper fluid reservoir) here is what I ended up with:
>>>
In conclusion, not one single thing will make a difference for sound deadening. I believe that a combination of ALL the above products will yield the best improvement for your MX3 and make it a much more driveable and comfortable space.