Project Jay-Spec MX-326GS

In this section, Users can post worklogs for their vehicle and show users their projects. (MX-3 ONLY!). Please create only ONE topic when starting a project, and DO NOT create 2 worklogs for the same vehicle, even though they are different projects. READ THE STICKY!
Post Reply
IMACHU2
Regular Member
Posts: 559
Joined: September 25th, 2008, 4:11 pm
Location: Guelph Ontario Canada

Project Jay-Spec MX-326GS

Post by IMACHU2 »

Project Jay-Spec MX-326GS
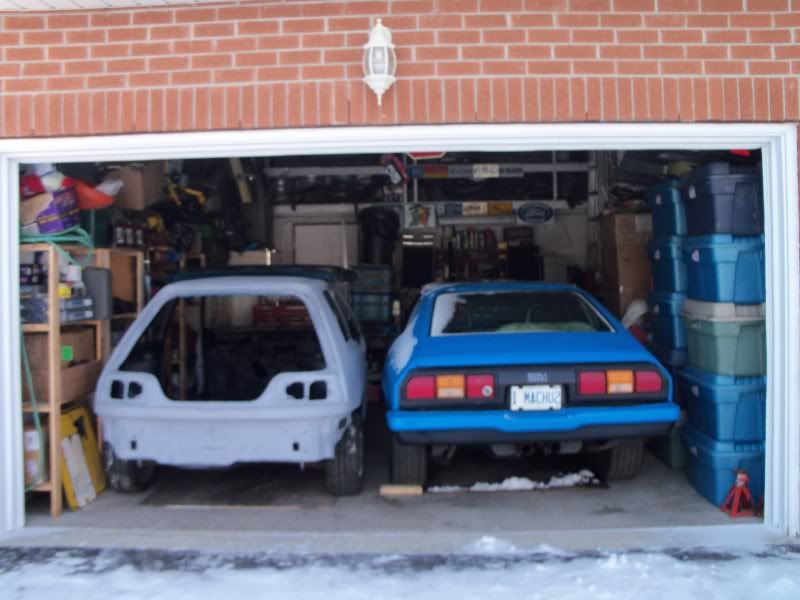
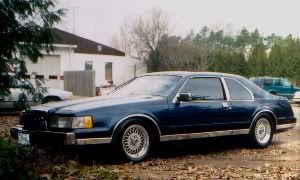
My beloved Lincoln Mark VII had covered a staggering 980000KM. The original engine’s head gasket sprung a leak. It was leaking out, not in, so I would fill it with water every morning before my hour long commute. I decided not to fix it. The poor Lincoln was just plain warn out.

Image

I was recently separated and pretty poor. As far a Lincoln replacement I knew what I wanted……..kinda.

Criteria:
-Recently separated cheap!
-Small and nimble
-Easy to see out of
-Reliable and cheap to fix
-Fit me, a passenger and a baby seat
-Quick and fun to drive
-Stealth (I get a lot of tickets)

I wanted a Mini Cooper S, but I could not afford one, or the BMW priced up-keep.

Image

Then I thought Pulsar GTI-R! But, right hand drive is a heat score, and with AWD and a Turbo easy and cheap to maintain was not very realistic.
Image

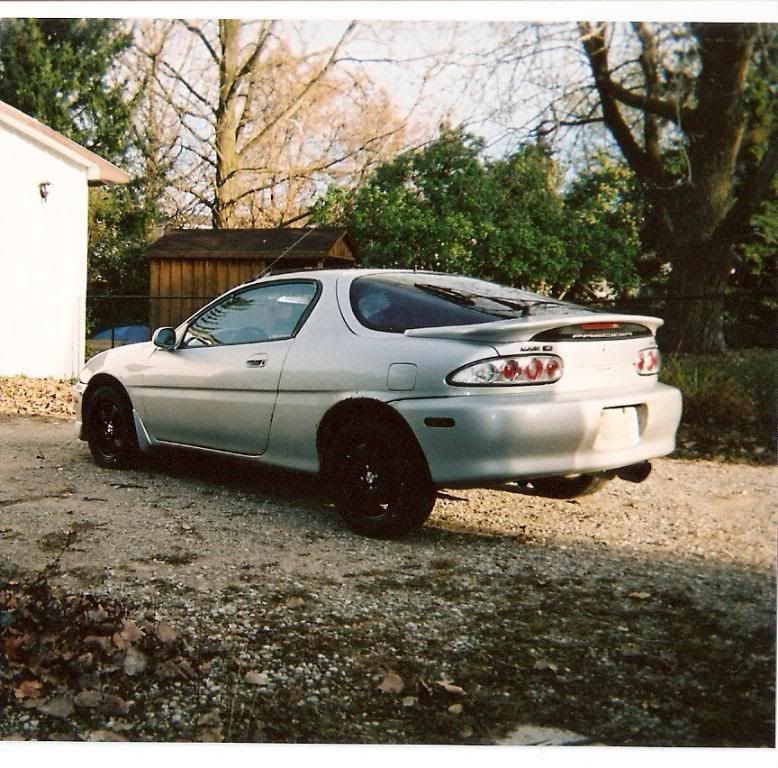
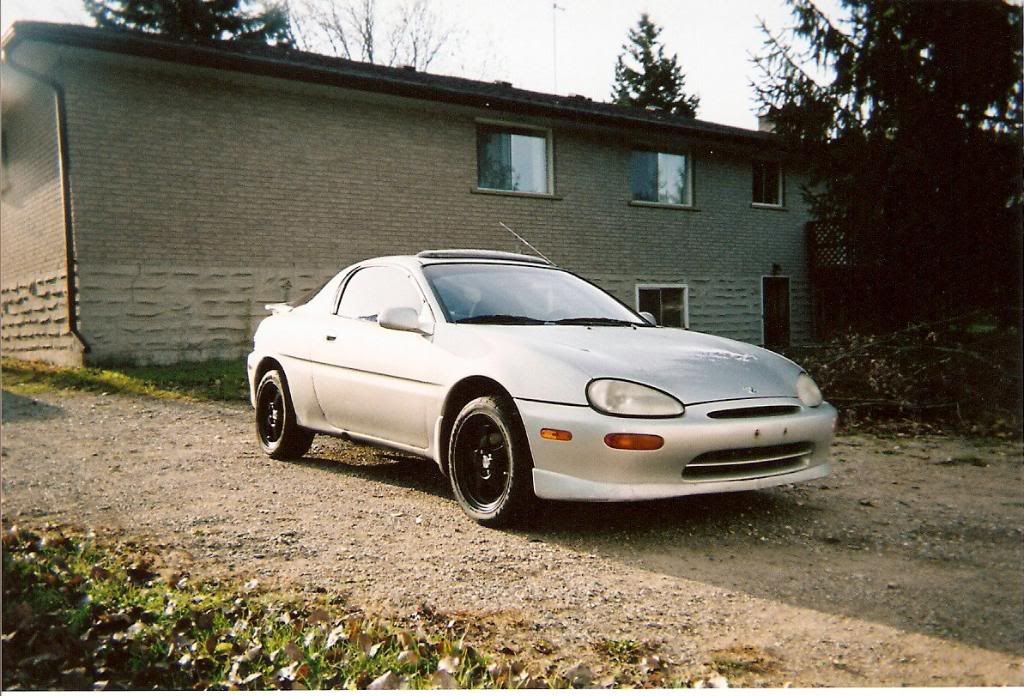
Then I found a car that fit all my Criteria! A Suzuki Swift GTI!
Image

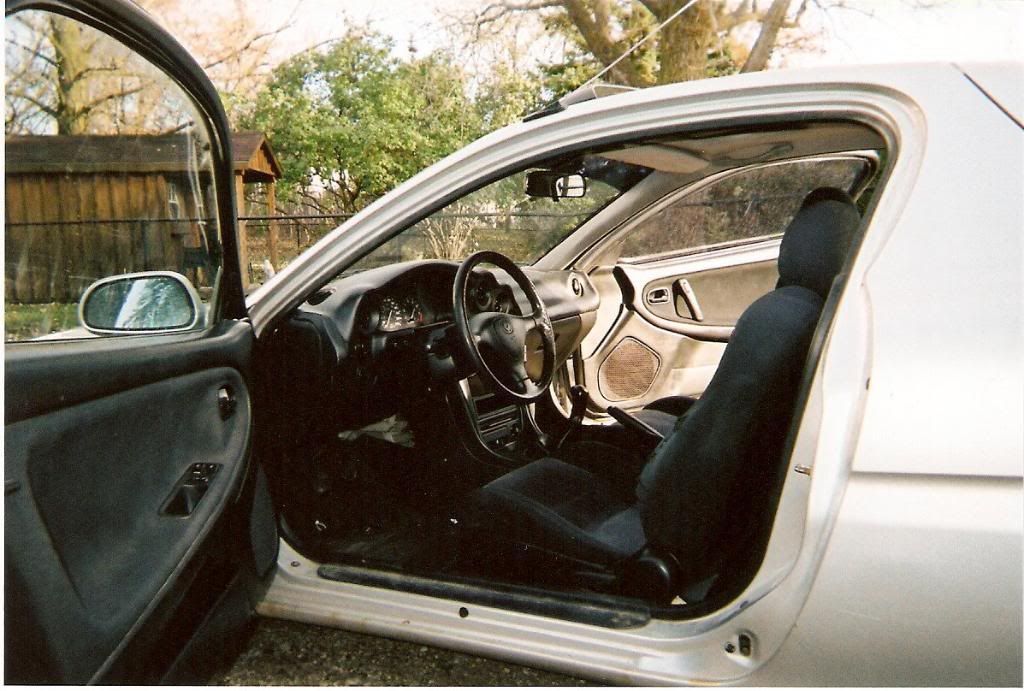
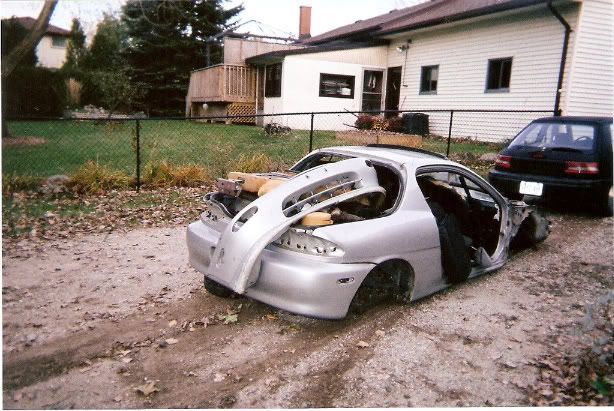
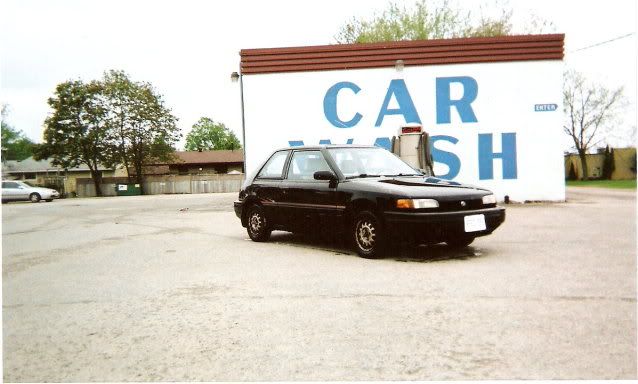
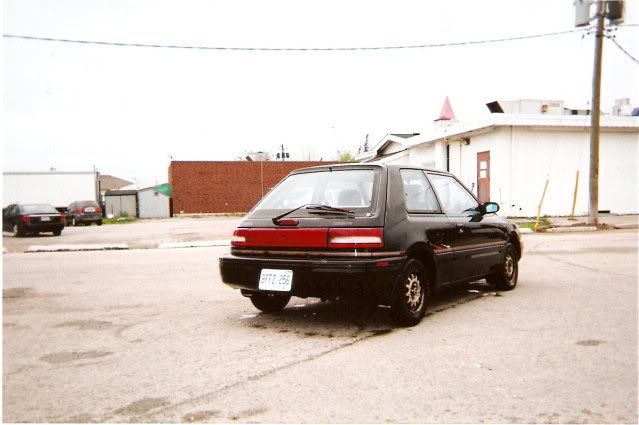
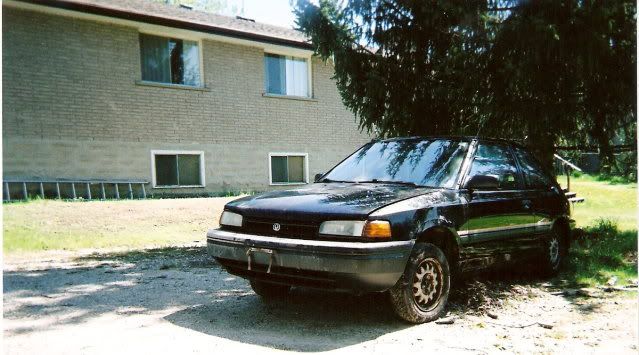
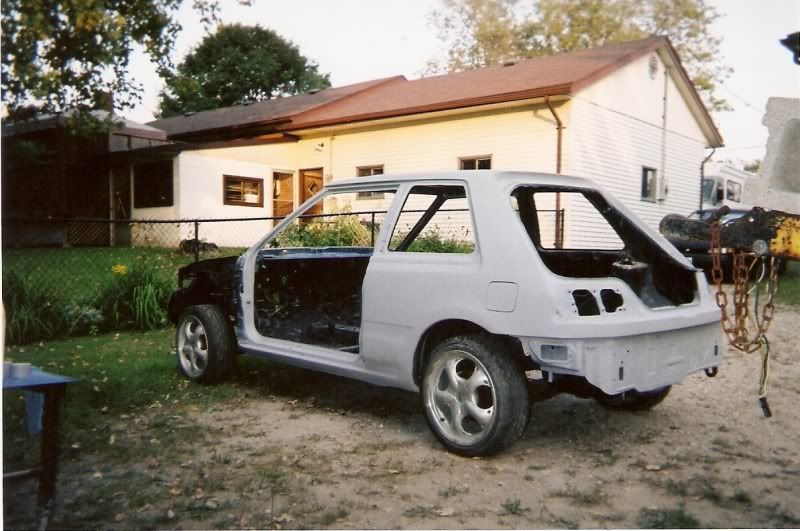
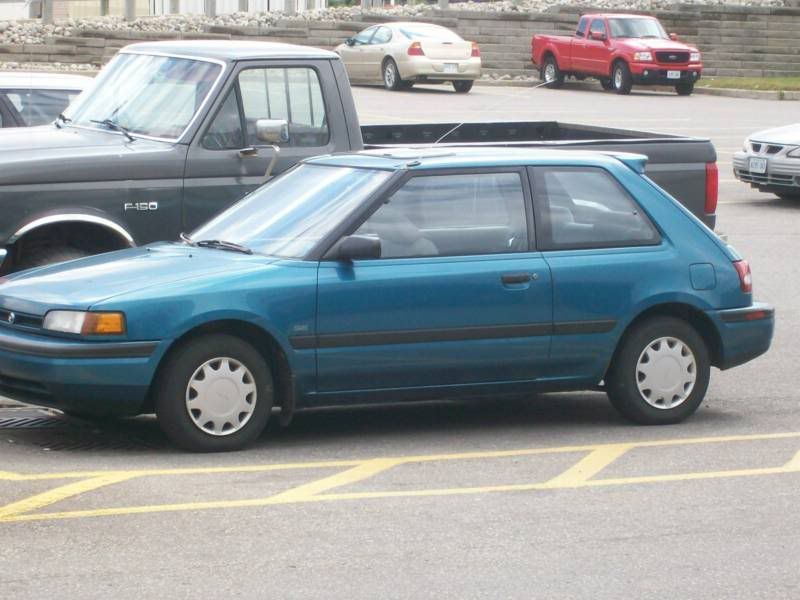
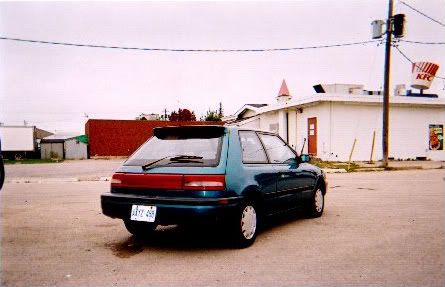
I scoured the earth and by a fluke came up with a mint conditioned 80000KM Swift GTI Locally! I took the car for a test drive and I was in love. The Poor mark VII was almost dead. I had to carry a trunk full of water jugs just to get to work! I decided to buy the Swift. With $5000 in hand I went to the used car lot to pick up my prize. As I pulled up two kids were driving away in my car! (they bought it). In a panic I asked the used car dealer what he had that was 4cyl and cheap. He pointed me to a 1993 Mazda 323 for $500.00. I took it for a drive and it drove well and needed little for the safety check. I decided hell, I will buy it and drive it until I find a suitable replacement.


Image

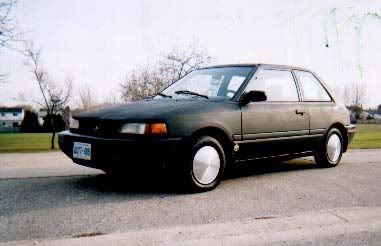
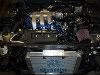
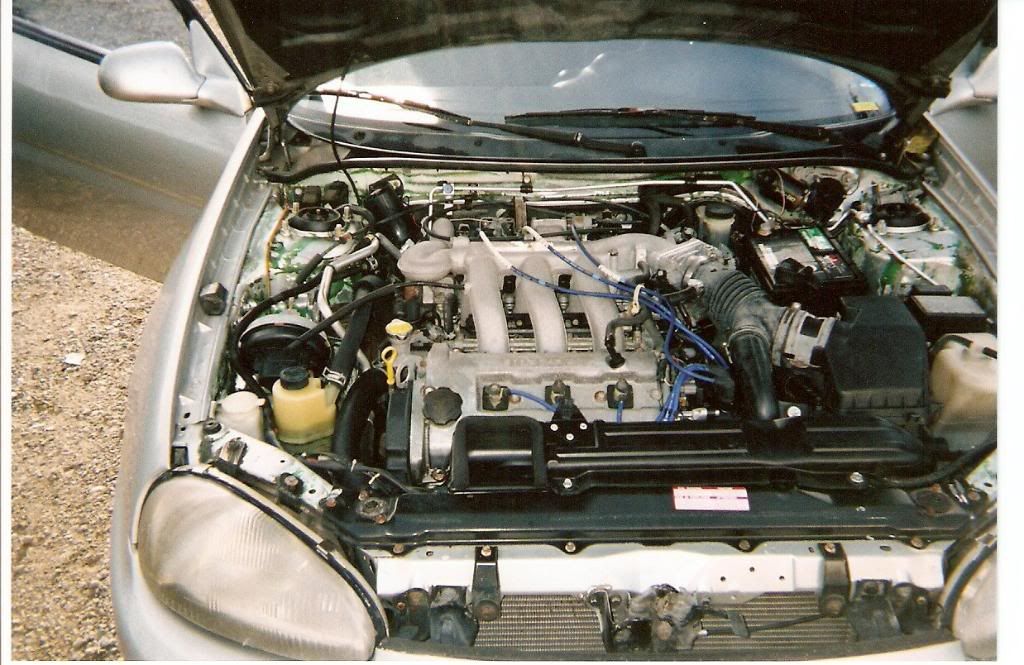
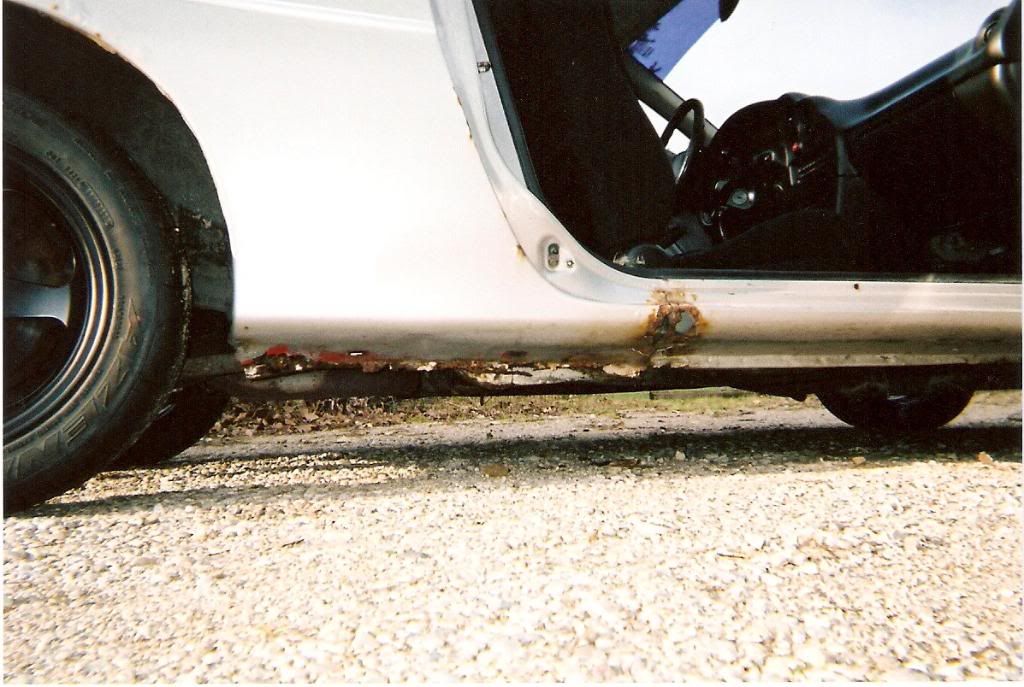
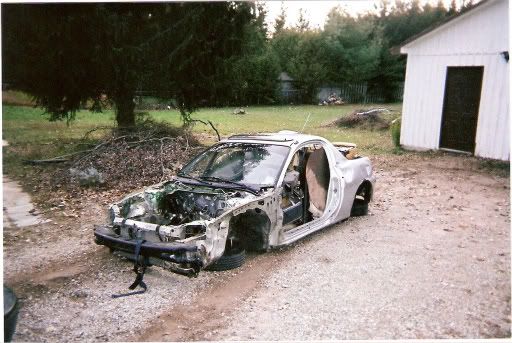
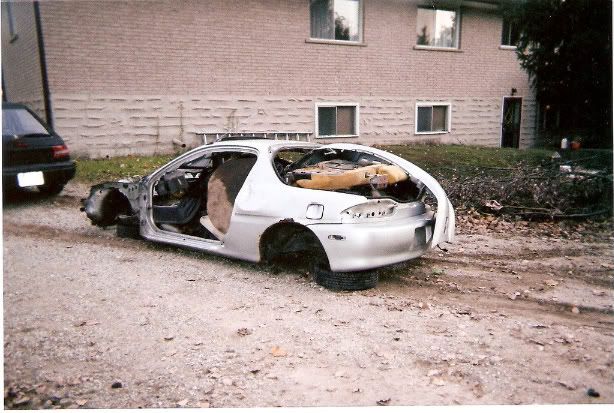
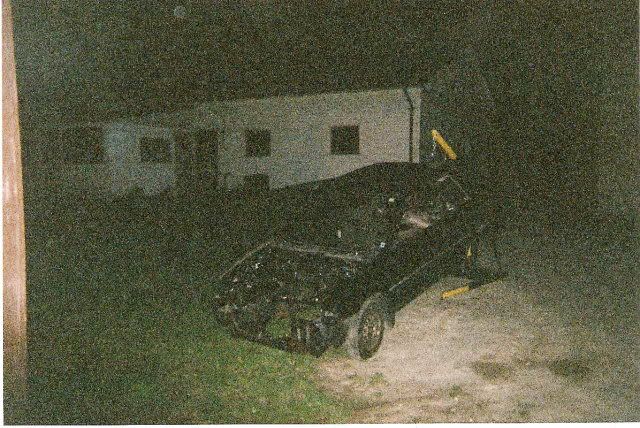
I actually didn’t mind the 323. Five years latter I am still driving my “temporary car”. One day on my way home from work I thought to myself you know this would be a great little car if it had about about 100 more horsepower and some good brakes. When I got home I Googled 323 engine swap. Holly crap! A KLZE will fit in one! My friend had a KLZE powered MX-6 back in the day. It was very reliable and pretty fast. The search for a swap candidate 323 begun immediately! Found this one for $800 on Kijiji. It had a blown head gasket, but appeared to be in pretty good shape. I talked the gurl down to $500, filled it full of water and drove it home.

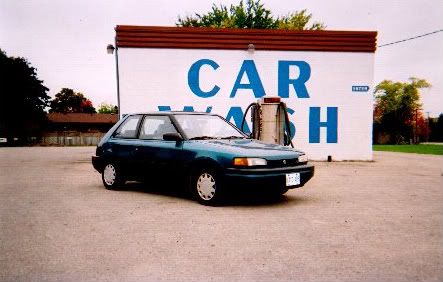
Photo from the Canadian Tire service center parking lot from the Kijiji
ad.
Image

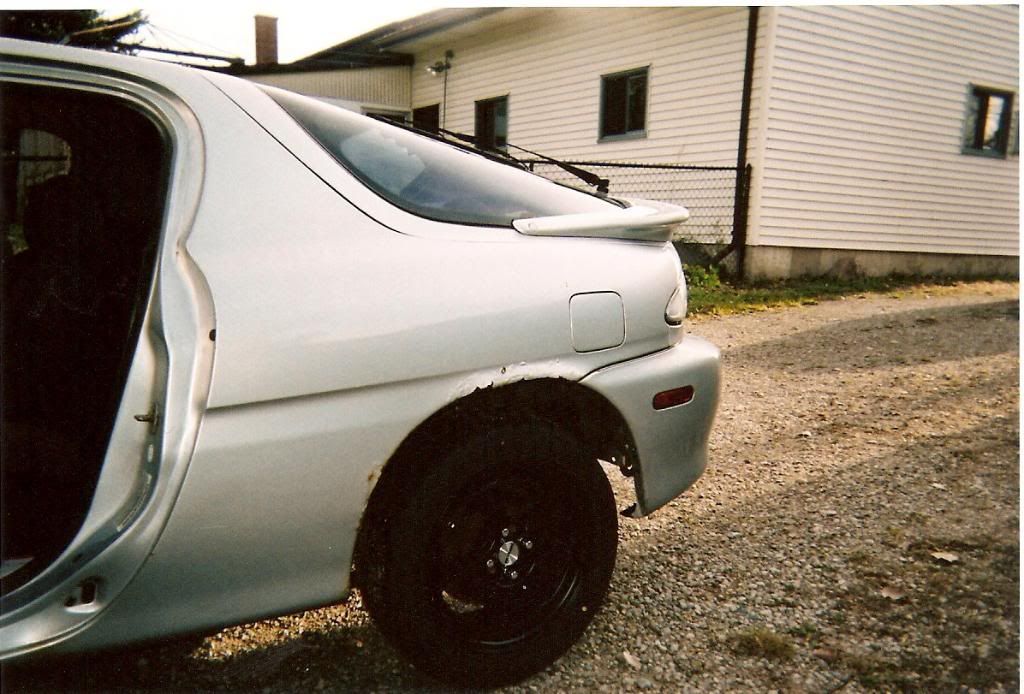
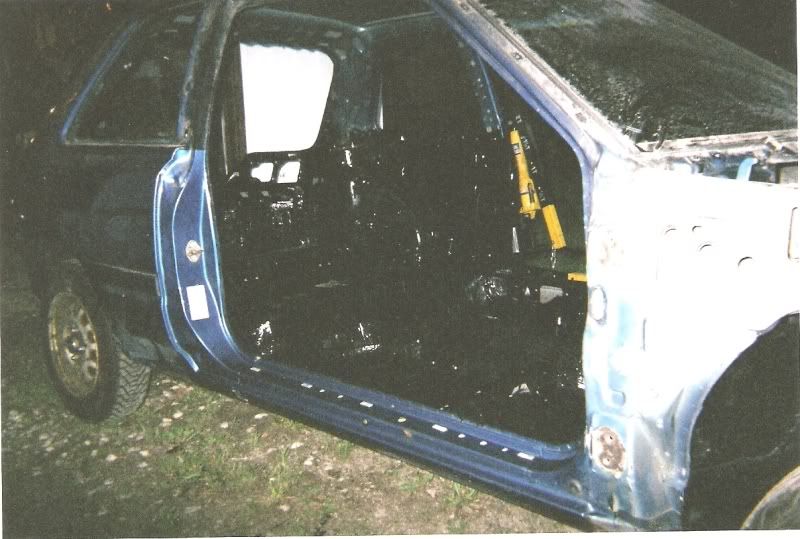
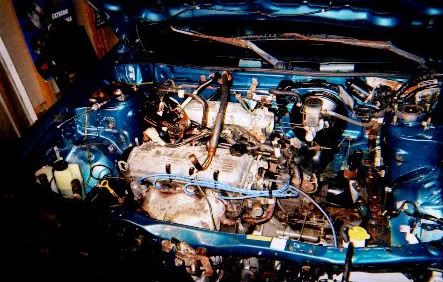
Car was ubber gross. It was covered with gooey under coat and looked like it may never have been washed. So the project started at the car wash!

Image

Image

Image

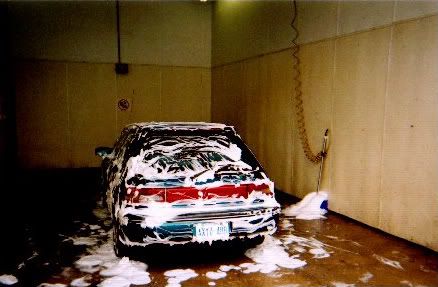
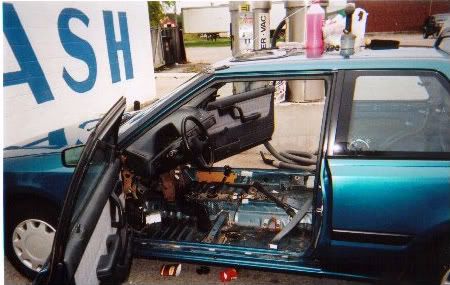
I removed most of the interior and bolted the drivers seat back in. Drove it to the car wash and to the horror of those around the car wash, I power washed the interior! Guys at the body shop across the parking lot were laughing and one of them said “it will never start.” That had crossed my mind, but I figured it was only a block from my garage so the tow would be cheap. To on-lookers and my own amazement it stated right up after its bath.

Image

Image

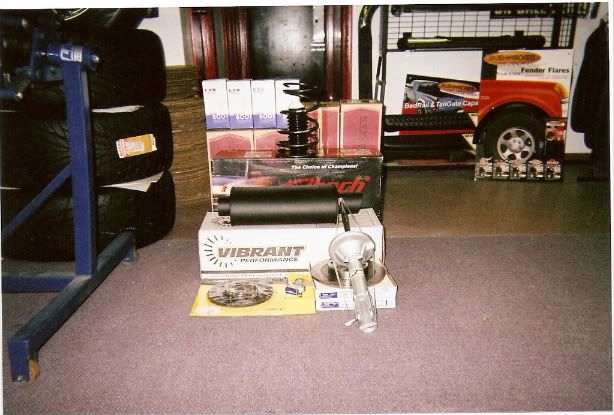
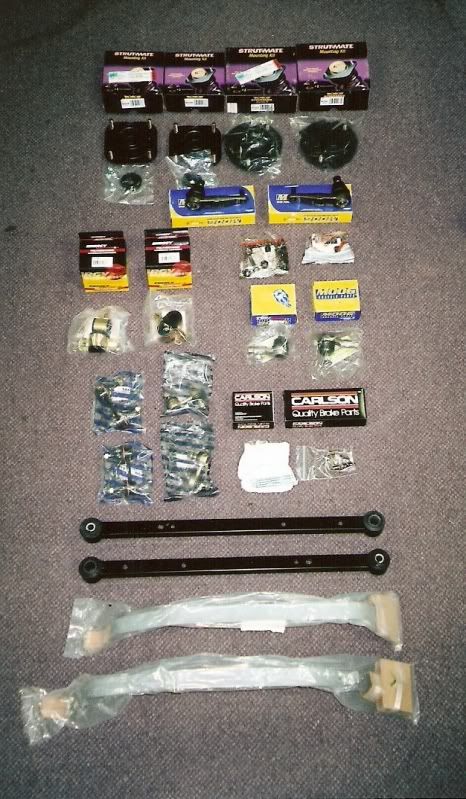
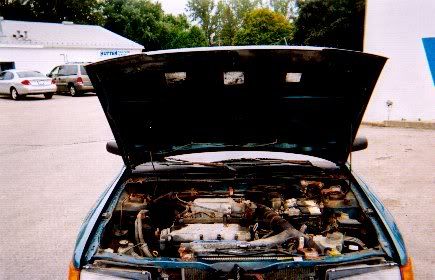
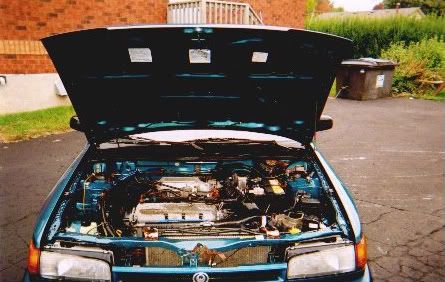
I used "Revive" engine degreaser. It is the best degreaser I have ever used.

Before:
Image

After:
Image

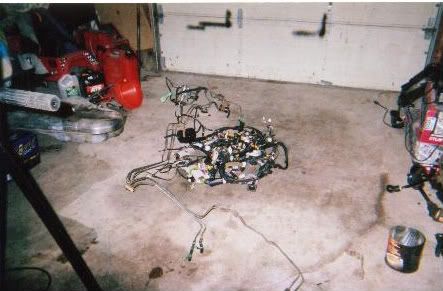
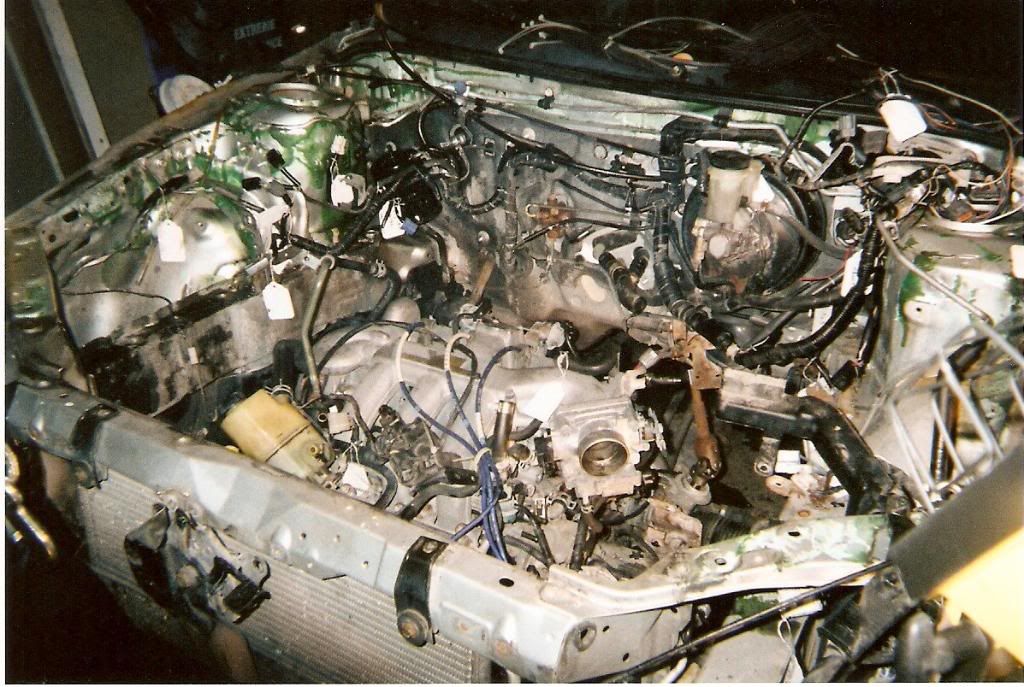
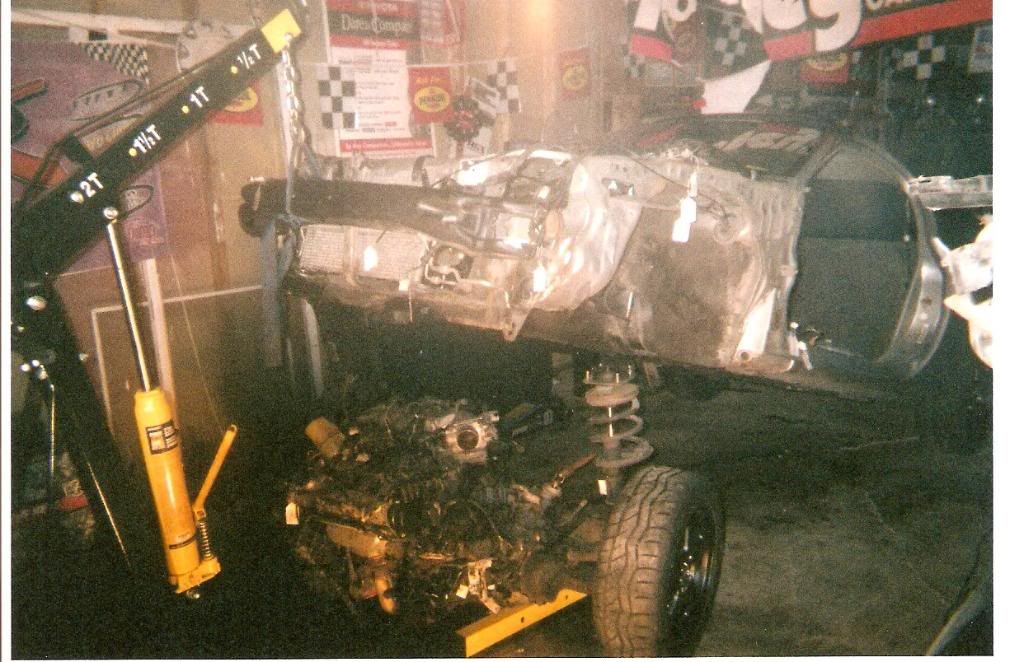
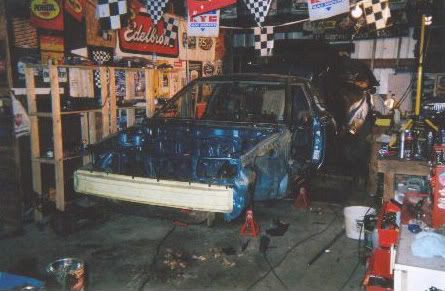
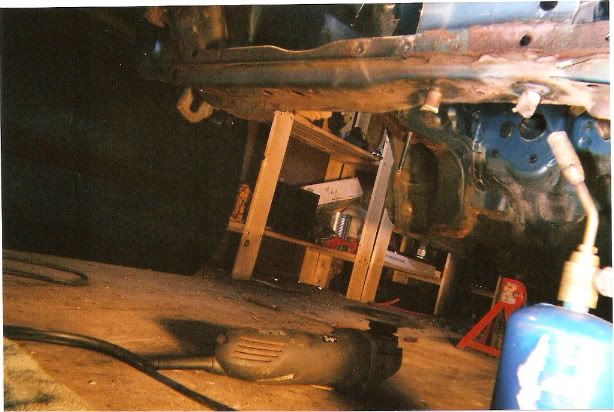
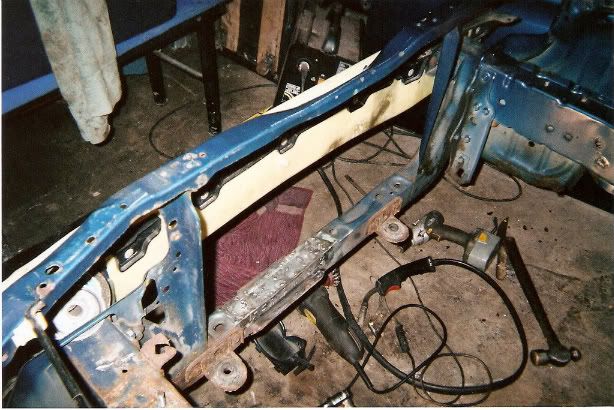
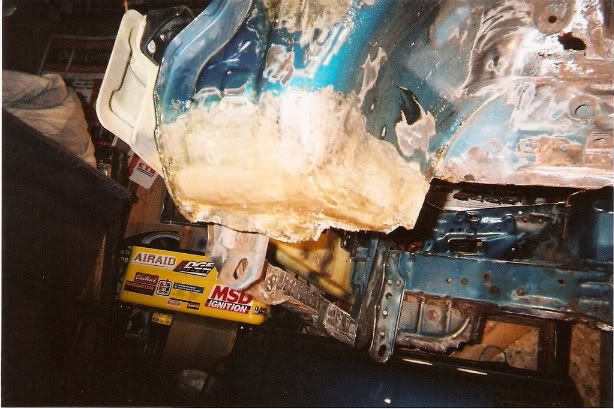
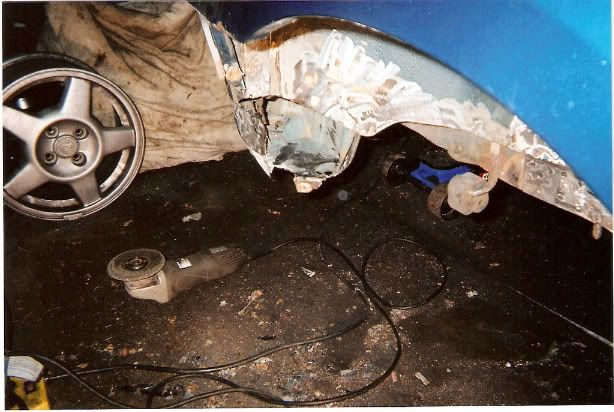
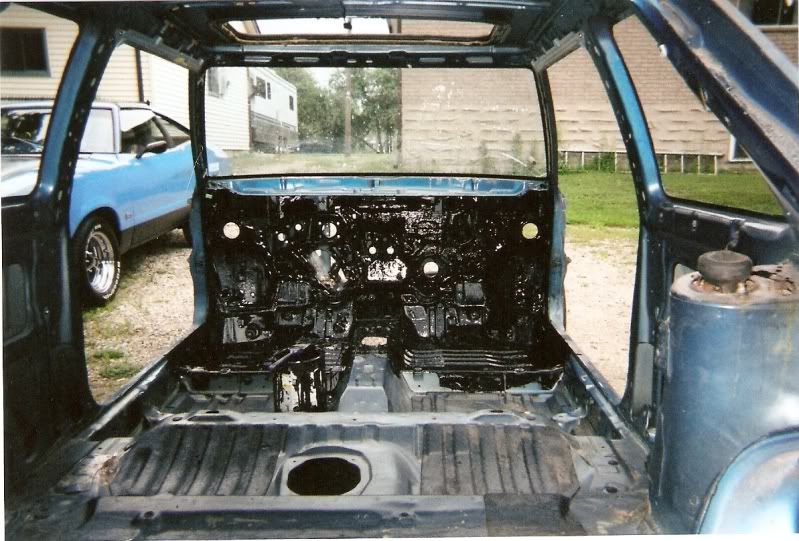
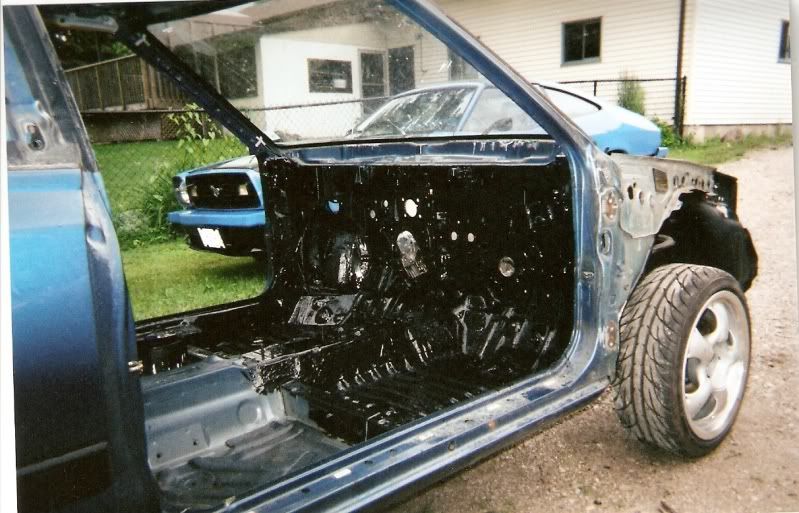
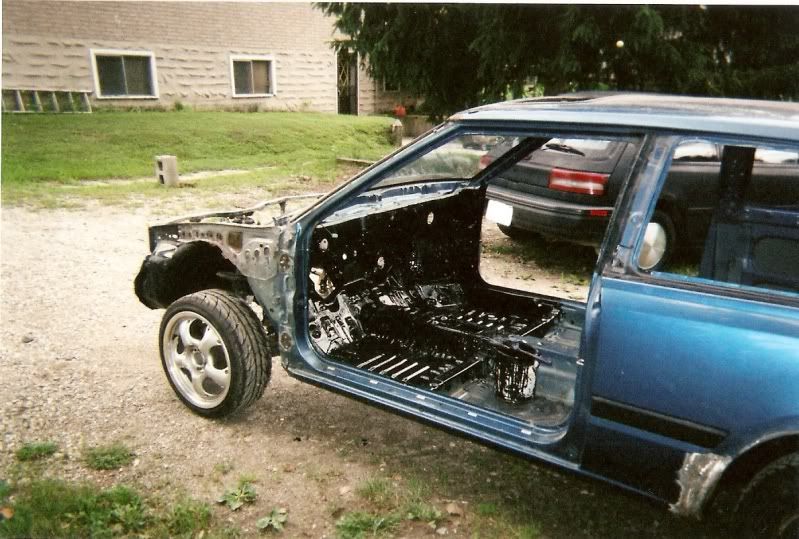
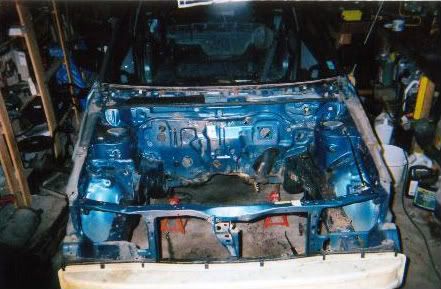
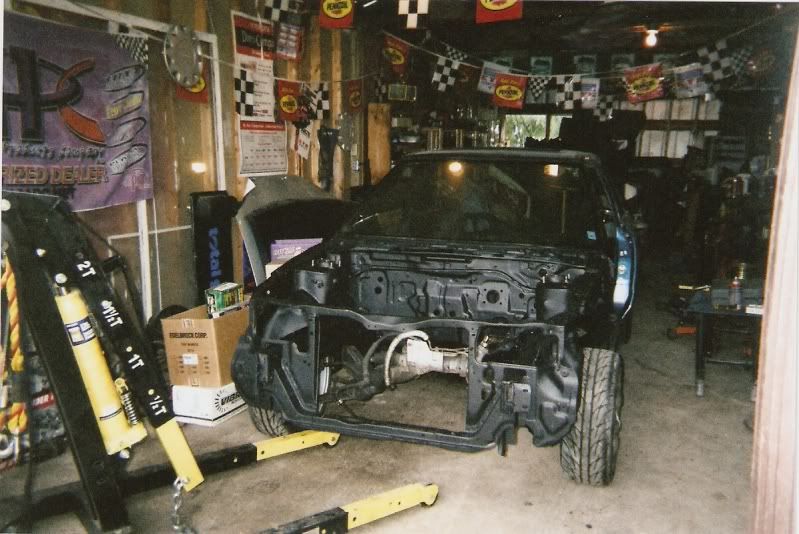
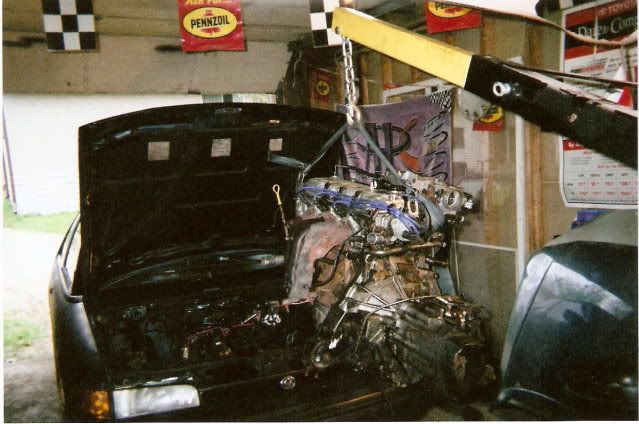
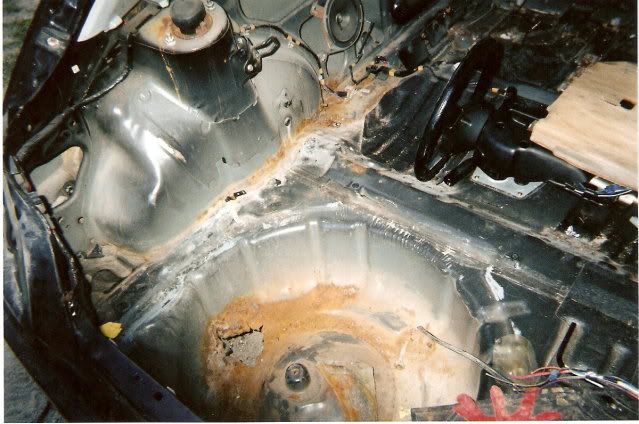
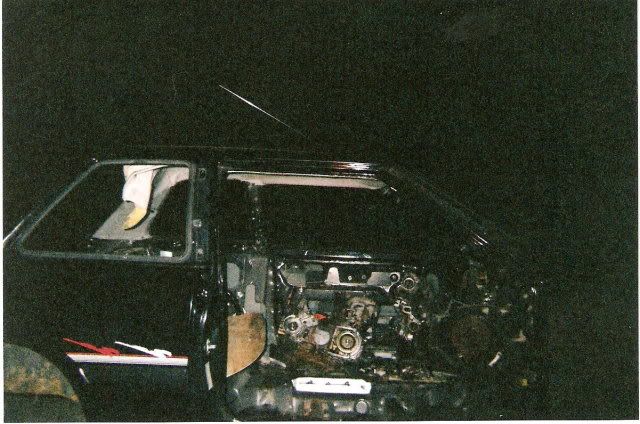
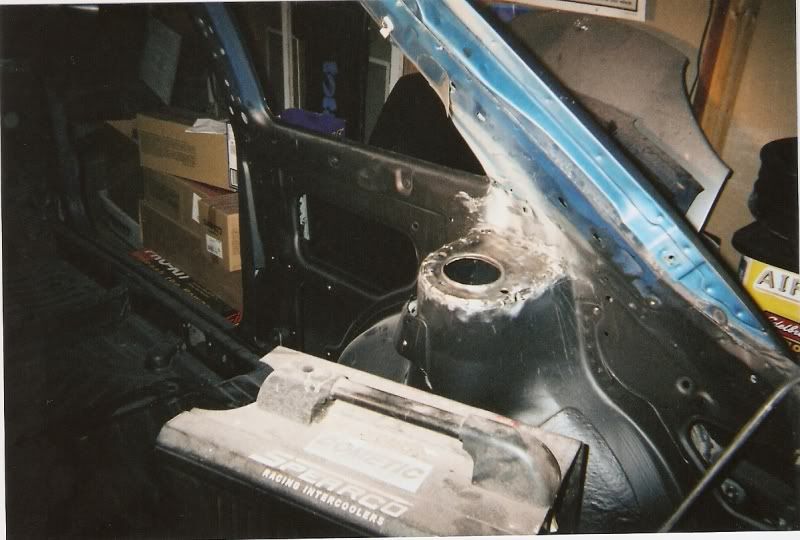
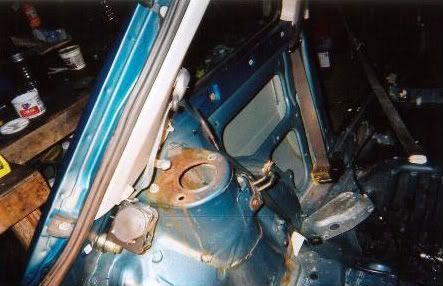
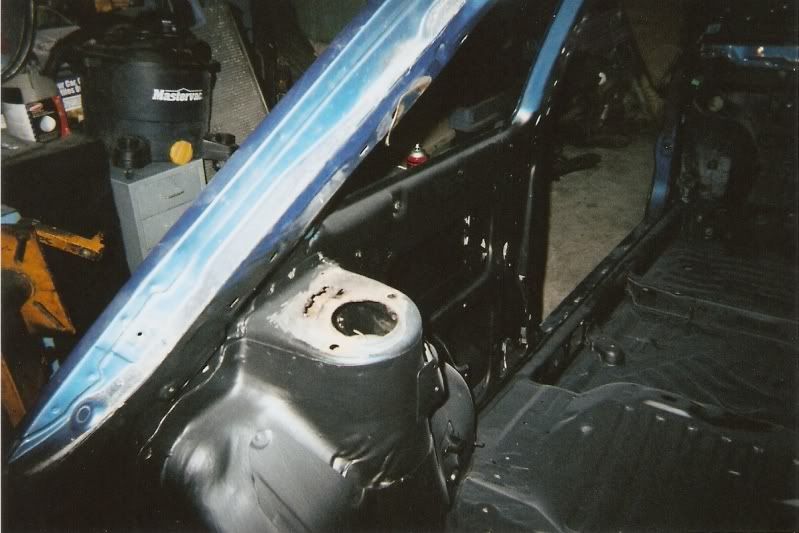
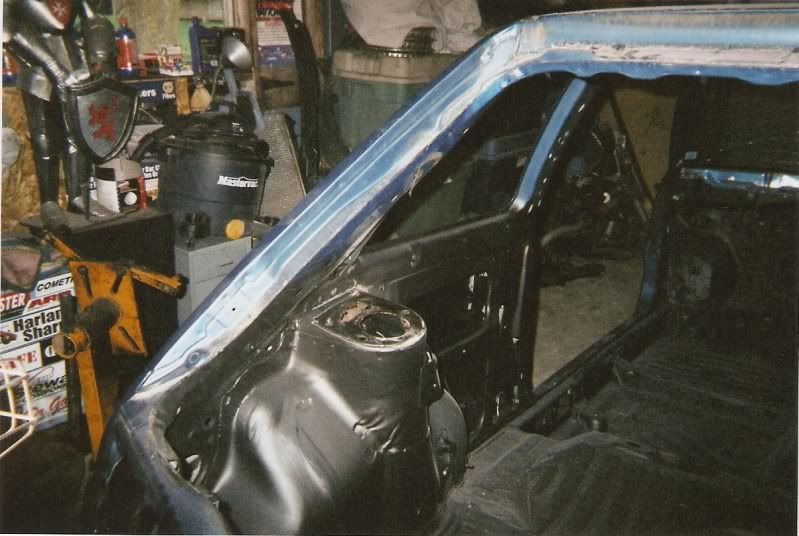
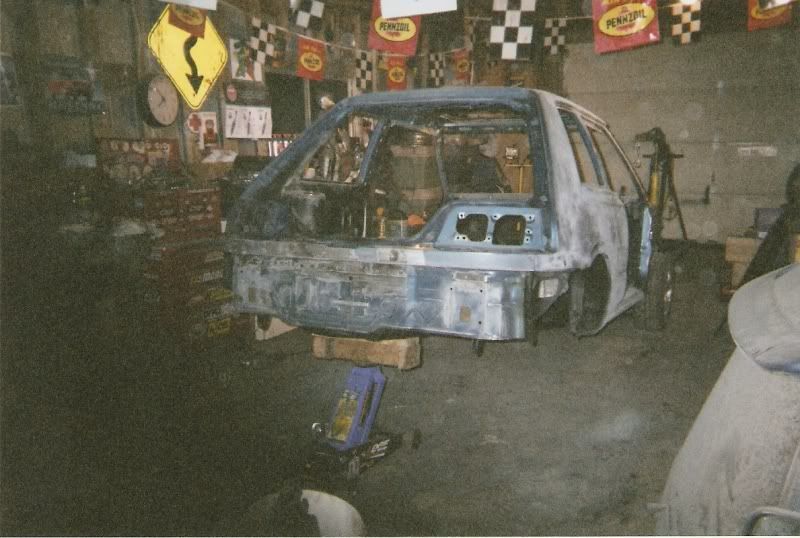
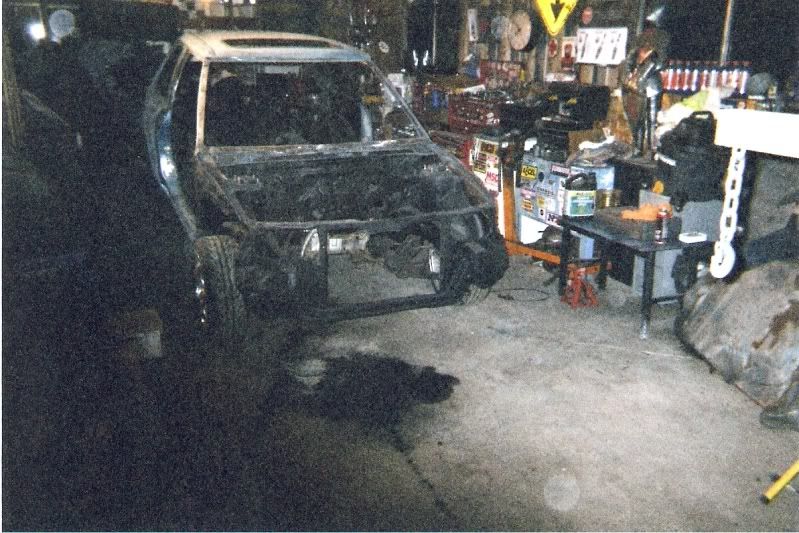
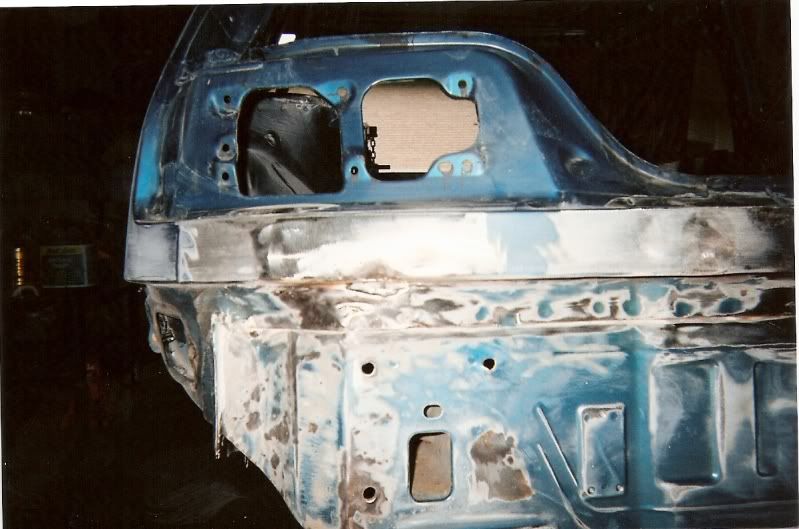
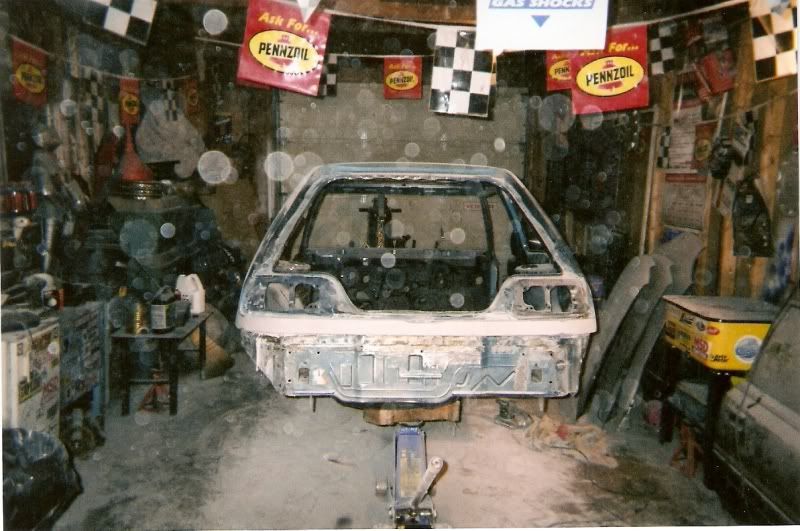
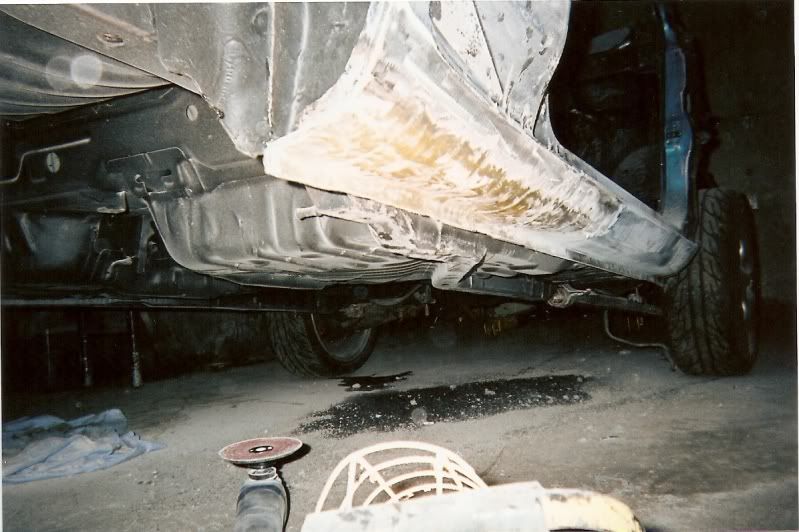
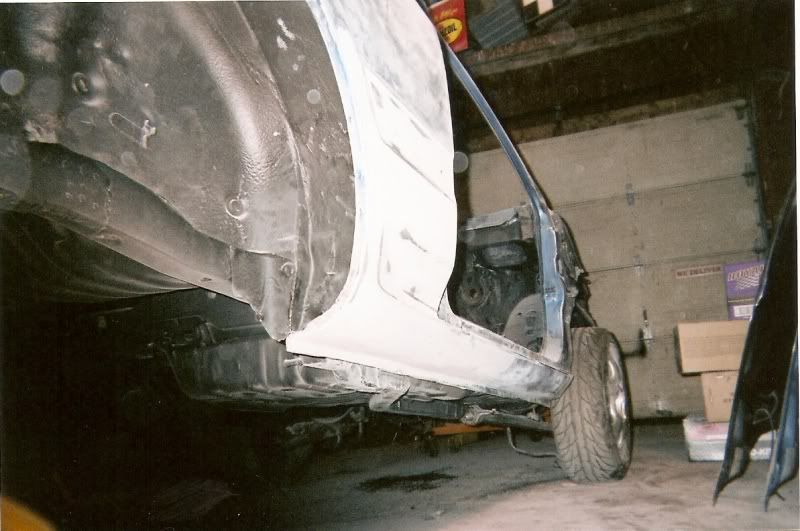
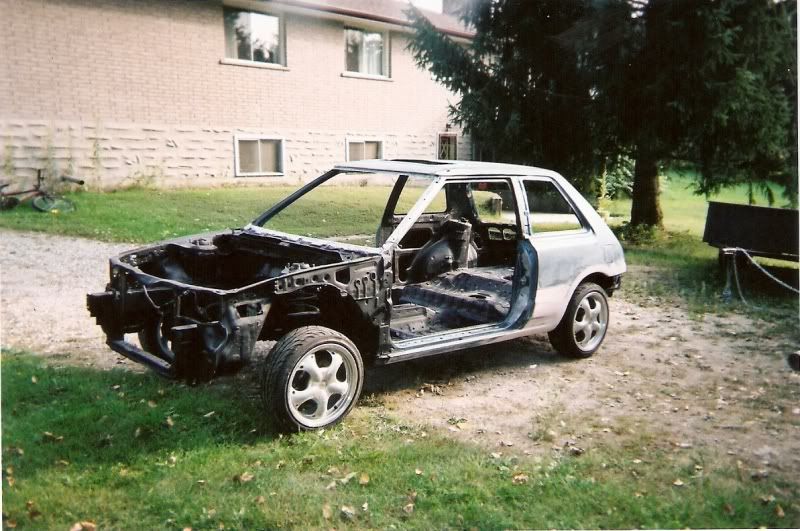
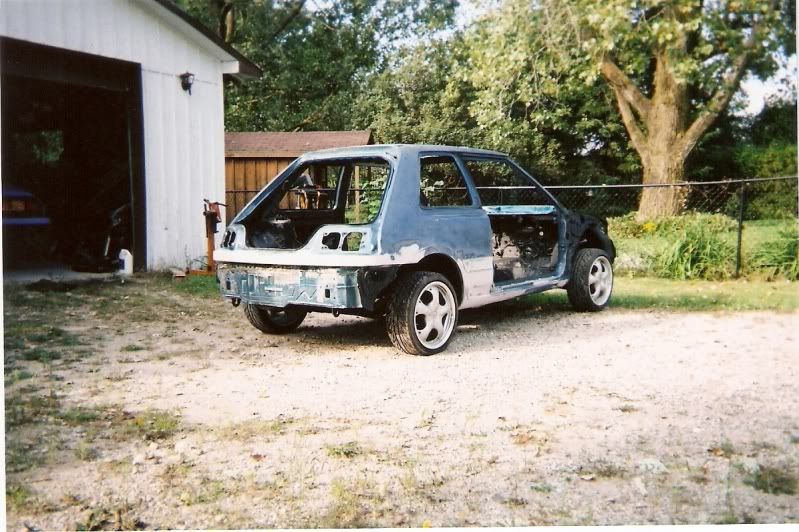
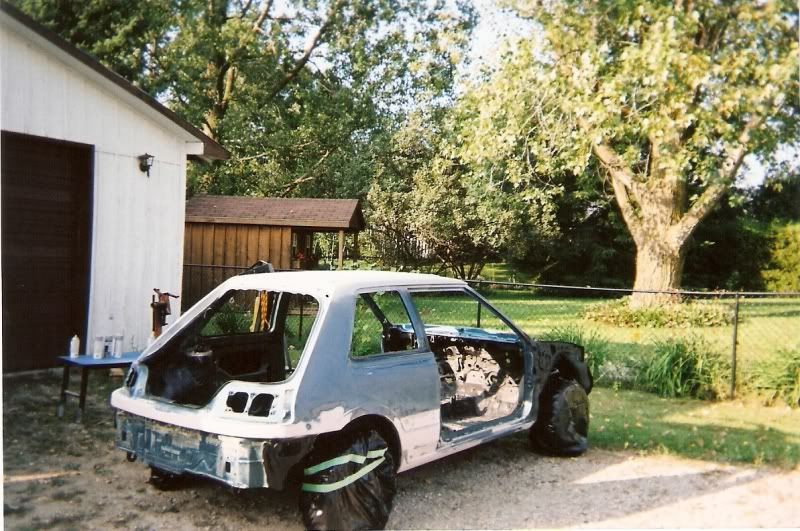
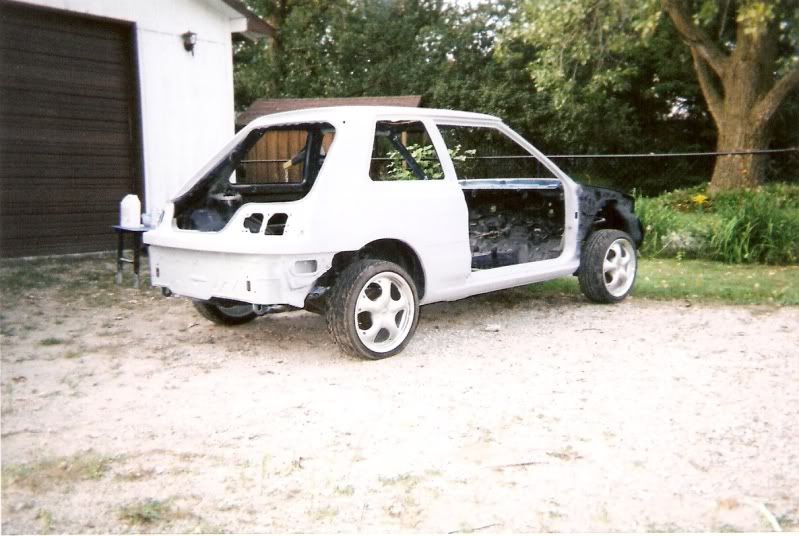
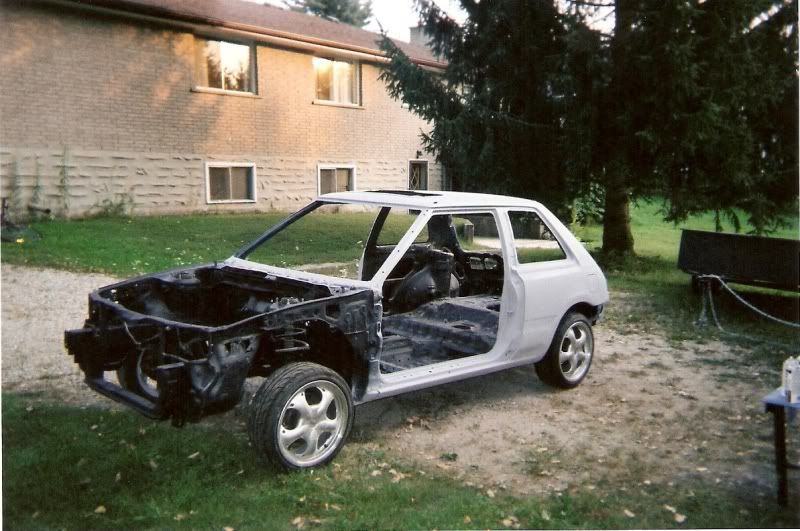
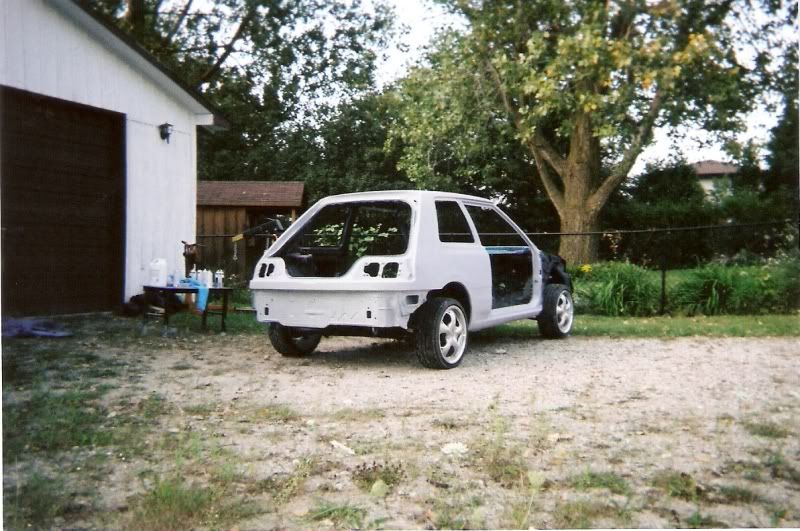
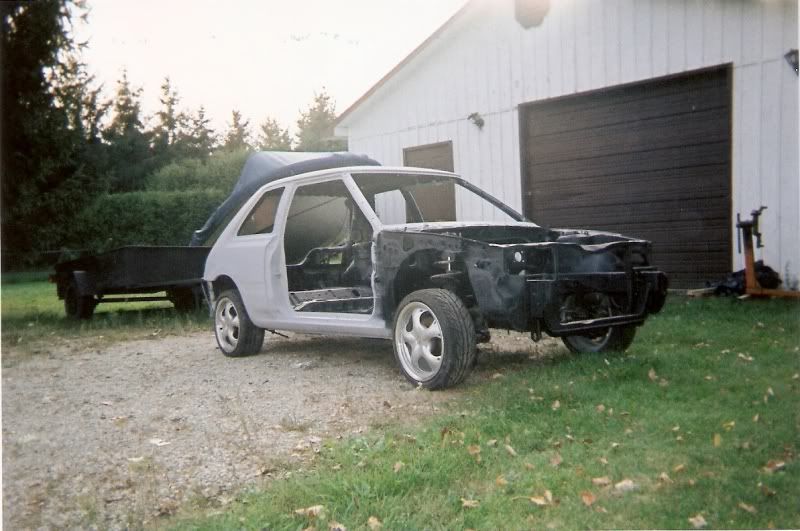
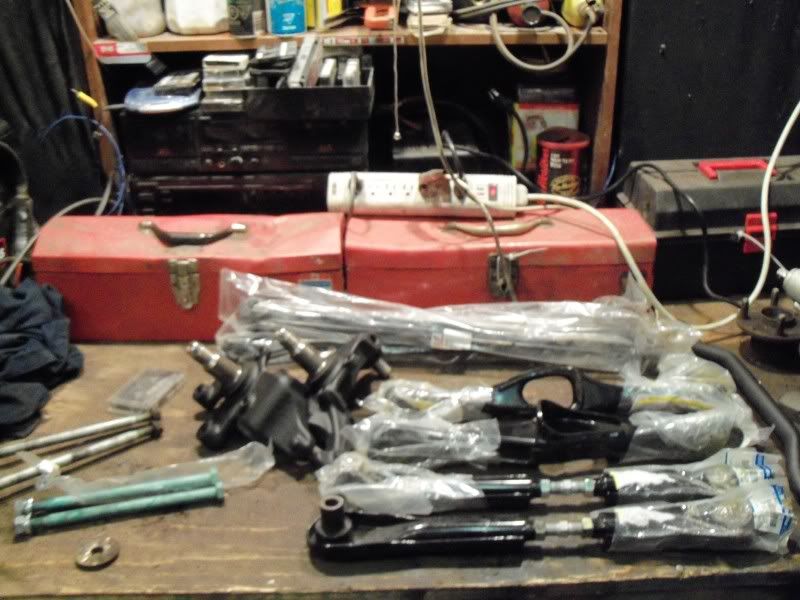
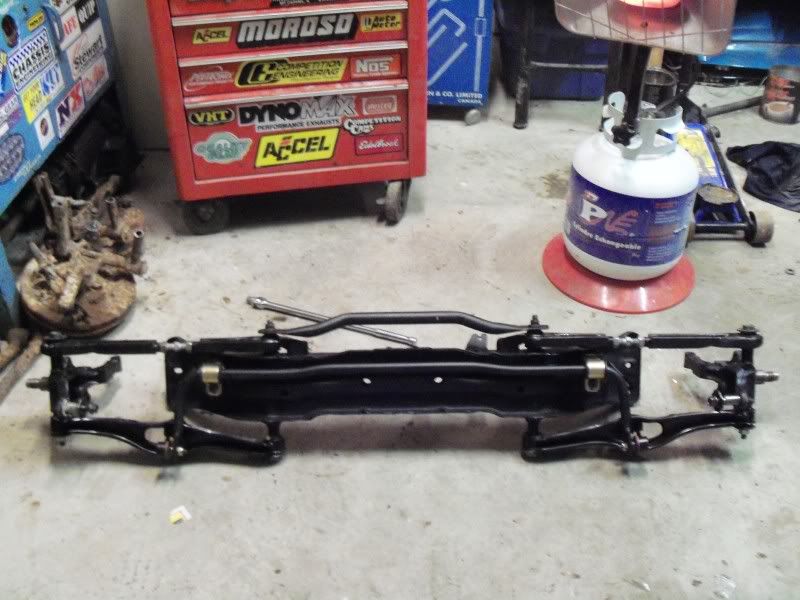
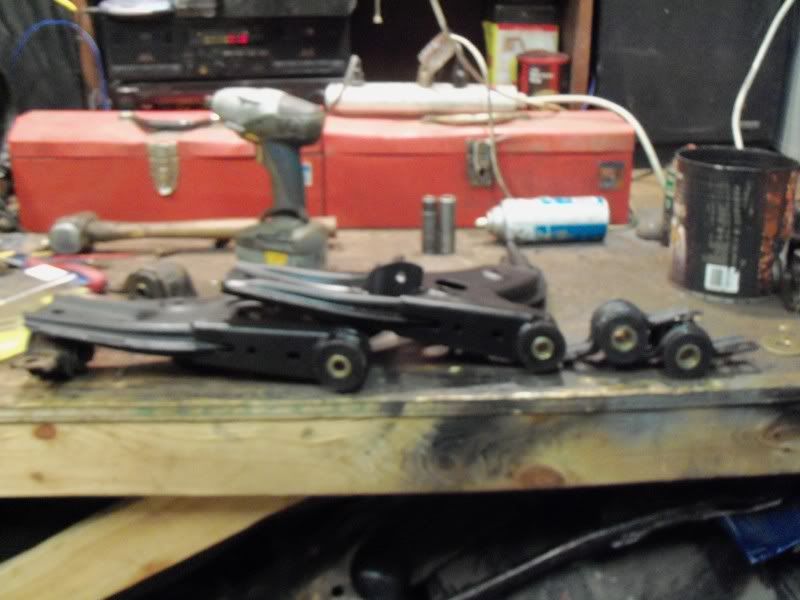
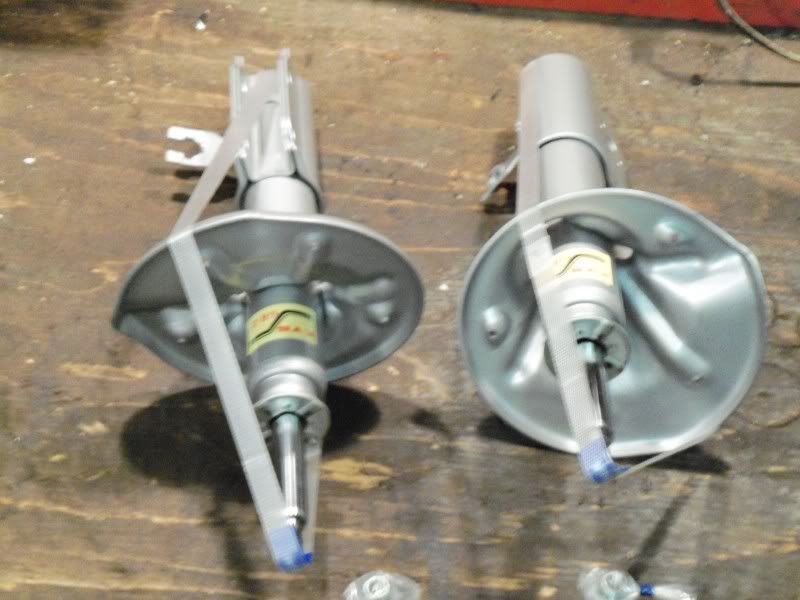
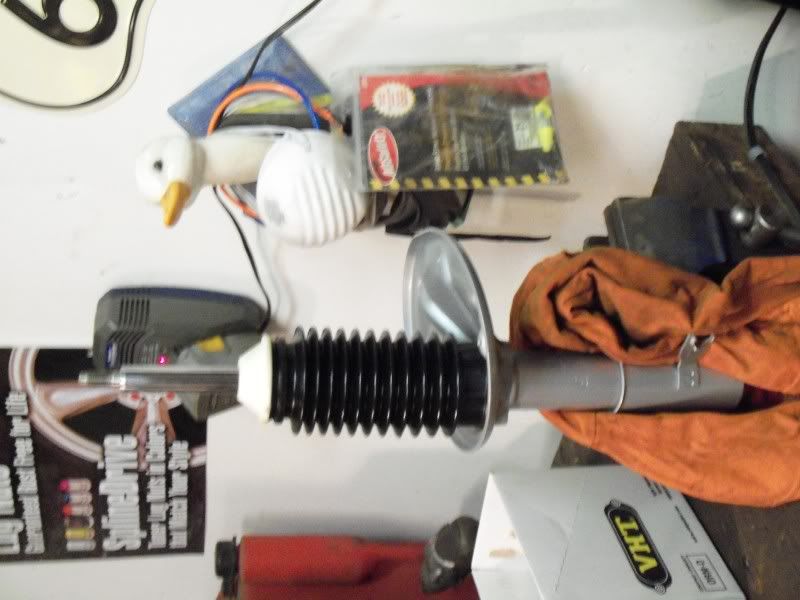
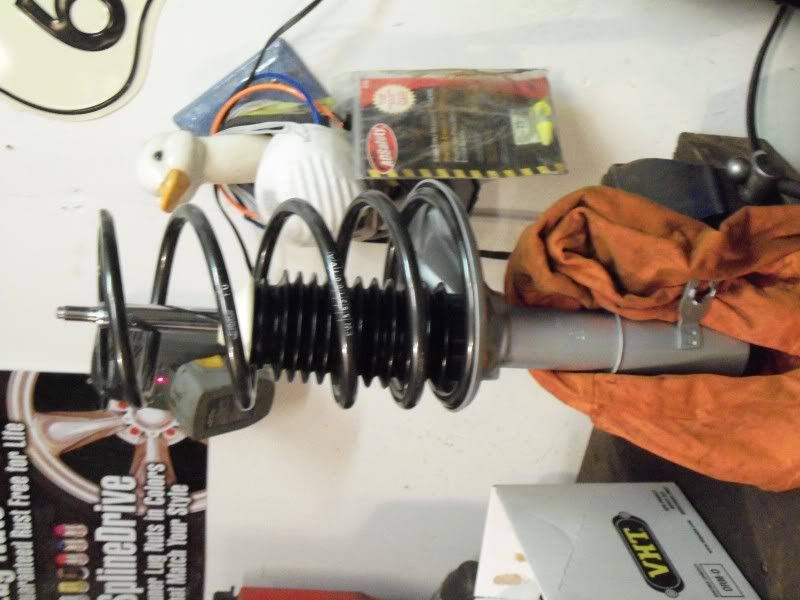
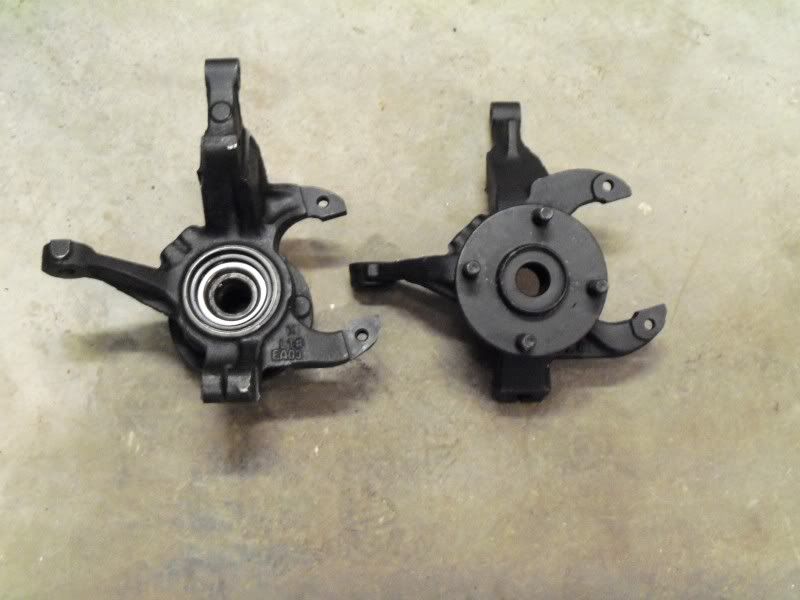
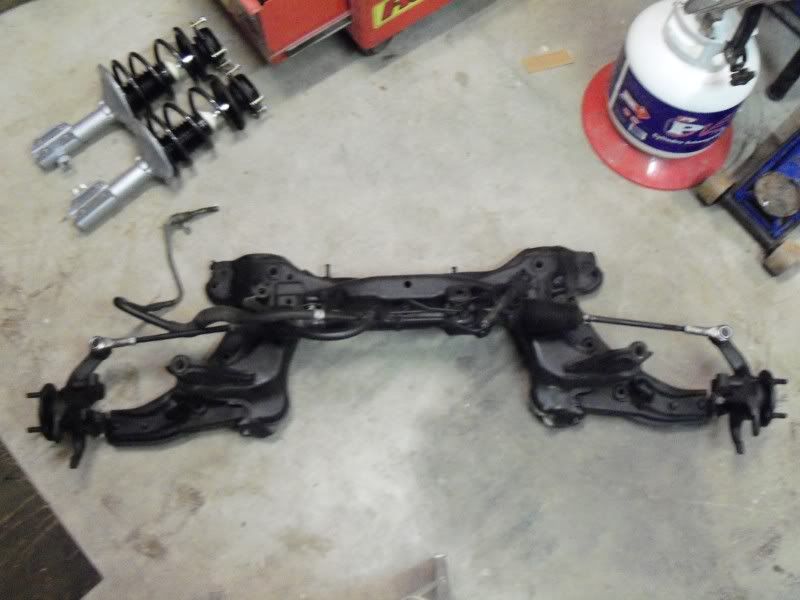
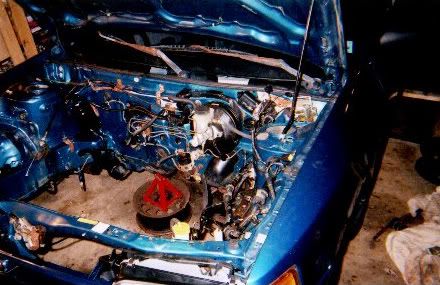
Drove the old 323 home 1.6L powered for the last time. First I pulled out the engine.

Image

Image

Image

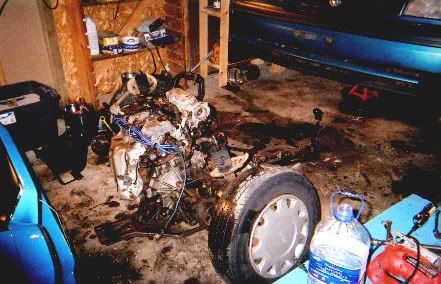
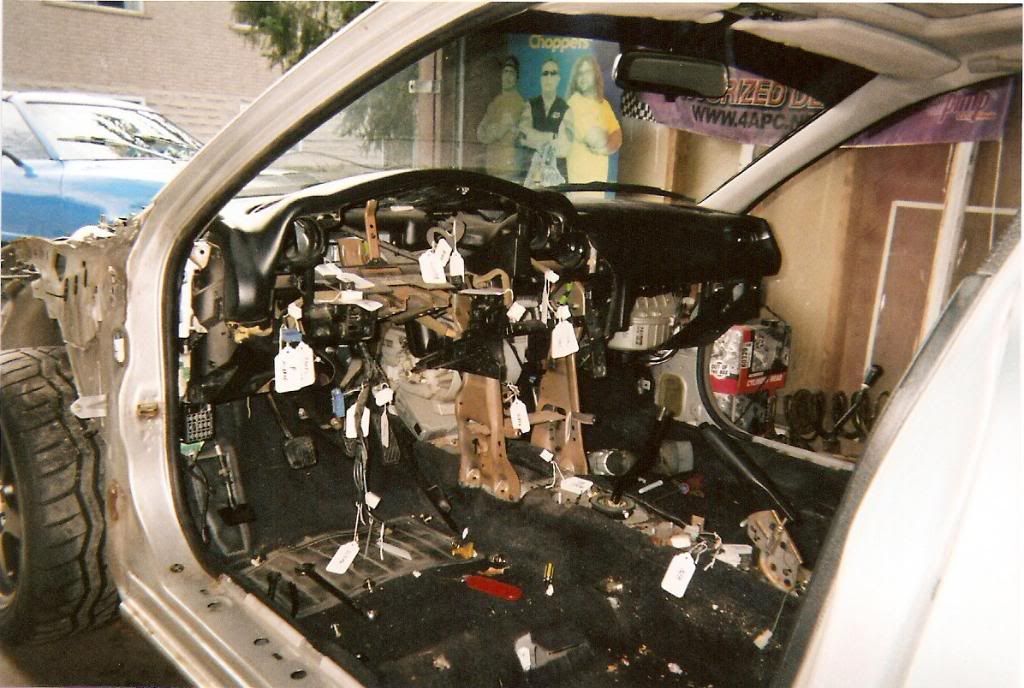
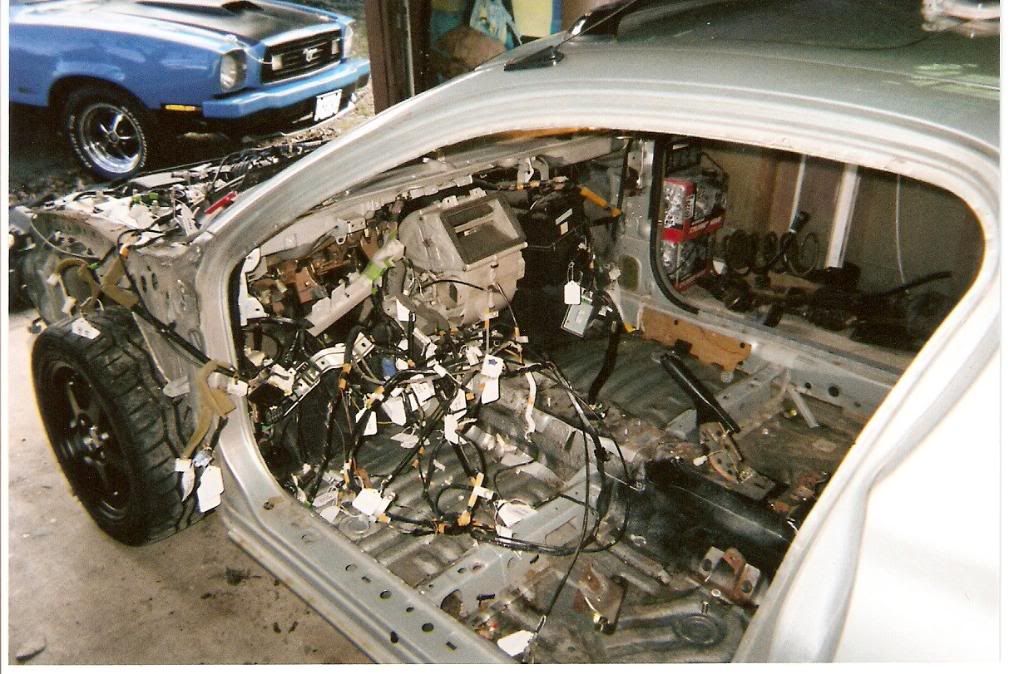
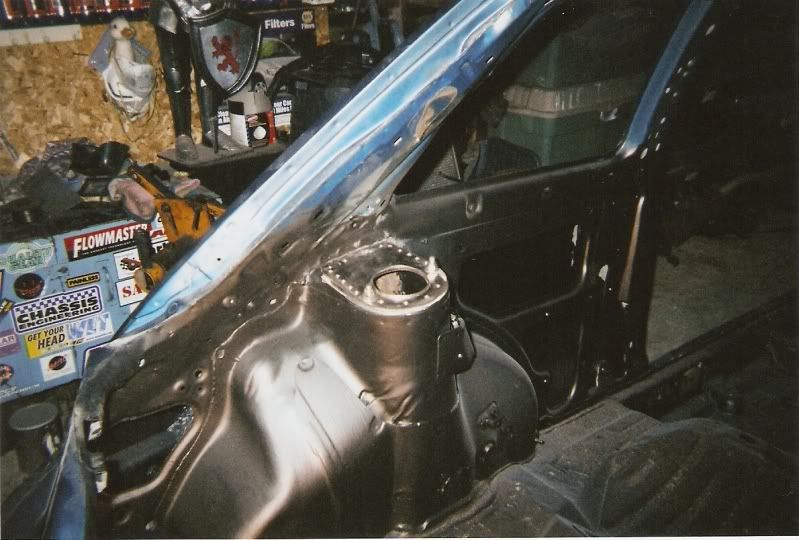
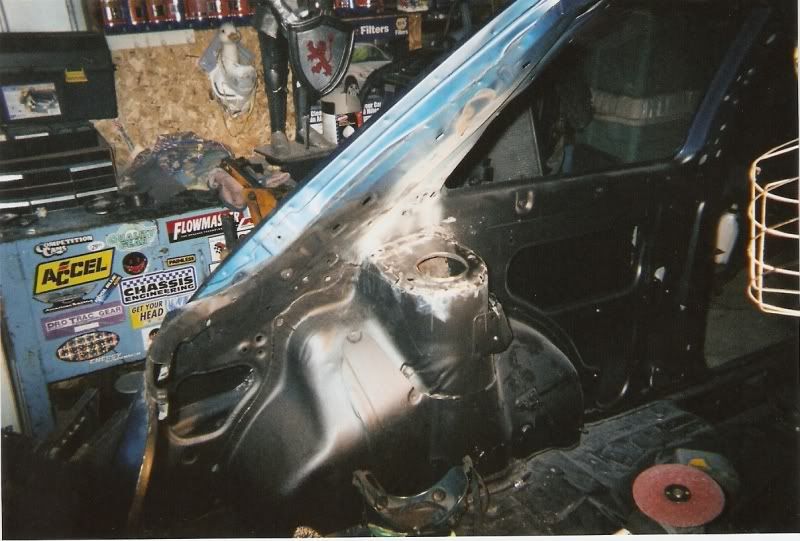
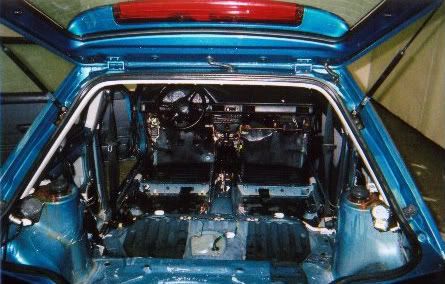
When I was done pulling the drive train, I pulled the dash, heater box and interior wiring harness out.
Image

Image

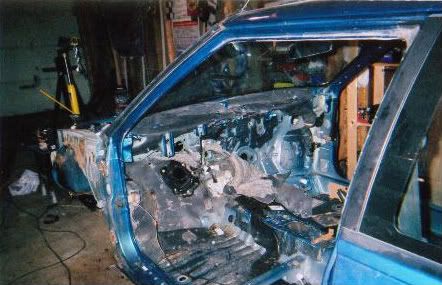
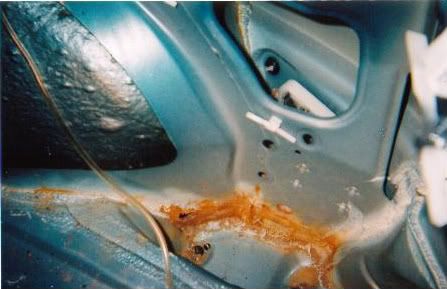
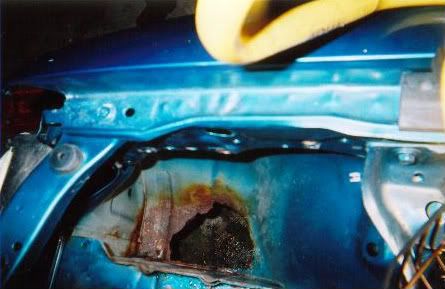
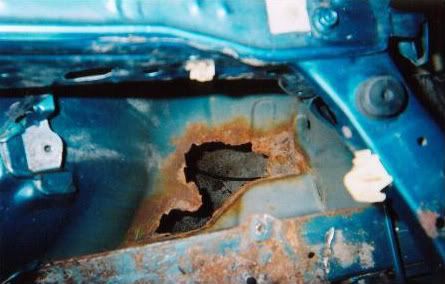
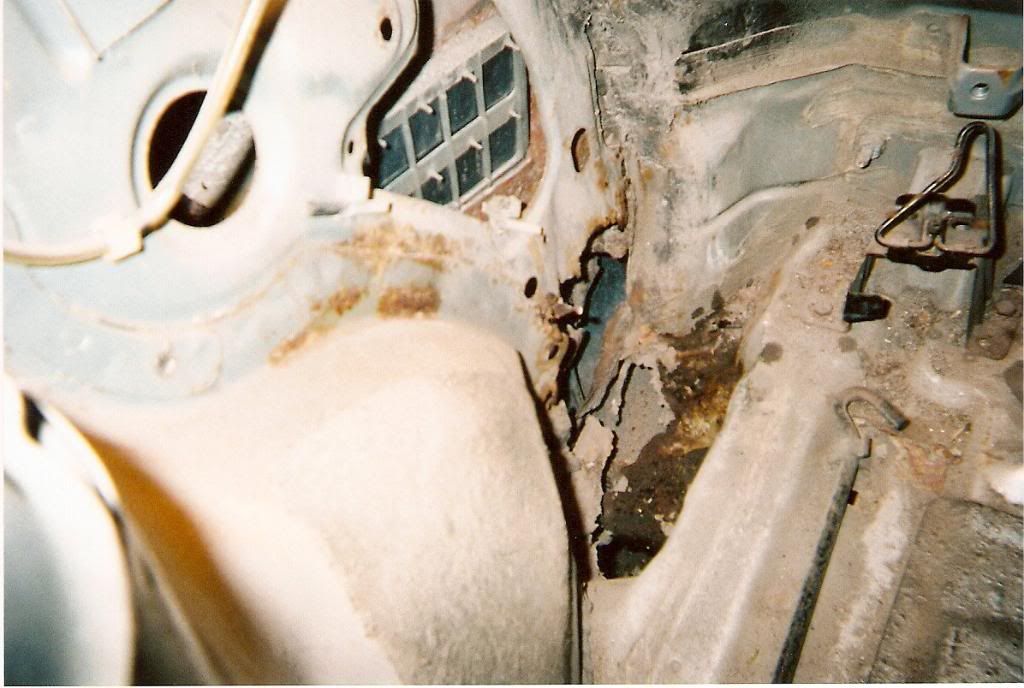
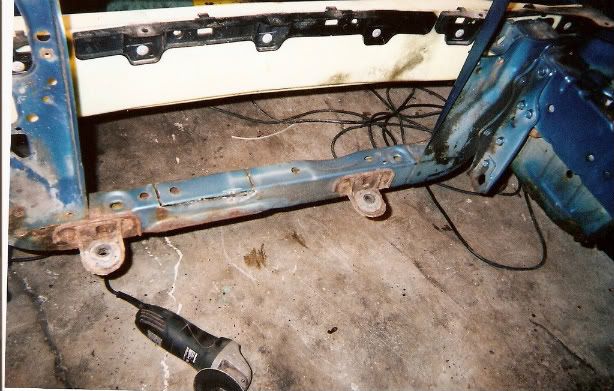
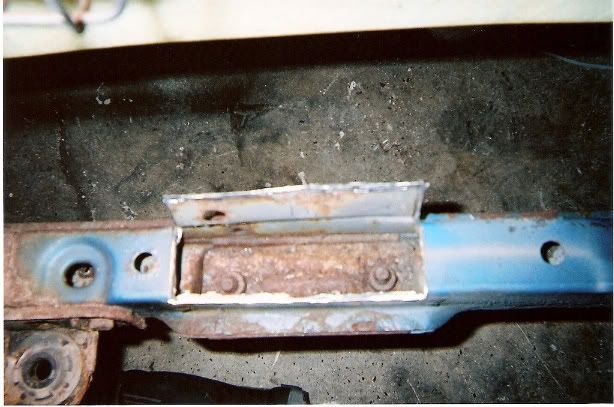
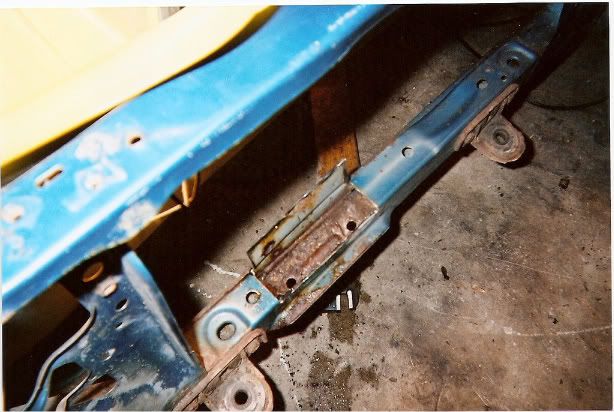
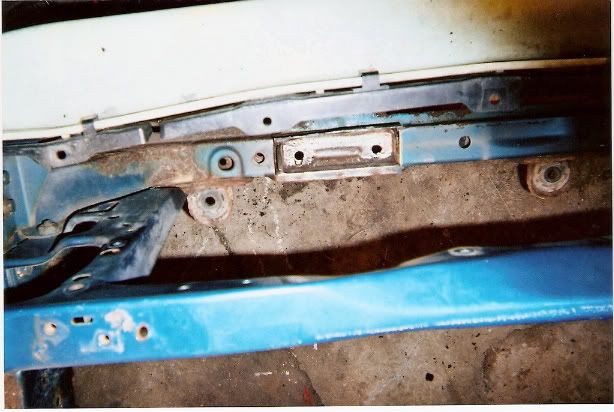
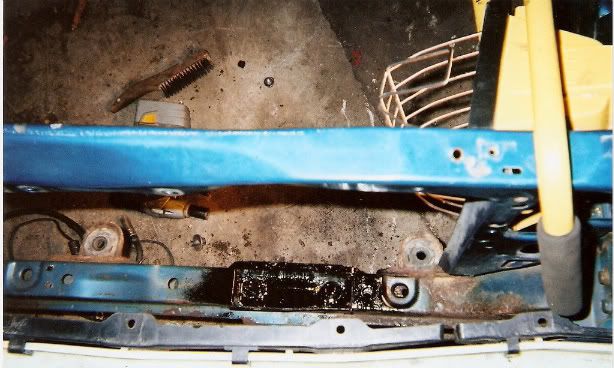
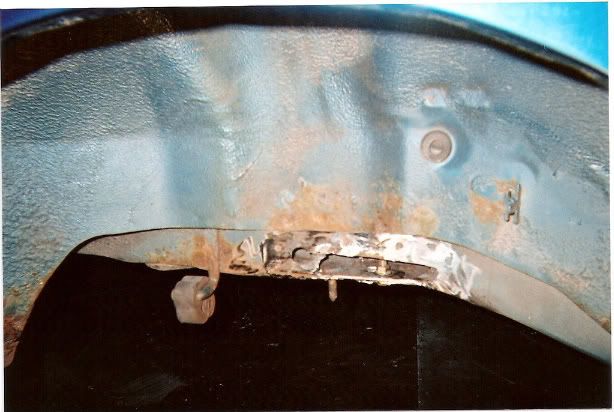
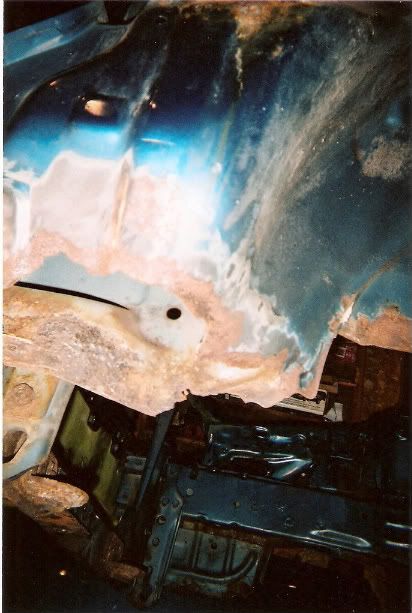
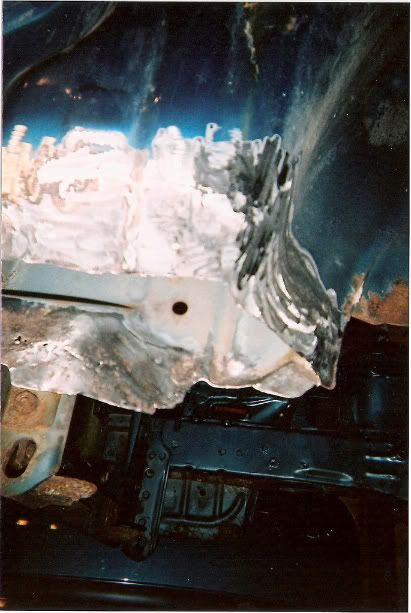
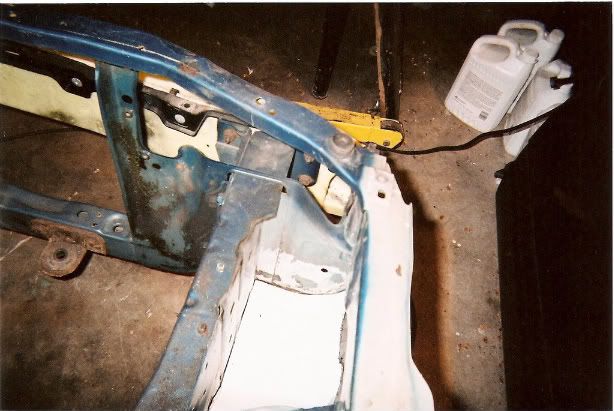
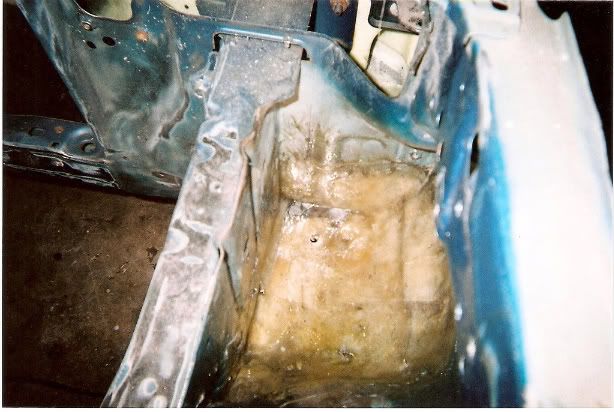
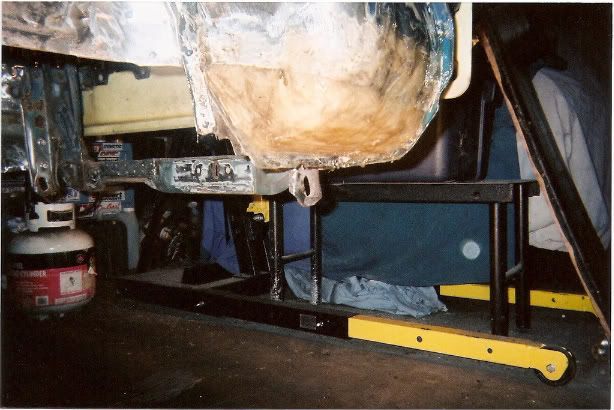
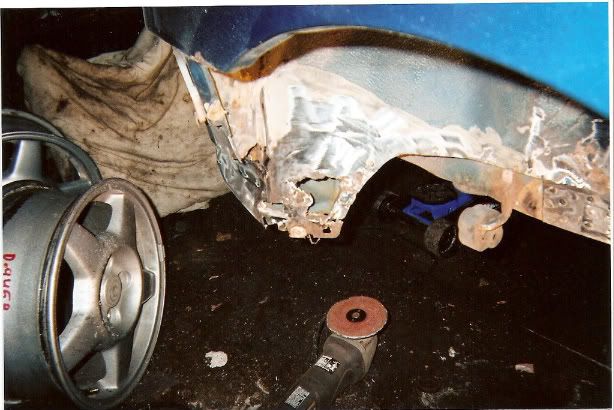
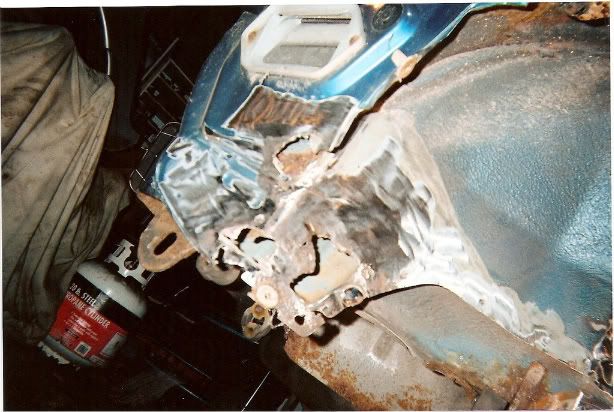
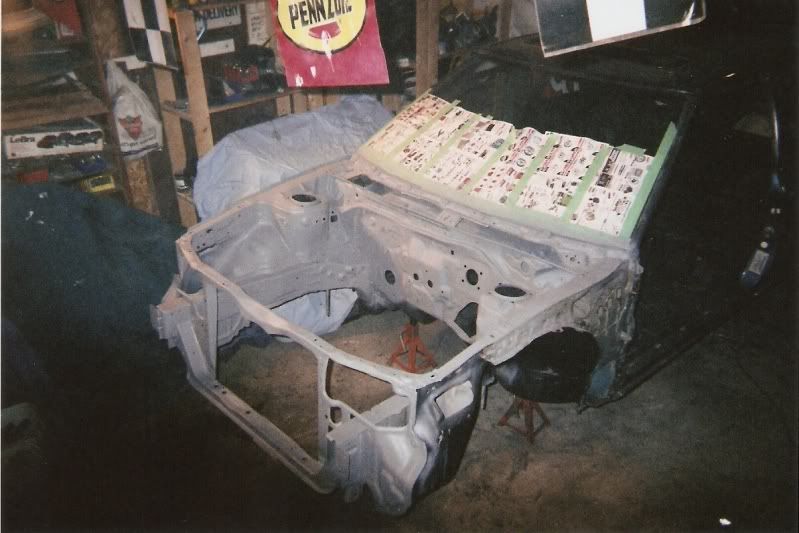
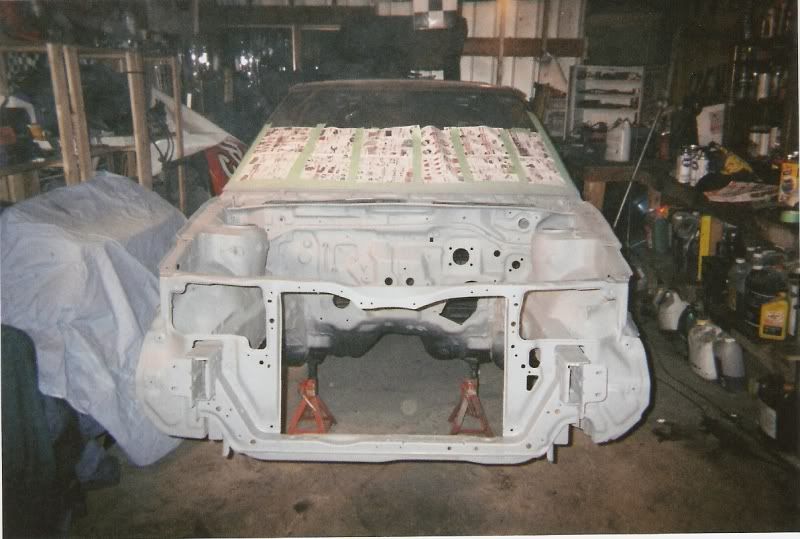
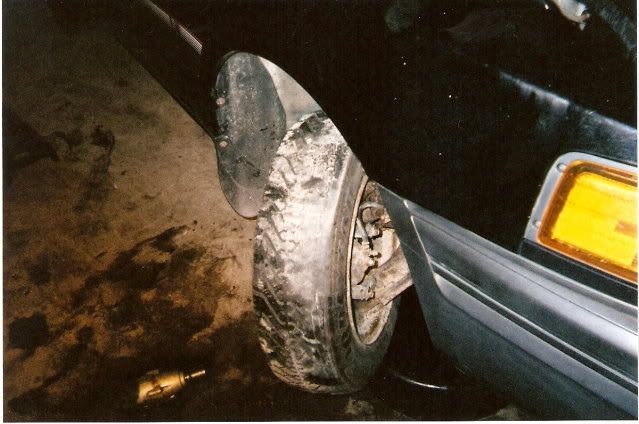
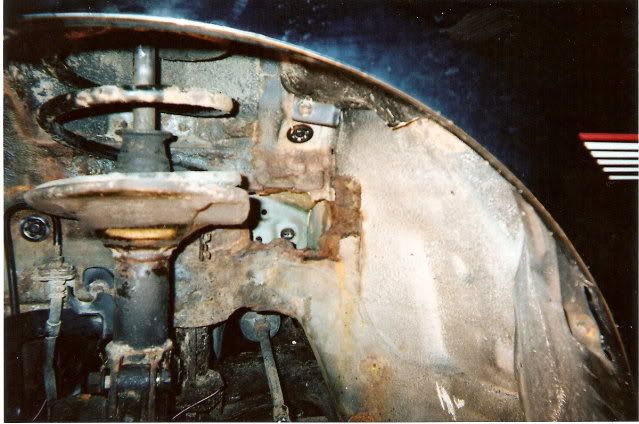
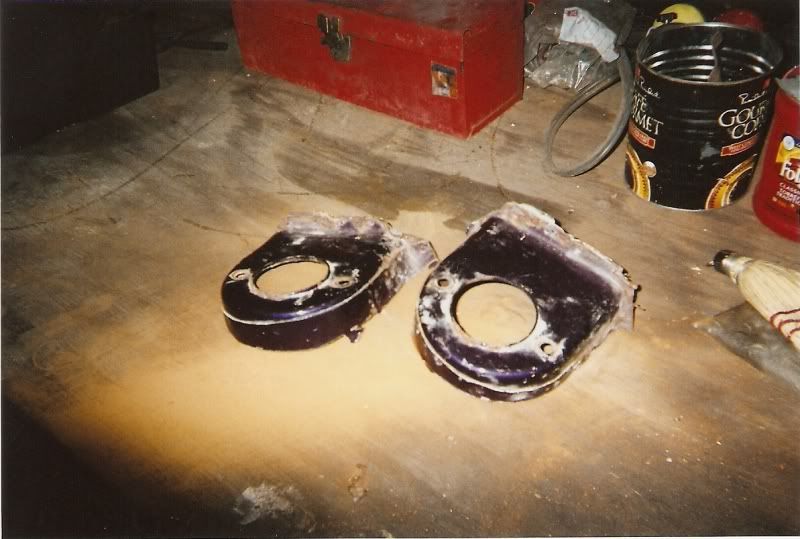
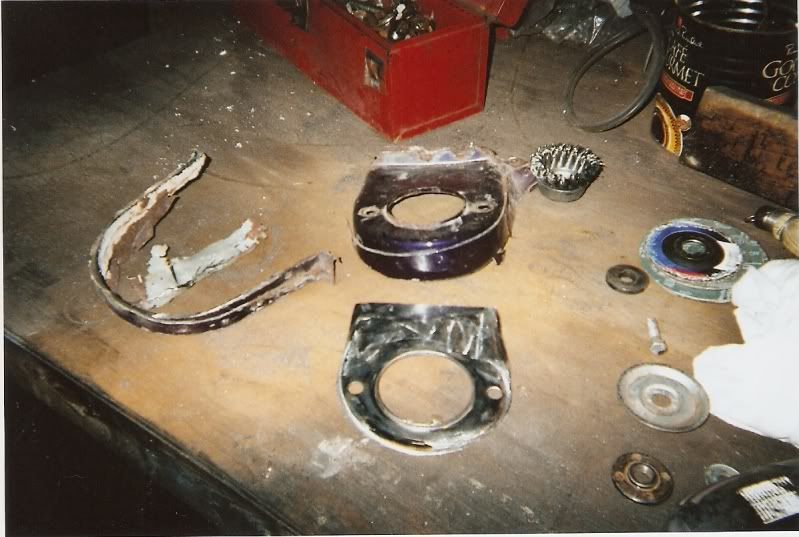
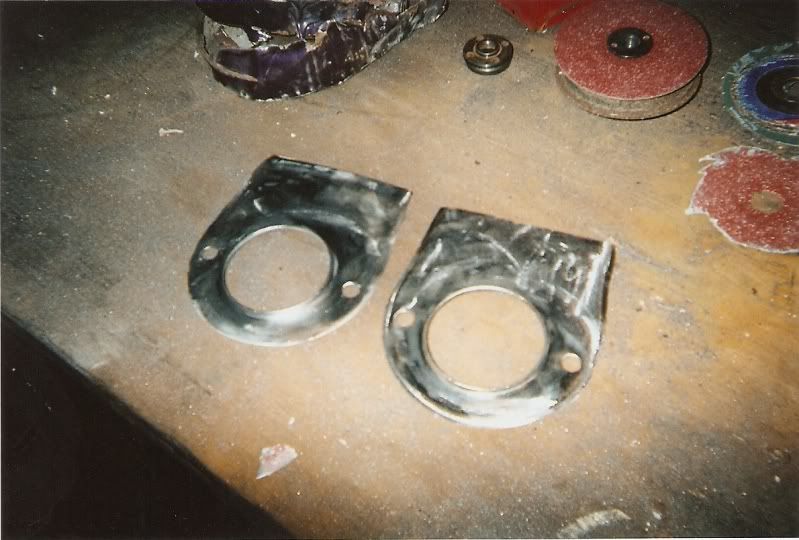
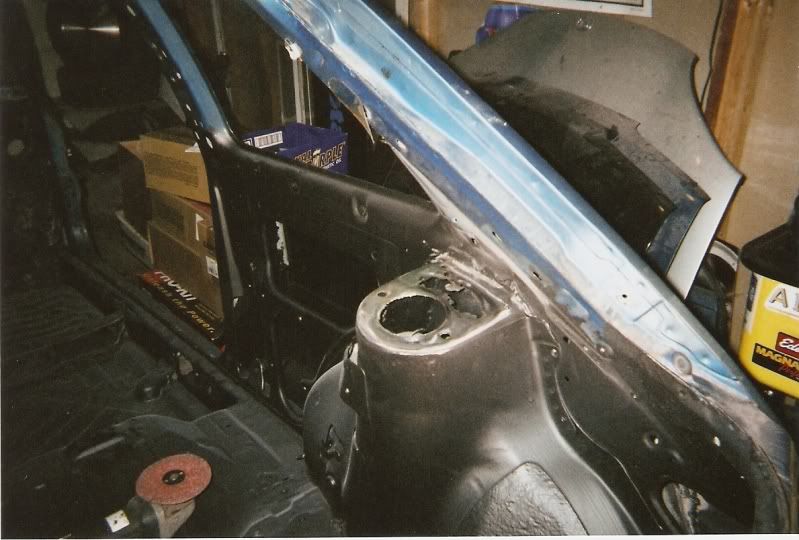
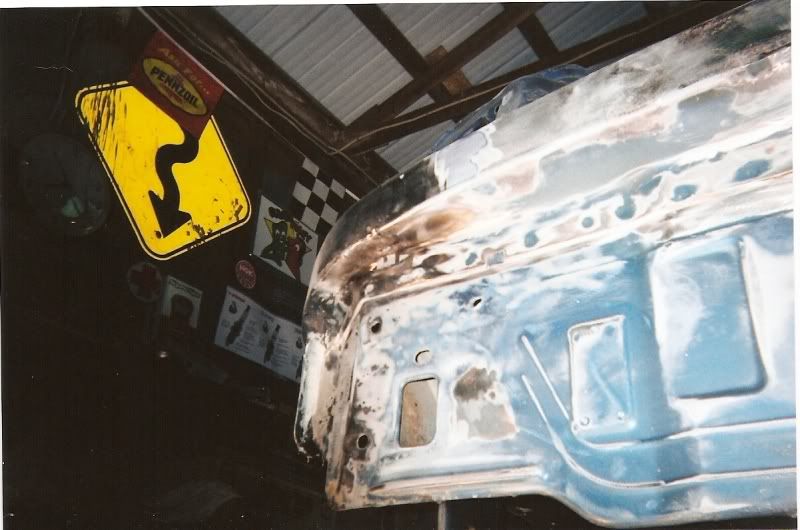
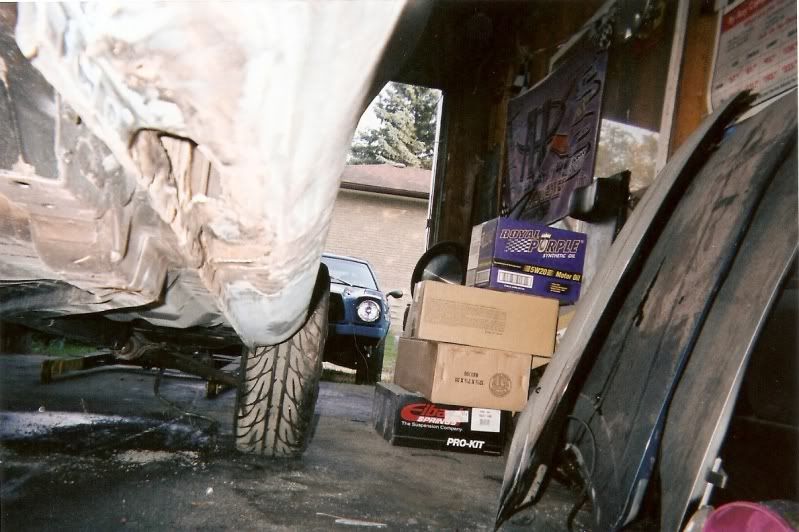
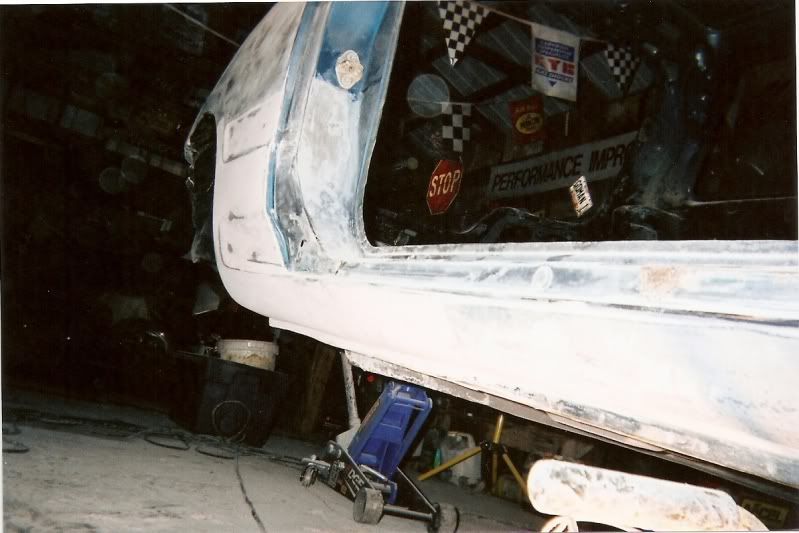
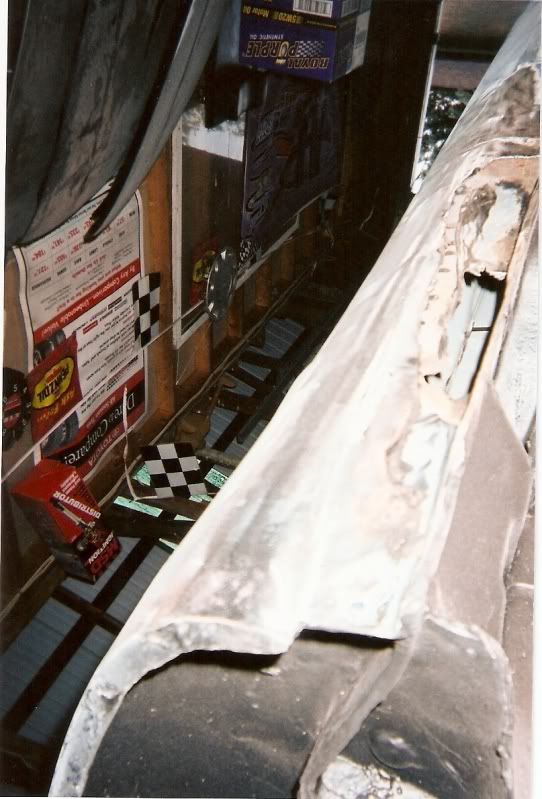
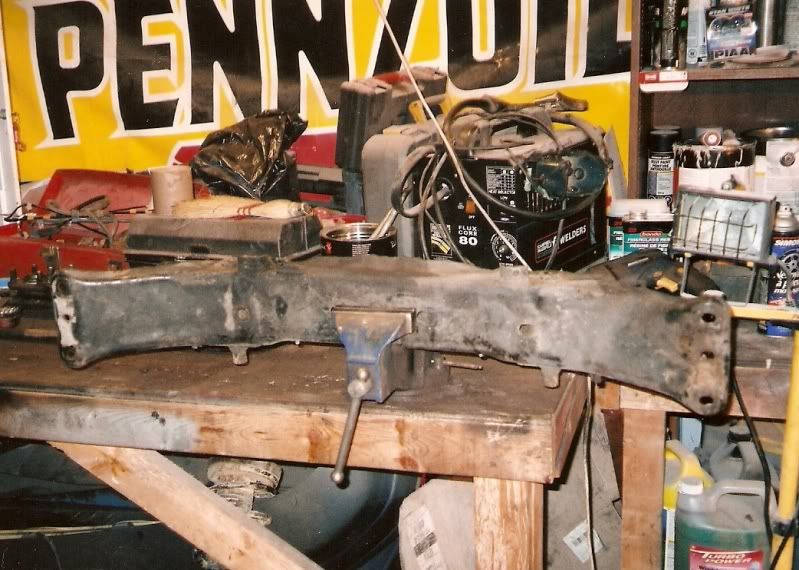
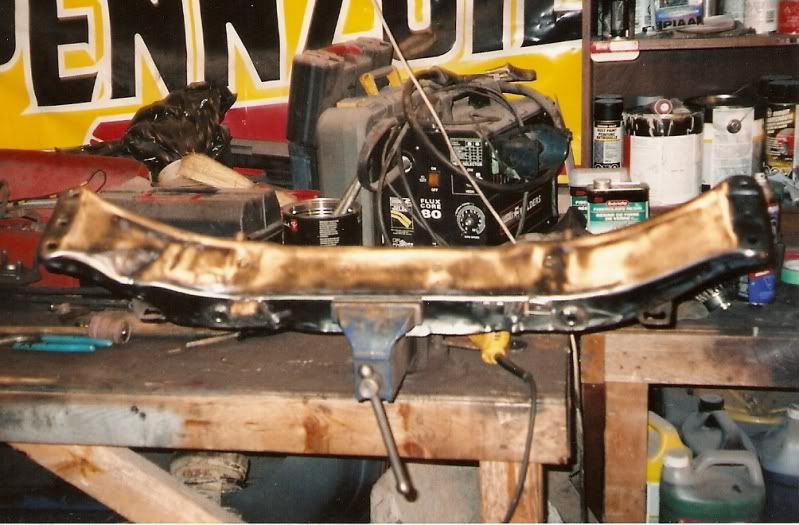
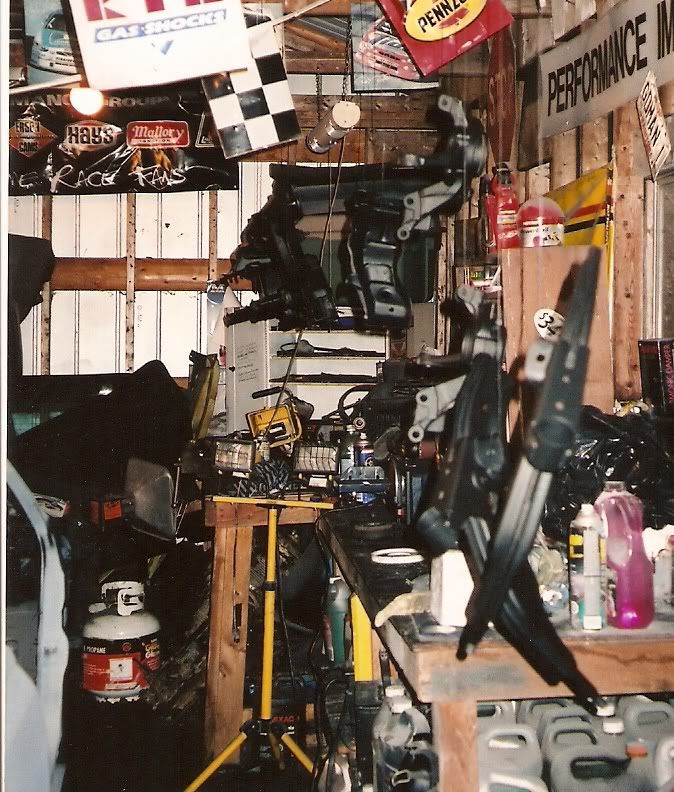
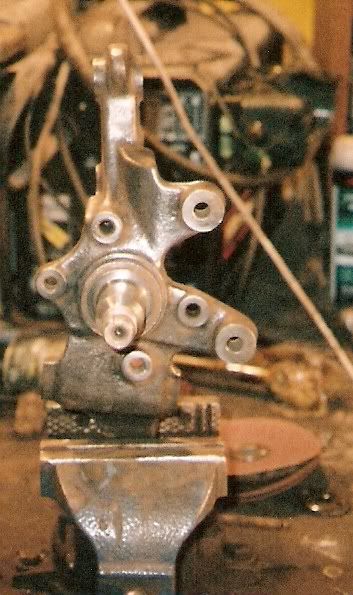
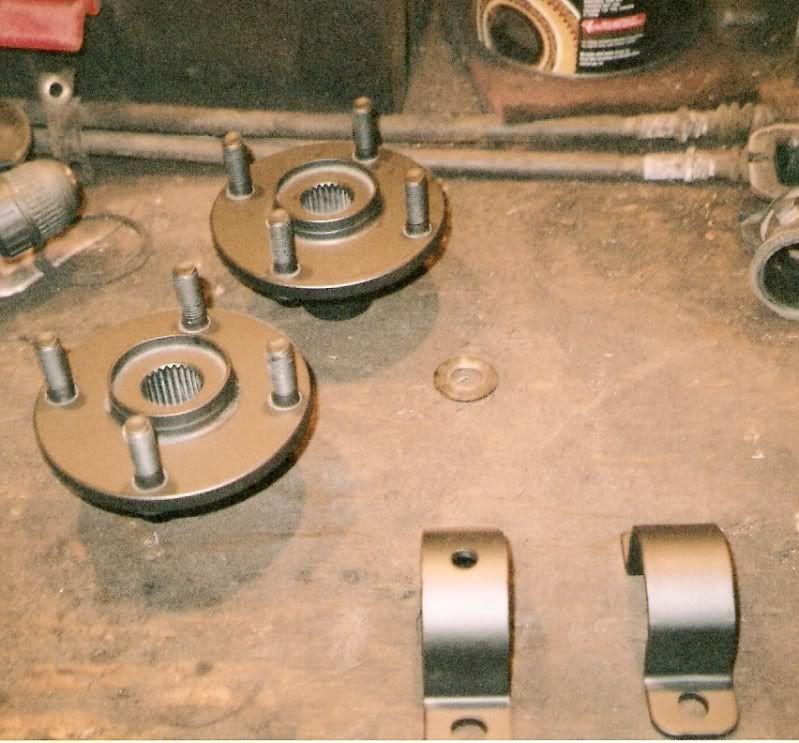
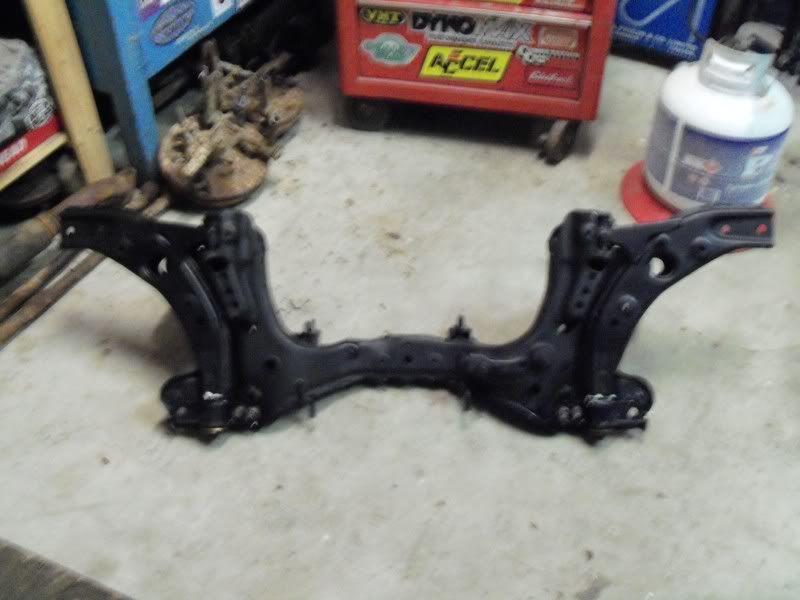
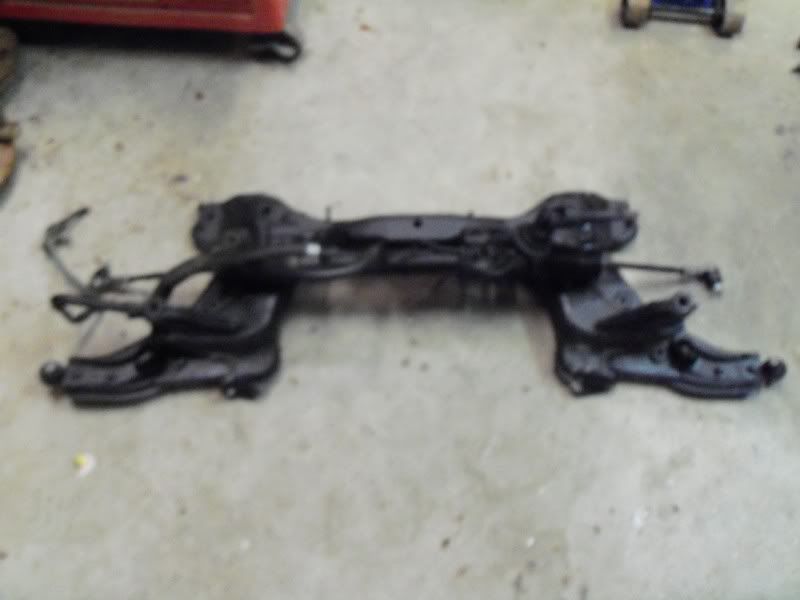
That was day one! Somehow I think the project will slow down a little from this point on. Well at least until I buy a MX-3 parts car. Next round I am going to knock the rear sub frame out and paint the top and bottom of the floor and the engine compartment. I have to fix a little rust in the passenger rear inner fender also. I screwed-up the sub frame to rad support nut serts, so I got to somehow fix those too. There was some kinda metal splash shield inner fender type deals under the air box that must of been retaining water because they are dust?! Cold air via a rust hole?! I will have to have a closer look.
Dominic Toretto's whip is a MaZda and his cell phone number starts in "(323)"
My work log http://mx-3.com/phpBB3/viewtopic.php?f=46&t=72471
Image
IMACHU2
Regular Member
Posts: 559
Joined: September 25th, 2008, 4:11 pm
Location: Guelph Ontario Canada

Re: Project Jay-Spec MX-326GS

Post by IMACHU2 »

I bought an engine crane. The dude at the rental shop said I could have bought theirs three times over with all the rental fee's I paid over the years. I refused to rent it on Monday because Princess Auto had cranes on sale Tuesday for $219.00! The old floor jack and a prayer got the 323 engine out quick and dirty. The KLZE will go in on the hook though!

I have not had much of a chance to play with the 323 this week. I went to the shop for a few hours yesterday. I managed to remove the rear suspension, front bumper and lights. I broke one of the rear sub frame bolts trying to remove it. That should be fun to get out! The rear trailing arm bushings are F'd and they won't come out! The nut serts started turning in their cages. (I heated all the bolts with a torch, I used to dismantle cars for a living). I removed the trailing arms from the suspension end for now.

I got a chance to play with the car again tonight. I removed everything from the engine compartment. I removed the whole wiring harness. (I had 80% of it out last go, so I finished it off).

Image

Decided to take off the fenders, doors, hood, wiper cowl, rear bumper and tail lights. The gas tank had been replaced by the previous owner and the lines looked O.K, but I decided to rip all the brake and gas lines out of it, so I could paint the floor properly. Removed the gas tank also.

Image

The floor is in really nice shape, so I figured a good coat of rust paint and some asphalt rocker paint should keep it that way. The rust issues are definitely not going to be a big deal. Basically there are rust holes under each bottle! The right rear corner inner fender where the rear washer bottle sits.

Image

Front right corner under the front windshield washer bottle.

Image

Left front corner under the coolant overflow bottle.

Image

Going to wire brush /grind-out the bad and fibreglass them. Figure they are hidden, the holes are not structural and fibreglass makes a good easy repair (if your used to working with it). Besides have you ever seen a rusty Corvette?? I took a whole disposable camera of film today. I will post up the pics as soon as I can. Priced out some new MX-3 trailing arms. They are quite reasonable, so next time out, I am going hack what’s left of the 323 ones out / off. Looks like you can get just about everything for the MX-323 and everything seems to be quite reasonably priced even for a cheap prick (like myself). I plan to replace all the bushings, ball joints, tie rods, struts, strut mounts, springs so it looks like a old car, but drives like a new one!

To put a V6 into a 323 you need many MX-3 V6 parts. I have decided to buy a whole MX-3 for parts. A couple has promised me their sons running driving 1994 MX-3 V6 for $500.00 just as soon as they find him a replacement car. (it's rusty). I have joint custody of my ten year old son, so I have him for two weeks and the X has him for two weeks. The weeks he is with us I don't usually get much work done on the car. My son and I did assemble my new parts washer and 3 tonne jack though. He was having a blast lifting me up with the jack. We also applied racing decals to the jack and the parts washer to make them "go faster" LOL. The next round will be Sunday night.

I drove my running, driving 1994 Mazda MX-3 V6 5SPD for $500.00 home Today!

Well my adventure to Simcoe to pick up a MX-3 was a complete success! The dude that owned the car had given me a un-easy feeling and I could not seem to pin him down to a time to pick it up. He calls me and confesses that he had been trying to find a set of old tires to put on it, but he could not find any! Turns out the poor guy just put four brand new Marangoni tires on the car. I laughed. I just brought my Falken / Maxxim rims and tires with me and stuck them on. Larry who turned out to be a really cool dude, agreed to bring me the wheels when he gets the tires taken off them. I actually believe he will (stand-up kinda guy). The wheels are the cool 5 spoke 15" Mazda aluminium wheels. If they had been the ugly ones he could have kept them LOL.
Well what does a $500.00 MX-3 look like?
Not bad actually! It has some serious bubbling paint with some rust underneath, but it was not terrible. The car is mechanically sound, in-fact I had the moon roof open, the cruise control on and the A/C was pumping cold air! The engine is two stroke.
Dominic Toretto's whip is a MaZda and his cell phone number starts in "(323)"
My work log http://mx-3.com/phpBB3/viewtopic.php?f=46&t=72471
Image
IMACHU2
Regular Member
Posts: 559
Joined: September 25th, 2008, 4:11 pm
Location: Guelph Ontario Canada

Re: Project Jay-Spec MX-326GS

Post by IMACHU2 »

now though. (It burns a fair bit of oil) 340000KM. I am not using the rusty part or the oil burning part on project 323 so for me it is perfect.

Image

Image

Image

Image


I was feeling a little bad about using my new MX-3 for a parts car. It looked to be in pretty good shape. I took it to the car wash tonight and had a good look at it. The body is so rough, it looks like it is ready to split in two! There is nothing left of the rockers, lower quarter panels or most of the floor.

Image

Image

Image


A shiny coat of paint on what must have been quite the turd! The guy that owned it was a mechanic. It is in tip top mechanical form. Beyond the new distributor (that I am very happy about), it also has a fresh cap, rotor and NGK plug wires on it too! Newer front struts, strut mounts and a new A/C condenser and A/C lines. Too bad I won't be re-installing the A/C. The brakes must have been done quite recently also. I degreased the engine and engine compartment tonight. Although I won't be using the engine, I am likely going to use 100% of the rest of the mechanical's. Looks like the body will be the only 323 part left on my 323! A Mazda 323 with MX-3 DNA that will hopefully become a MX-326 or would that be a MX-623?? The MX-3 dies tomorrow, I can hardly wait to rip it apart!

I spent the whole weekend at the garage. Saturday morning I drove the MX-3
in the garage, Saturday night I dragged the empty hulk out (with my daily driver 323 and a tow strap!). Sunday I cleaned up the mess and did a complete garage clean up & out. I labelled every plug on the entire wiring harness. Holy crap the MX-3 wiring harness is much larger and more complex then I had ever imagined! I will have to count them, but I estimate the harness has more then 100 plugs on it! The MX-3 was the best parts car ever. Besides all the other new stuff on the car upon taking it apart I found it had a new Filler neck and fuel pump! So I am emptying the tank into a huge funnel into a gas can, it had a full tank of gas so it was taking forever, first I notice a shiny black filler neck with a fresh Mazda part number on it, then I notice shiny new hex bolts on the sending unit! (Mazda usually has star head machine screws) I removed the sending unit to find a new pump! Too bad the tank was not new, it had been repaired with all new brass nipples soldered on it. The 323 has a brand new tank in it with a big dent in it (looks like some one put it in with a floor jack, with out much care) hopefully I can knock it out or else live with it. LOL


Took the interior out.
Image

Labelled all ten million plugs

Image

Image

Removed all the body panels. Note: these cars are like used parts gold! Save everything you can sell it all!

Removed the driveline….or more accurately the car from the driveline LOL

Image

Image

Not pictured (was getting pretty tired and focused or confused?) Took out the rear suspension complete.

Image

Image

Image


Back to work on the 323!
Image

The repair of the rad support bolts:

The problem: Freakin bolts rusted-in
Image

Step 1: Mark the hole

Image

Step 2: cut the hole. (I used a grinder with a cutting wheel)
Step 3: pry the metal up.
Image

Step 4: Remove the broken nut-certs. I used a chisel and a hammer.

Image

Step 5: Clean the area.

Image

Step 6: Weld in some nuts and paint everything. Note:
Trying to weld a nut to the tin foil thick metal is like trying to weld a
dew drop to a snow flake! I nailed the fist one, the second took a few
nuts and a few tries. I recycled proper size nuts from my maZda bolt bucket.

Image

Step 7: Fold the metal back over the repair and weld it shut.
I used a patch panel which I drilled full of holes and welded to the rad support.

Image


I made a similar repair to the rear sub frame nut-certs.
Image

Image

The “bottle hole” repairs.

I cut out a bunch of fiberglass. I usually pre cut a whole bucket
of different sizes and shapes. (It is difficult to cut out new pieces when
your covered in fibreglass resin). Then I mix up a batch of fiberglass resin
and hardener in a large coffee can. Then dip the pieces of fiberglass into
the resin and place them on the mould. I wear disposable gloves. Don't try to cover a hole this big with a single sheet. Fiberglass in much easier to deal with in 3" square
pieces (overlapped). When your finished remove the bristle board and
tape. Some will be stuck to your repair which you can simply sand off.

Made a fiberglass mould using adhesive bonding strips (duct tape) and tree fiber sheeting (bristle board)

Image

Image

Image

Image

Image
Last edited by IMACHU2 on January 3rd, 2010, 9:56 pm, edited 1 time in total.
Dominic Toretto's whip is a MaZda and his cell phone number starts in "(323)"
My work log http://mx-3.com/phpBB3/viewtopic.php?f=46&t=72471
Image
IMACHU2
Regular Member
Posts: 559
Joined: September 25th, 2008, 4:11 pm
Location: Guelph Ontario Canada

Re: Project Jay-Spec MX-326GS

Post by IMACHU2 »

ScannedImage-32.jpg[/IMG]

Image

Image

Image
Repaired the rear inner fender too.
Image

Image

Image

Image

Spent an un-told number of hours strippin' the goo off the bottom of the floor. I used an angle grinder with a few wire brushes to get the job done. The floor is near mint. (unlike the rest of the car) LOL The bottom of the car is clean enough to eat off of. I got under there with a can of flat black rust paint and Painted the bottom of the floor and the inner fenders on the MX-326GS. The bottom of the floor and the inner fenders are now not: slimy, scungy, rusty, multicoloured or missing.(anymore) Clean, solid and flat blackened.

I spent the long weekend working on the MX-326GS

Painted the interior floor

Image

Image

Image


Image

I primed and painted the engine compartment.

Image

Image

Image

Image

My daily driver 323 had 470000KM on it and would not pass the emission test. I put the old 1.6L from project MX-326 GS into it after putting a new head gasket and water pump on it. The engine passed the emission test but nearly blew up on the emission dyno. So I bought a 1993 Mazda 323 with 200000KM Today. I am going to use it for parts for both the Project 326 and my daily 323.

Image

Image

Image

Image

Image

Image

Image

It looked nice but it was a turd.

Serious tire wear!
Image

Caused by small hole maybe?
Image

Image

I loaded it full of garage junk and sent it to the wreckers.

Image


I saved:

-The black interior and dash
-Mint hatch
-Passenger door, mirrors,
-Left window regulator and mirror
-Mint Hatch
-Right Fender
-Textured bumpers
-All the lights and grill
-The hood
-The whole rear cross member /struts
(to roll the MX-326 around on until it’s suspension is rebuilt)

The engine is still working great in my daily driver. Feels about 40hp stronger then the old engine LOL.

Image

Image

Image


Back to work on project MX-326GS!

Shock tower repair.

I got these out of my parents old escort that was rotting into the ground at their farm.
Image

Image

Image

Cleaned them up and welded them on the 326.

Image

Image

Image

Image

Image

Image

Image

Image

Cleaned the shock towers all up and painted them, did not take any pictures. duh!


Sanded the whole car down. It looks surprisingly straight and rust free accept the rockers and rear tail panel they are Facked!

Image

Image

Image

Image

The rear panel was mangled. It had holes in it, it was crumpled and dented everywhere. I ground out the bad. I fiberglassed all the holes and smoothed it all out.

Image

The rocker were in really bad shape! Same deal ground out all the rust, fibreglassed the holes and smoothed them out. The fiberglass went on really smooth, only a skim coat of body filler was needed to finish the job.

Image

Image

Image

Image

Image

Image

Image
I rolled the car outside to check my work. The sun can be cruel, but in this case only some minor areas had to be fixed.

Image

Note: although it kinda looks like a car Its not. The rear suspension is out of the 323 I bought for parts. The front suspension is the un-rebuilt complete out of the MX-3 and the wheels are square/bent and don’t hold air. (I kept them because the clear the front MX-3 brakes and they look really kool in build photos!) LOL

Gave the beast a rattle can primering!
Image

Image

Image

Image

Image

Image

Image

Shortly after this I ripped the front suspension to pieces, then I learned I had to move garages! I built a dolly using some casters and a piece of lumber. I bolted it to where the front sub frame bolts on.

Image
Dominic Toretto's whip is a MaZda and his cell phone number starts in "(323)"
My work log http://mx-3.com/phpBB3/viewtopic.php?f=46&t=72471
Image
IMACHU2
Regular Member
Posts: 559
Joined: September 25th, 2008, 4:11 pm
Location: Guelph Ontario Canada

Re: Project Jay-Spec MX-326GS

Post by IMACHU2 »

I bought a press and a sander. I was going to rebuild the MX-3 lateral links, but they turned out to be a mess I ended up buying new ones.

Image

Image

The last project in the old garage was cleaning and painting all the suspension parts and cross members.

Image

Image

Image

Image

Image

Image

Image

Image

Image

I did some more painting. This time the interior roof. No pics though.


The MX-326GS and the Mustang are safe in the new garage. Preparation of the mechanical restoration has begun.

The Suspension Set-up:
Front:
-MX-3GS Power rack
-MX-3GS Front sub frame
-MX-3GS lower control arms with E.S 4-3152G bushings. (Sexcort/323 # 13's)
-MX-3GS Brakes with KVR "J" hook rotors and Carbon Fiber pads
-MX-3GS Stabilizer bar
-MX-3GS Stabilizer end links.
-ES universal stabilizer bar mount bushings (if I get them to work)
-Eibach Pro-Kit springs
-KYB GR2 struts

Rear:
-MX-3GS Rear sub frame
-MX-3GS Altrom Trailing Arms
-MX-3GS Stealership lateral links
-MX-3GS Stabilizer end links
-ES Universal sway bar mount bushings (if they work again) LOL
-MX-3GS brakes new stock rotors with KVR Carbon Fiber pads
-Ractive strut tower bar
-Eibach Pro-Kit springs
-KYB GR2 Struts

Got some good old #13’s from my parents old 97 Escort. So I can use the Energy Suspension Bushings control arm bushings for an Escort on the MX-3 front suspension. You can use 323 ones also (I threw mine out…opps)

Image

Image

Image


MX-326 GS rear suspension:

The trailing arms were from Altrom, my local Jobber hooked me up $43.45 each + Tax.
http://www.altrom.com/" onclick="window.open(this.href);return false;

Trailing arm is red in this diagram
Image

The MaZda Stealership gives me 20% off. (I am the manger of the local Speed Shop). They touched me where my bathing suit covers to the tune of $373.50 + tax for the 4 lateral links.

I was past the point of no return. (I ordered all new parts for the MX-3 rear Suspension). If I were to do it again I would order new 323 lateral links from Altrom. They were less then $40.00 each. Then I would rob a 97-up Escort of it's trailing arms, rear hubs (big drum brakes) and re-bush the trailing arms with Energy Suspension Part# 4-7123G $52.99 Retail (at my boutique speed shop), you could likely find them cheaper LOL. If you really want rear disc brakes get an Escort GT set-up. MX-3 Callipers are supposed to be a pain in the a-- too. MX-3's have a different sway bar set-up too. They use expensive little sway bay links $42 / $44 each! The 323 is 15mm narrower then a MX-3, but you could make it up in wheel spacers.....or leave it. Can you tell my car is 15mm narrower at the rear in this picture?? LOL (I am just rolling it around on MX-3 front sub-frame and 323 rear right now).

Image


My mound of new parts:

-Tie rods

-Ball joints

-Strut mounts

-Trailing arms

-Lateral links

-Sway bar links

-Brake pad hardware kits

-Rear strut bar

-"J"hooked black cad plated KVR front brake rotors

-KVR carbon fiber pads

-Stock rear brake rotors

-KVR SS brake line kit

-All star brake proportioning valve

-Gas tank straps

-Energy Suspension sway bar mount bushings

- Konig Maxxim air's and 205/50/15 Falken Azenis RT615's

-Eibach Pro kit

-KYB GR2 struts and boots

-ACT Clutch PP,disc,RB,PB and the alignment tool.

-Vibrant Muffler (Flat black one)

-Piaa Xtreme White headlight bulbs

-Pacesetter headers
-Magnaflow High flow Cat

-Grant Steering Wheel & hub

Image

Image

Image

Image

Image

Image

Image

Image

Image

Image
Last edited by IMACHU2 on January 4th, 2010, 10:38 pm, edited 1 time in total.
Dominic Toretto's whip is a MaZda and his cell phone number starts in "(323)"
My work log http://mx-3.com/phpBB3/viewtopic.php?f=46&t=72471
Image
IMACHU2
Regular Member
Posts: 559
Joined: September 25th, 2008, 4:11 pm
Location: Guelph Ontario Canada

Re: Project Jay-Spec MX-326GS

Post by IMACHU2 »

Had the chance to play in my new garage.
Image

I started putting the suspension together.
Image
Image

Got my universal Energy Suspension sway bar bushings to work.
Image

Pic of the MX-3 bracket on top of the universal.
Image

Trimmed the Energy brackets down.
Image

Sanded the bottoms of them down a bit.
Image
Image


Rear suspension all done. I have new trailing arms too. Left them off until I put the suspension back in the car.

Used Escort #13's to put a Energy Suspension Escort control arm bushings kit in the MX-3 control arms.
Image

Image
Image
Image
Image
Image
Image
Image


At this point I am saving up for new wheel bearings then I will be able to finish the suspension and add the brakes.

Got the rear struts and springs put together. KYB GR2's with Eibach Pro Kit spring and Monroe strut mounts.
Image
My parts car MX-3 had new stock springs, Monroe sensitrac struts so i kept the units together to put in my daily driver 323. I needed front spring seats for the MX-326GS though. I robbed some from my parents old 97 Escort.
Image
They were looking pretty sad, so I cleaned them up and painted them
Image
Image
Last edited by IMACHU2 on January 4th, 2010, 11:50 am, edited 2 times in total.
Dominic Toretto's whip is a MaZda and his cell phone number starts in "(323)"
My work log http://mx-3.com/phpBB3/viewtopic.php?f=46&t=72471
Image
User avatar
fowljesse
Supporting Member
Posts: 5676
Joined: March 17th, 2006, 2:59 pm
Location: portland, OR
Contact:

Re: Project Jay-Spec MX-326GS

Post by fowljesse »

Nice progress!
'93 GS - P&P DE w/ ZE exh. cams/ pistns, KLG4 IM, 65mm TB, MSnS, Phenos, K&N RAI, UDP, Grnd wires, rear batt, filld MM, torq strt, TWM short shftr, Exedy, Lng tube hdrs 2.5" Side exhaust, H&R sprngs, Poly bushngs, strutbars, Alum. crss mmber&tiebar, 22mm swybar, solid links, Direzzas, leather int, Alpine 9805 stereo & alrm, keyless entry, 10 Boston Accoustics spkrs, Prjectrs, Blaster2, CF hood, FG hatch, Lexan
wytbishop
Senior Member
Posts: 5554
Joined: August 25th, 2004, 2:01 am
Location: Edmonton, Alberta, Canada

Re: Project Jay-Spec MX-326GS

Post by wytbishop »

You should do a short separate write up on the way you installed the ES swaybar bushings. There are a number of people who would like to do that and I can't compete with their price if I have the molds made and produce them myself.

Fantastic work so far.
94' RS/GS/MS/CF Monster Turbo...coming soon.
93' GS SE, the Black Beast, the former love of my life...soon to be gutted and crushed.
94' GS, black on black, now in several small pieces...and one large crushed piece.
2007 Mazda3 GT Sport --- super fun
2004 Honda RC51 --- Lost forever to some theavin' bastard
My Worklog
My feedback thread
Never attribute to malice that which can be adequately explained by stupidity.
IMACHU2
Regular Member
Posts: 559
Joined: September 25th, 2008, 4:11 pm
Location: Guelph Ontario Canada

Re: Project Jay-Spec MX-326GS

Post by IMACHU2 »

Thanks guys, good idea on the write-up. For a 323 owner, I sure do alot of MX-3 suspension write-ups LOL :lol:
Dominic Toretto's whip is a MaZda and his cell phone number starts in "(323)"
My work log http://mx-3.com/phpBB3/viewtopic.php?f=46&t=72471
Image
wytbishop
Senior Member
Posts: 5554
Joined: August 25th, 2004, 2:01 am
Location: Edmonton, Alberta, Canada

Re: Project Jay-Spec MX-326GS

Post by wytbishop »

YEah...tell me about it.
94' RS/GS/MS/CF Monster Turbo...coming soon.
93' GS SE, the Black Beast, the former love of my life...soon to be gutted and crushed.
94' GS, black on black, now in several small pieces...and one large crushed piece.
2007 Mazda3 GT Sport --- super fun
2004 Honda RC51 --- Lost forever to some theavin' bastard
My Worklog
My feedback thread
Never attribute to malice that which can be adequately explained by stupidity.
User avatar
93SOHC
Regular Member
Posts: 1875
Joined: November 21st, 2004, 2:01 am
Location: Lake Villa IL usa

Re: Project Jay-Spec MX-326GS

Post by 93SOHC »

Insane amount of progess! awesome job, cant wait for more!
93SE-KLDE Theres a big peice of metal inside my other peice of metal now...weird???
Image
IMACHU2
Regular Member
Posts: 559
Joined: September 25th, 2008, 4:11 pm
Location: Guelph Ontario Canada

Re: Project Jay-Spec MX-326GS

Post by IMACHU2 »

Played with the car for a few hours tonight.

Image

Put My front struts together

Image
KYB GR2's with KYB strut boots. Safety duck was overseeing the operation.

Image
Eibach Pro Kit springs.

Image
97 Escort spring seats.
(The MX-3 had new struts and new factory springs, so I saved them as an assembly for my daily driver 323)

Image
Monroe strut mounts.
Image
Completed front struts.

Put My Wheel bearings in too.
Image
Image
Used a strange combination of two old wheel bearings and half the press table to press the bushings in.
Image
Used an two old wheel bearing and a unloved Chinese wrench to push the bearing in the last little bit.


Bearing installed
Image
Used a two stack of old wheel bearing and the unloved wrench to push the hub flange in. Everything went in real smooth and the Chinese wrench survived.
Image

Image
Completed spindle.
Image

Image
Used the same old wheel bearing and a hammer to press in the new bearing seal. If you have not come to the same conclusion by now, let me say it: Old wheel bearings rule!


Image
Nearly complete rebuilt MX-3 front suspension.

Image

Image
I have to buy a good used MX-3 front sway bar. Somebody previously used a blue tip wrench to get those pesky end links off.

Image
The brakes were in good working order and I was hoping to re-use the brake calipers. Although not seized the front calipers have seen better days.

Image
The rear brake calipers must have been replaced recently. They had only thin surface rust on them and they are looking and working perfectly.
Dominic Toretto's whip is a MaZda and his cell phone number starts in "(323)"
My work log http://mx-3.com/phpBB3/viewtopic.php?f=46&t=72471
Image
User avatar
fowljesse
Supporting Member
Posts: 5676
Joined: March 17th, 2006, 2:59 pm
Location: portland, OR
Contact:

Re: Project Jay-Spec MX-326GS

Post by fowljesse »

Informative, entertaining, fun to follow.. Your worklog has it all... AND a Safety Duck!
'93 GS - P&P DE w/ ZE exh. cams/ pistns, KLG4 IM, 65mm TB, MSnS, Phenos, K&N RAI, UDP, Grnd wires, rear batt, filld MM, torq strt, TWM short shftr, Exedy, Lng tube hdrs 2.5" Side exhaust, H&R sprngs, Poly bushngs, strutbars, Alum. crss mmber&tiebar, 22mm swybar, solid links, Direzzas, leather int, Alpine 9805 stereo & alrm, keyless entry, 10 Boston Accoustics spkrs, Prjectrs, Blaster2, CF hood, FG hatch, Lexan
IMACHU2
Regular Member
Posts: 559
Joined: September 25th, 2008, 4:11 pm
Location: Guelph Ontario Canada

Re: Project Jay-Spec MX-326GS

Post by IMACHU2 »

Thanks. You should here the safety duck quack when I remove sending units with the angle grinder! :lol:
Dominic Toretto's whip is a MaZda and his cell phone number starts in "(323)"
My work log http://mx-3.com/phpBB3/viewtopic.php?f=46&t=72471
Image
User avatar
RS_OBD'oh_2
Senior Member
Posts: 2400
Joined: April 9th, 2007, 1:26 pm
Location: Calgary, AB

Re: Project Jay-Spec MX-326GS

Post by RS_OBD'oh_2 »

very nice. I was thinking about that vibrant muffler as well. keep us informed, great job so far.
Post Reply

Return to “MX-3 Worklogs”