Spyder/ carpart4u write-up NOW with HID!

This forum is for discussion of topics relating to MX-3 lighting such as Headlights, Tail lights, Accessory Lights, Interior Lights, Etc. For example, Rear Euro Altezza Style Tail lights, Headlight units, LED's, HID's, Bulbs, Interior lights, Neons, Strobes, Auxillary Lights/Fogs or anything filament and gas discharge related.
Also anything dealing with the elctrical system.
User avatar
fowljesse
Supporting Member
Posts: 5676
Joined: March 17th, 2006, 2:59 pm
Location: portland, OR
Contact:

Spyder/ carpart4u write-up NOW with HID!

Post by fowljesse »

Edit: Instead of using the wire crimp things, solder, and shrink tube them.

This is how I installed them. It was surprisingly easy:

First, remove your headlights.
Take out the top bolts behind the lights, on the radiator support.
Take out your turn signals, and take the bulbs out (There is 1 screw. Once it's out, pull on that side to pivot the whole thing out).
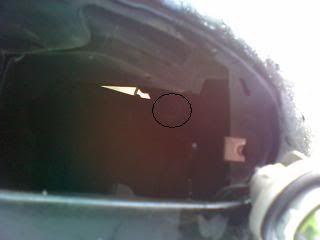
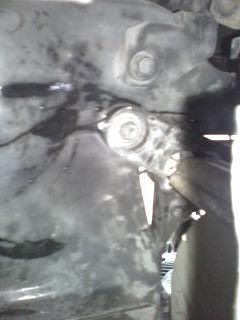
Look up inside the hole where the turn signal was, and toward the fender for this bolt:
Image

Image

Take it out. I used a ratchet wrench with a long extension (10mm).

Take out the bumper bolt:
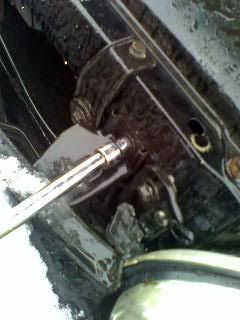
Image

Then take out the headlight support bolt:
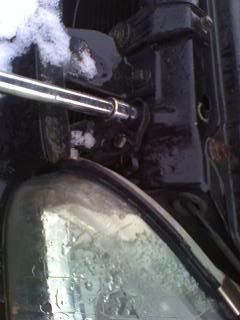
Image
Pull the plug from the back of the headilghts by squeezing the sides, and pulling.

Now Wiggle, tug, and twist the lights out. I can't explain... but you'll need to pull the bumper out a little, too. That's why you took out that bolt.

I wired the halos, and LEDs with the running lights;
Cut 1mm of casing off all the wires, being careful not to cut any wire with it.
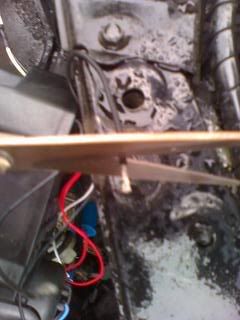
Image

Twist the red (Halo wires, and the white (LED) wires together.
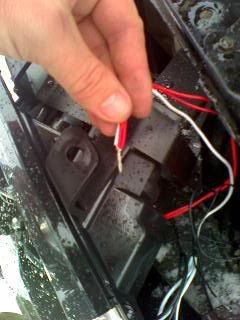
Image

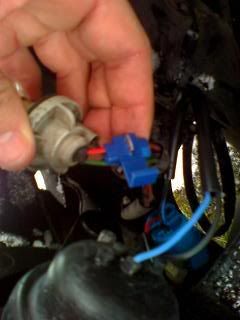
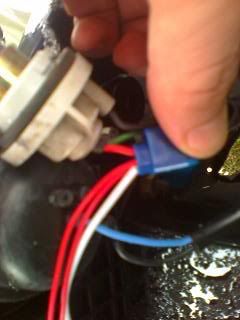
Get the following connectors (the kind that you slip onto a wire without cutting it, and you slip a pigtail into it, close it, and it taps, and secures a new wire into an existing one), and tap the white/ red wire combo into the Red/Green wire from your turn signal by sticking the Red/Green wire into the terminal, and sticking the REd/White pigtail into the other hole in the terminal. Hold the pigtail in place as you crimp the metal part with pliers. Then close the blue flap.
Image

Image

Tap this wire further away from the bulb than I did in this picture. I tapped the one on the other headlight as close to the harness sheath as I could, leaving more room to pull the turn signal bulb out, to screw it into the housing.

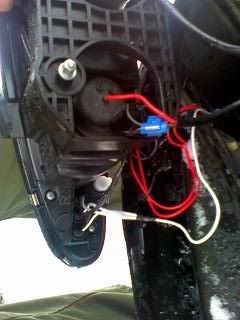
Then do this same procedure with the black wires, tapping them into the black wire coming out of the high beams. I did the high beams, since i'm going to take the other ones out to put in the HIDs.
Here's the back, all wired up.
Image

Now put the lights into place. It's easier than taking the other ones out, because they don't have the bolt that holds them to the radiator support.
Bolt and plug everything back together in reverse order, and you're done!
Against a wall at night, you can adjust the beams with the 8mm bolts on the back of the housings.


HID

The HID installation was MUCH easier than I thought it would be. I'm cautious around electricity ever since I sent 60,000 volts through my arm, and burnt a hole in my thumb checking for spark on a HEI system :?
Here's how I did the HIDs:

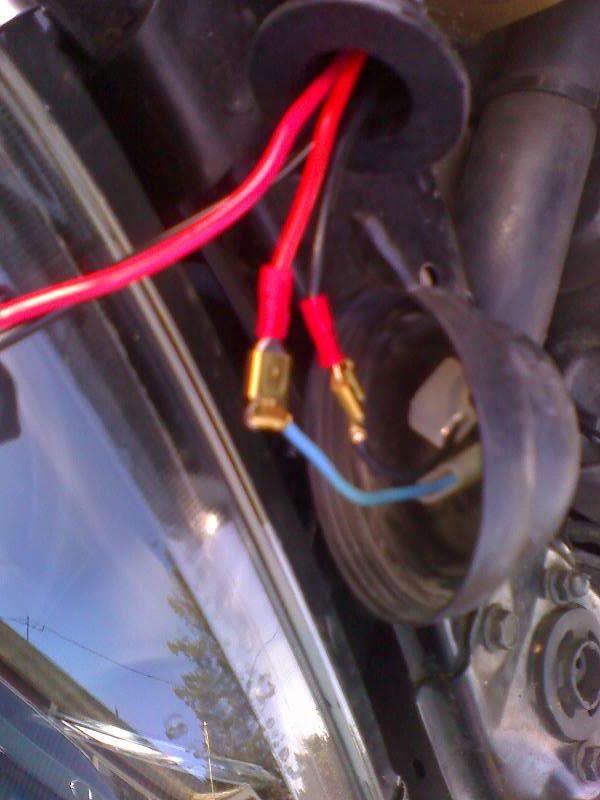
Just for reference, these are the wires you will connect later, in their original housings;
Image

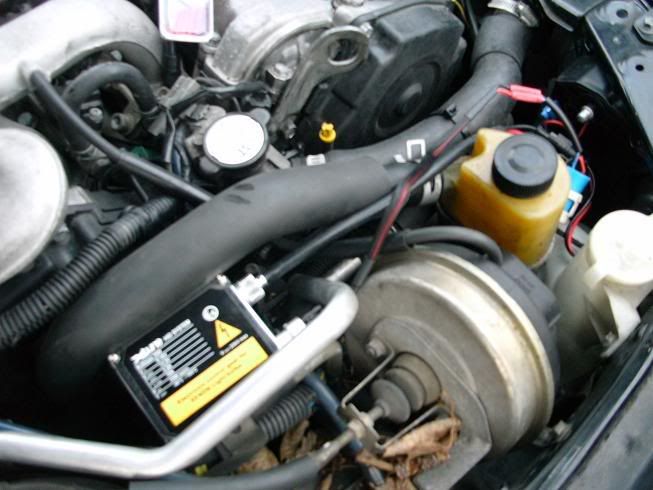
First, find where you're going to put your ballast boxes, and secure them, making sure the wires will reach. Here's where I put mine:
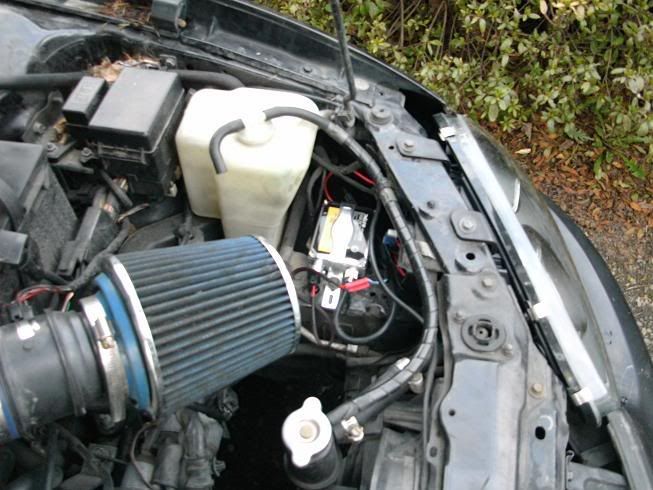
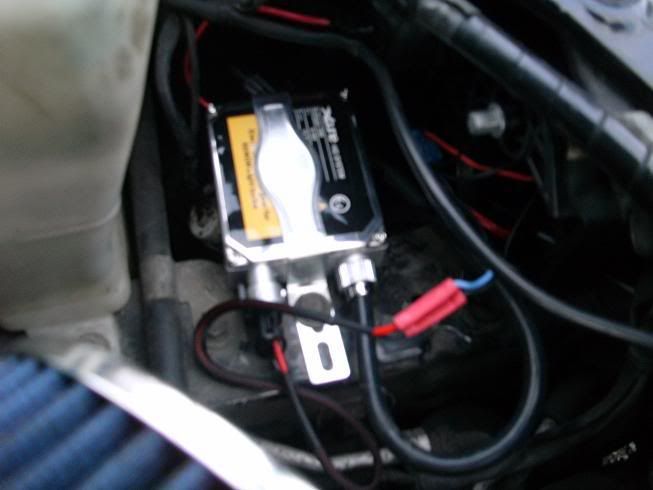
Image

Image

Image

Start by pulling the seal off the back of the headlight assembly, and pull the wires out of the bulb, and housing. Then unclip the bulb retainer, and take the bulb out.
Here's the retainer clip (ignore the red circle :confused2: ):
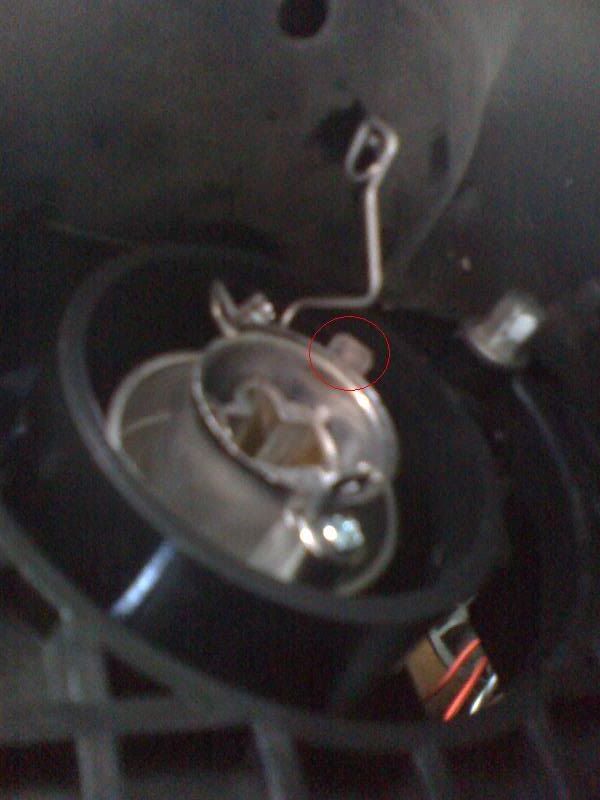
Image

Then cut about 3 inches off of the wires that you just unplugged, and pull them out of the seal. The HID kit comes with it's own seal that you will plug into the other seal. Cut a hole in the projector seal just around these holes that are in it.
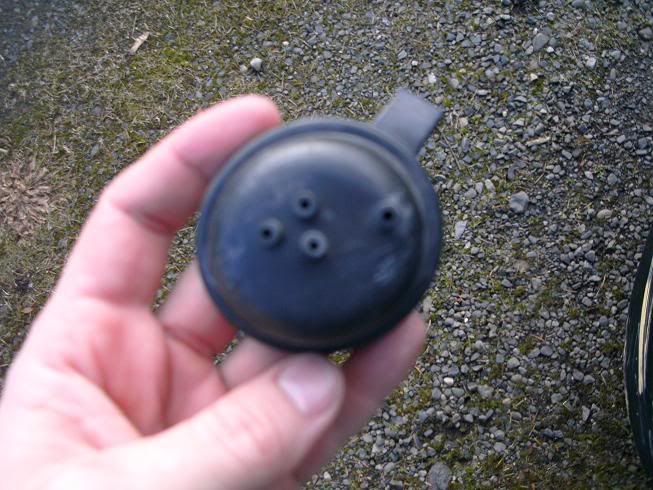
Image

You want the hole you cut to be just smaller than the diameter of the seal on the HID kit as such (NOTE: I already cut the other 2 wires out of the seal that come from the ballast, but you will do it later):
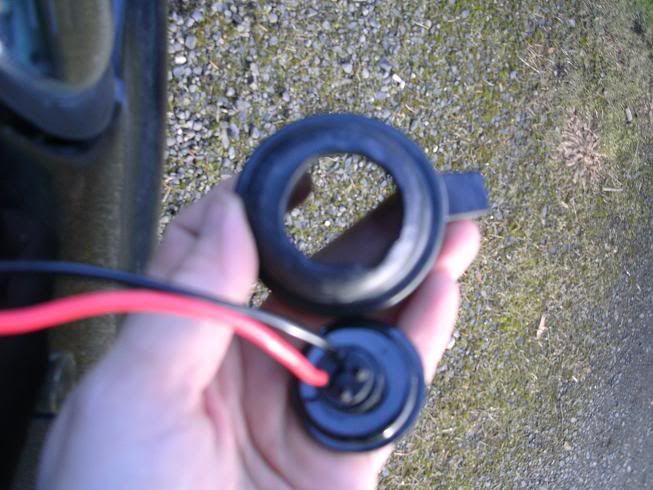
Image

That way, you can plug the HID seal into it, and have a good seal like this:
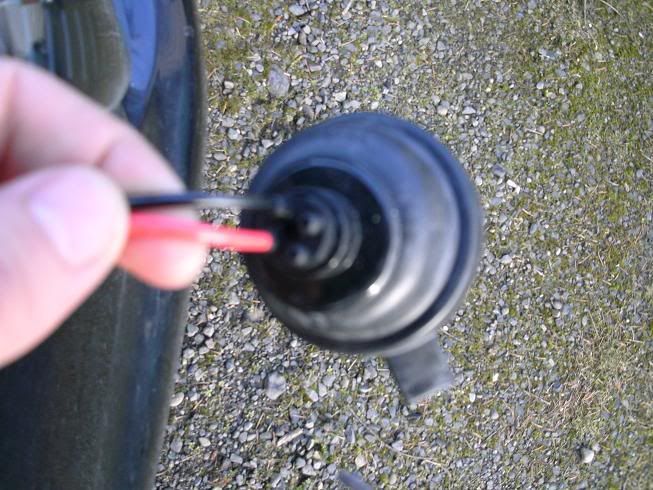
Image

Image


Now, cut the Red and Black wires coming from your ballast, to whatever length works, and pull them out of the seal. I wired them in with butt connectors, but you can use tabs, if you think you'll need to disconnect them.
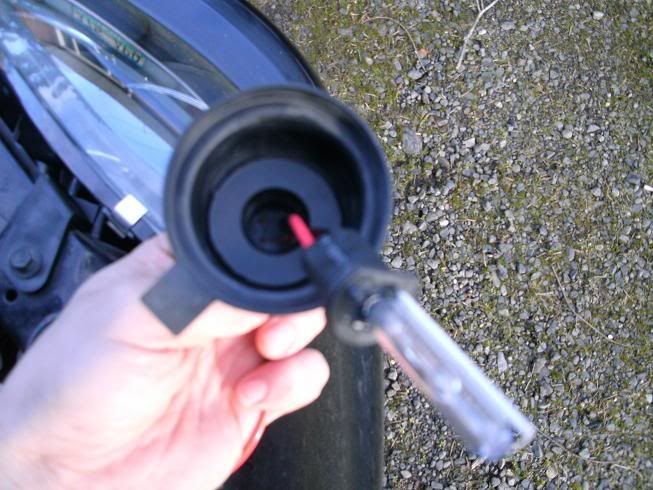
Now you can put the HID bulb in, and pull the excess wires out from the seal. NOTE: Don't let the HID bulb touch anything. If it does, clean it with rubbing alcohol.
When putting the HID bulb in, make sure the flat part on the base of the bulb lines up with the tab on the housing you're plugging it into. It takes a little more effort to get the retainer clip to seat with the HID bulb.
Connect the black (ground) wires, and connect the red to the blue wire, and you're done!
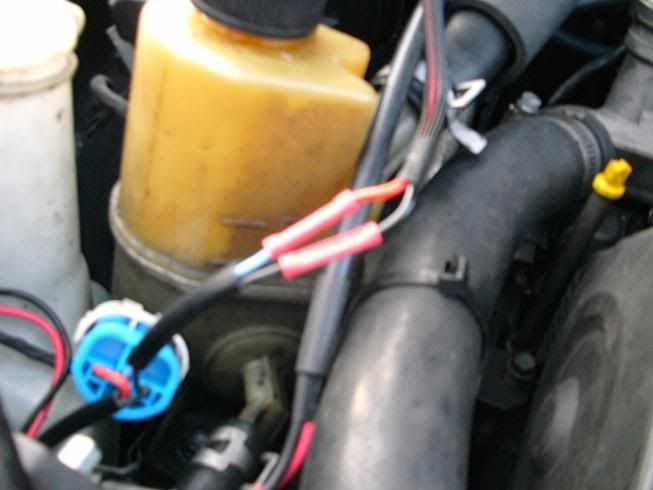
Image


Let me know if something isn't clear enough :)
Last edited by fowljesse on January 10th, 2010, 3:36 pm, edited 6 times in total.
'93 GS - P&P DE w/ ZE exh. cams/ pistns, KLG4 IM, 65mm TB, MSnS, Phenos, K&N RAI, UDP, Grnd wires, rear batt, filld MM, torq strt, TWM short shftr, Exedy, Lng tube hdrs 2.5" Side exhaust, H&R sprngs, Poly bushngs, strutbars, Alum. crss mmber&tiebar, 22mm swybar, solid links, Direzzas, leather int, Alpine 9805 stereo & alrm, keyless entry, 10 Boston Accoustics spkrs, Prjectrs, Blaster2, CF hood, FG hatch, Lexan
User avatar
Evo_Spec
Senior Member
Posts: 2504
Joined: December 30th, 2008, 3:41 am
Location: Calgary, Alberta, Canada

Re: Spyder/ carpart4u write-up

Post by Evo_Spec »

sweet right up man! helps me with just taking out my stock headlights
have bigger pictures by any chance?
User avatar
fowljesse
Supporting Member
Posts: 5676
Joined: March 17th, 2006, 2:59 pm
Location: portland, OR
Contact:

Re: Spyder/ carpart4u write-up

Post by fowljesse »

Thanks :)
I shrunk them down, because it was taking too long to upload them.
believe it or not, I'm on 56K here!
Going to Comcast tomorrow.
I can get new pictures of something, if you like.
'93 GS - P&P DE w/ ZE exh. cams/ pistns, KLG4 IM, 65mm TB, MSnS, Phenos, K&N RAI, UDP, Grnd wires, rear batt, filld MM, torq strt, TWM short shftr, Exedy, Lng tube hdrs 2.5" Side exhaust, H&R sprngs, Poly bushngs, strutbars, Alum. crss mmber&tiebar, 22mm swybar, solid links, Direzzas, leather int, Alpine 9805 stereo & alrm, keyless entry, 10 Boston Accoustics spkrs, Prjectrs, Blaster2, CF hood, FG hatch, Lexan
User avatar
Evo_Spec
Senior Member
Posts: 2504
Joined: December 30th, 2008, 3:41 am
Location: Calgary, Alberta, Canada

Re: Spyder/ carpart4u write-up

Post by Evo_Spec »

mainly the wiring, the existing wiring, going to what on the new one
User avatar
fowljesse
Supporting Member
Posts: 5676
Joined: March 17th, 2006, 2:59 pm
Location: portland, OR
Contact:

Re: Spyder/ carpart4u write-up

Post by fowljesse »

Okay. I'll explain it now, and put up pics soon.
They come with an OEM style plug that you plug in exactly like your old one. This runs your low, and high beams.
Your Halos have a positive red/ Black negative wire, and the LEDs have a positive white/ negative black wire. I twisted the white, and red wires together, and plugged them into the self splicing connector (blue thing), and connected that to the green and red wire that goes to the front turn signal, which is the positive wire that runs the running light filiment in the turn signal bulb. I twisted both of the black wires together, and attatched them to the black (ground) wire coming from the high beam, using the same self tapping (blue) splicer.
Once you buy the self tapping (No cutting required) blue splicers, it'll all make sense.
'93 GS - P&P DE w/ ZE exh. cams/ pistns, KLG4 IM, 65mm TB, MSnS, Phenos, K&N RAI, UDP, Grnd wires, rear batt, filld MM, torq strt, TWM short shftr, Exedy, Lng tube hdrs 2.5" Side exhaust, H&R sprngs, Poly bushngs, strutbars, Alum. crss mmber&tiebar, 22mm swybar, solid links, Direzzas, leather int, Alpine 9805 stereo & alrm, keyless entry, 10 Boston Accoustics spkrs, Prjectrs, Blaster2, CF hood, FG hatch, Lexan
User avatar
Evo_Spec
Senior Member
Posts: 2504
Joined: December 30th, 2008, 3:41 am
Location: Calgary, Alberta, Canada

Re: Spyder/ carpart4u write-up

Post by Evo_Spec »

that makes complete sense now, thanks.
once i get my speeding ticket settled i'll probably get a set, if i still have my license =P
User avatar
fowljesse
Supporting Member
Posts: 5676
Joined: March 17th, 2006, 2:59 pm
Location: portland, OR
Contact:

Re: Spyder/ carpart4u write-up

Post by fowljesse »

Cool :)
You don't need to drive to enjoy them :wink:
You could make really big shadow puppets with them, do a slide show, light up disco balls for a back yard party....
:lol:
'93 GS - P&P DE w/ ZE exh. cams/ pistns, KLG4 IM, 65mm TB, MSnS, Phenos, K&N RAI, UDP, Grnd wires, rear batt, filld MM, torq strt, TWM short shftr, Exedy, Lng tube hdrs 2.5" Side exhaust, H&R sprngs, Poly bushngs, strutbars, Alum. crss mmber&tiebar, 22mm swybar, solid links, Direzzas, leather int, Alpine 9805 stereo & alrm, keyless entry, 10 Boston Accoustics spkrs, Prjectrs, Blaster2, CF hood, FG hatch, Lexan
User avatar
smoke187
Regular Member
Posts: 120
Joined: June 4th, 2007, 1:27 am
Location: Buffalo,ny

Re: Spyder/ carpart4u write-up

Post by smoke187 »

so did you install the hid kit how do they install and keep the high beam working
http://www.cardomain.com/id/smoke187" onclick="window.open(this.href);return false;
93 mx3 bp-t
93 protege lx
User avatar
fowljesse
Supporting Member
Posts: 5676
Joined: March 17th, 2006, 2:59 pm
Location: portland, OR
Contact:

Re: Spyder/ carpart4u write-up NOW with HID!

Post by fowljesse »

I just did, and added the write-up to the first post :) You don't do anything with the high beams.
'93 GS - P&P DE w/ ZE exh. cams/ pistns, KLG4 IM, 65mm TB, MSnS, Phenos, K&N RAI, UDP, Grnd wires, rear batt, filld MM, torq strt, TWM short shftr, Exedy, Lng tube hdrs 2.5" Side exhaust, H&R sprngs, Poly bushngs, strutbars, Alum. crss mmber&tiebar, 22mm swybar, solid links, Direzzas, leather int, Alpine 9805 stereo & alrm, keyless entry, 10 Boston Accoustics spkrs, Prjectrs, Blaster2, CF hood, FG hatch, Lexan
User avatar
fowljesse
Supporting Member
Posts: 5676
Joined: March 17th, 2006, 2:59 pm
Location: portland, OR
Contact:

Re: Spyder/ carpart4u write-up NOW with HID!

Post by fowljesse »

It's almost uncomfortable how bright the HIDs are.
When the time came to take the comparison pictures, it was foggy.
I'll put up pictures in the comparison thread when it's clear out again.
The cool thing about fog is that you can see the beam shooting out about 100 feet before it spreads out.
'93 GS - P&P DE w/ ZE exh. cams/ pistns, KLG4 IM, 65mm TB, MSnS, Phenos, K&N RAI, UDP, Grnd wires, rear batt, filld MM, torq strt, TWM short shftr, Exedy, Lng tube hdrs 2.5" Side exhaust, H&R sprngs, Poly bushngs, strutbars, Alum. crss mmber&tiebar, 22mm swybar, solid links, Direzzas, leather int, Alpine 9805 stereo & alrm, keyless entry, 10 Boston Accoustics spkrs, Prjectrs, Blaster2, CF hood, FG hatch, Lexan
User avatar
onlytrueromeo
Senior Member
Posts: 2756
Joined: May 16th, 2007, 10:05 pm
Location: Albany, NY

Re: Spyder/ carpart4u write-up NOW with HID!

Post by onlytrueromeo »

So are the HID lows as bright as the highs, just the cutoff is lower? Is the cutoff still good? Do you think the HID's are worth it or necessary?
User avatar
fowljesse
Supporting Member
Posts: 5676
Joined: March 17th, 2006, 2:59 pm
Location: portland, OR
Contact:

Re: Spyder/ carpart4u write-up NOW with HID!

Post by fowljesse »

I haven't compared the HIDs to the projector highs, but they're as bright as the OEM highs.
Honestly, they aren't necessary. I will probably get them in my next set too, though, because they draw less voltage than the regular bulbs, and they look really cool :wink:
The cutoff is the same, I think. I'll see when it's clear (hopefully tonight). If it weren't for the good cutoff, I wouldn't use them, because I hate being blinded by other drivers so much that I'm thinking about getting a LASER to point at them when they blind me 8)
'93 GS - P&P DE w/ ZE exh. cams/ pistns, KLG4 IM, 65mm TB, MSnS, Phenos, K&N RAI, UDP, Grnd wires, rear batt, filld MM, torq strt, TWM short shftr, Exedy, Lng tube hdrs 2.5" Side exhaust, H&R sprngs, Poly bushngs, strutbars, Alum. crss mmber&tiebar, 22mm swybar, solid links, Direzzas, leather int, Alpine 9805 stereo & alrm, keyless entry, 10 Boston Accoustics spkrs, Prjectrs, Blaster2, CF hood, FG hatch, Lexan
User avatar
onlytrueromeo
Senior Member
Posts: 2756
Joined: May 16th, 2007, 10:05 pm
Location: Albany, NY

Re: Spyder/ carpart4u write-up NOW with HID!

Post by onlytrueromeo »

I also hate being blinded by other drivers and I don't want to do the same to others. HID's normally have a warmup, right? How long do the HID's take to warm up when you turn them on? Did you mind the 6000k color?
User avatar
jrors
Supporting Member
Posts: 567
Joined: February 6th, 2005, 8:58 am
Location: St.Louis

Re: Spyder/ carpart4u write-up NOW with HID!

Post by jrors »

Fowljesse, I would like to say thankyou, for taking all this time to post alll your work with these projectors.
If you fall, then get back up........Luck favors the prepared
User avatar
fowljesse
Supporting Member
Posts: 5676
Joined: March 17th, 2006, 2:59 pm
Location: portland, OR
Contact:

Re: Spyder/ carpart4u write-up NOW with HID!

Post by fowljesse »

You're welcome, Jrors :D I'm glad to be helpful.

They do warm up.. They start out about as bright as the OEMs, and take about 5 seconds to start getting brighter, and steadily rise to full brightnes, which takes about 2 minutes, from what I remember. I'll pay attention to it tonight.
I like the color alot. I wanted the 4200 or whatever was brioghtest, but these are a pleasant lavender-blue color, and are plenty bright. They aren't blue enough that they could possibly be mistaken for an emergency vehicle. I saw 4 cars last night that were alot more blue, and there weren't many cars out when, and where I was driving. I've always liked this color best.
'93 GS - P&P DE w/ ZE exh. cams/ pistns, KLG4 IM, 65mm TB, MSnS, Phenos, K&N RAI, UDP, Grnd wires, rear batt, filld MM, torq strt, TWM short shftr, Exedy, Lng tube hdrs 2.5" Side exhaust, H&R sprngs, Poly bushngs, strutbars, Alum. crss mmber&tiebar, 22mm swybar, solid links, Direzzas, leather int, Alpine 9805 stereo & alrm, keyless entry, 10 Boston Accoustics spkrs, Prjectrs, Blaster2, CF hood, FG hatch, Lexan
Post Reply

Return to “Electrical & Lighting”