Page 13 of 22
Re: Ryan's Final Build
Posted: June 7th, 2011, 3:53 pm
by Ryan
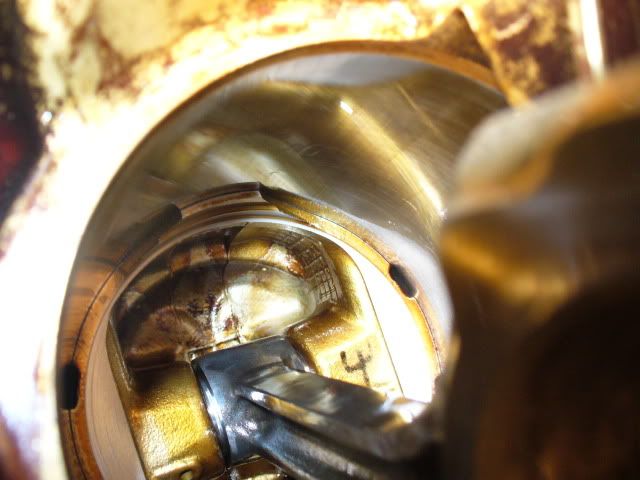
Found it!
Spun #5

WTF?

Oh.

s---.
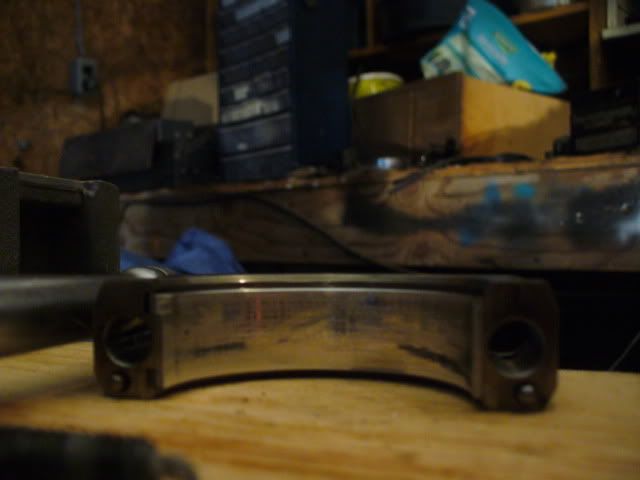
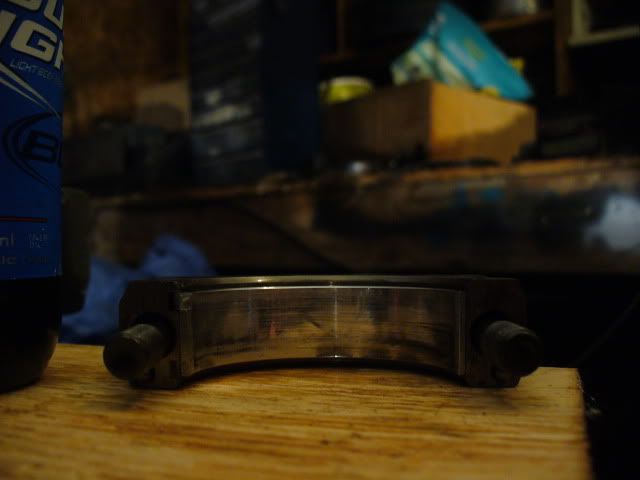
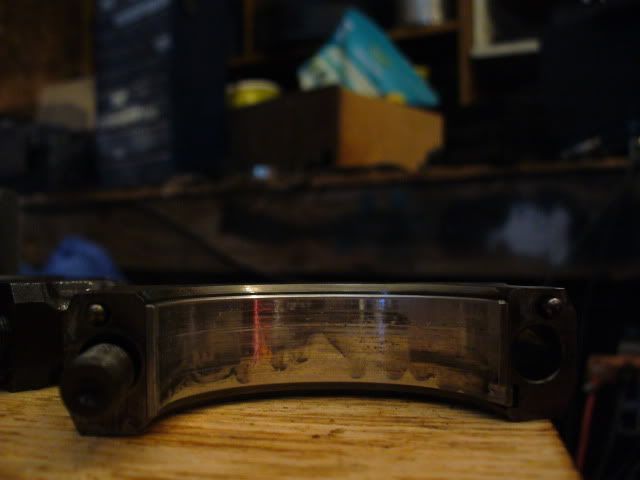
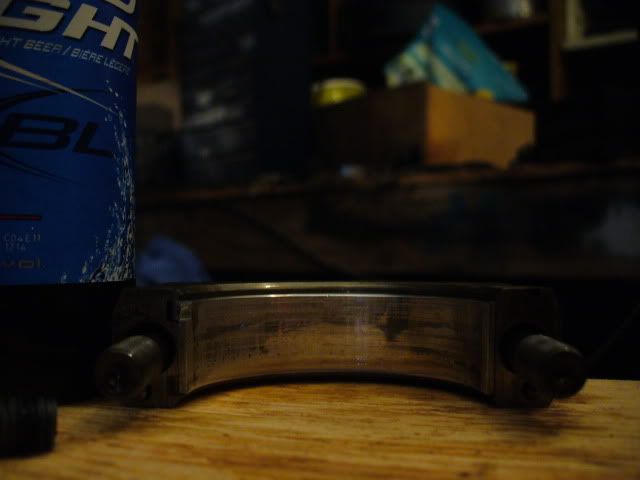
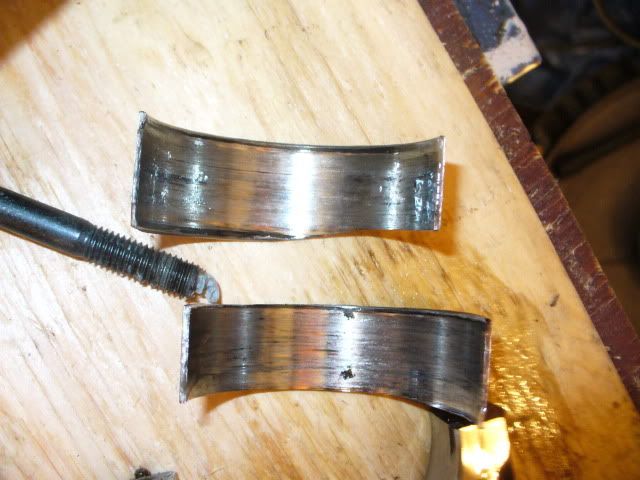
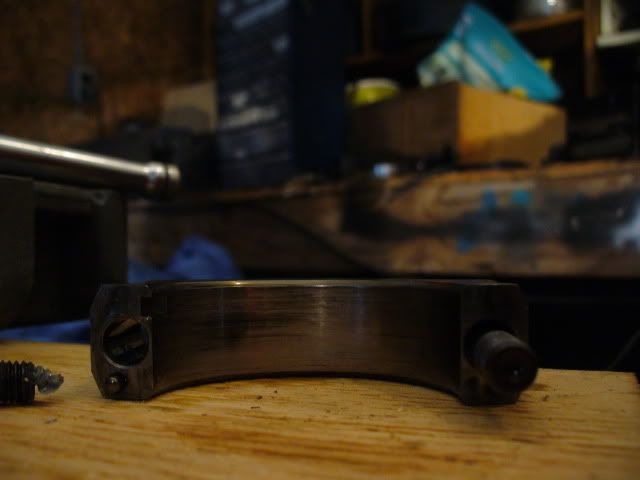
How bad does this crank look?
Re: Ryan's Final Build
Posted: June 7th, 2011, 3:55 pm
by mxmikey
At least bearings are cheap.
Re: Ryan's Final Build
Posted: June 7th, 2011, 4:23 pm
by wytbishop
that crank will have to be polished. You won't be able to size the replacement bearing properly unless you do.
Re: Ryan's Final Build
Posted: June 7th, 2011, 4:26 pm
by muttpower
Yeah, bearings are cheap, but how bad is the crank??? Is that a gouge (sorry for spelling) carved into the crank journal???? Kind of hard to tell in the picture.
Re: Ryan's Final Build
Posted: June 7th, 2011, 4:26 pm
by Ryan
Thanks wyt. 2000+ grit sandpaper here I come. Plastigauge too.
Its not bad, It doesn't catch my fingernail at all, not even close. I just ordered standard size for now, I hope they're good enough. This is my DD, so I'm just assuming for now, because there's a chance they'll still be in spec.
Re: Ryan's Final Build
Posted: June 7th, 2011, 4:46 pm
by Josh
Ryan wrote:Thanks wyt. 2000+ grit sandpaper here I come. Plastigauge too.
Exactly what i would have suggested! at least you now know. what kind of assembly lube did you use?
Re: Ryan's Final Build
Posted: June 7th, 2011, 7:30 pm
by Ryan
Copious amounts of white lithium grease.
Ordered the bearings, they'll be here tomorrow around noon, bought some plastigauge (green) and sandpaper...
So far teh rest of them look good, but I'm obviously goin to replace them all.
I'm thinking debris played a role... there are some strange wear/splotch marks on some of the bearings.
Re: Ryan's Final Build
Posted: June 8th, 2011, 12:00 am
by Ryan
Re: Ryan's Final Build
Posted: June 10th, 2011, 3:53 pm
by Ryan
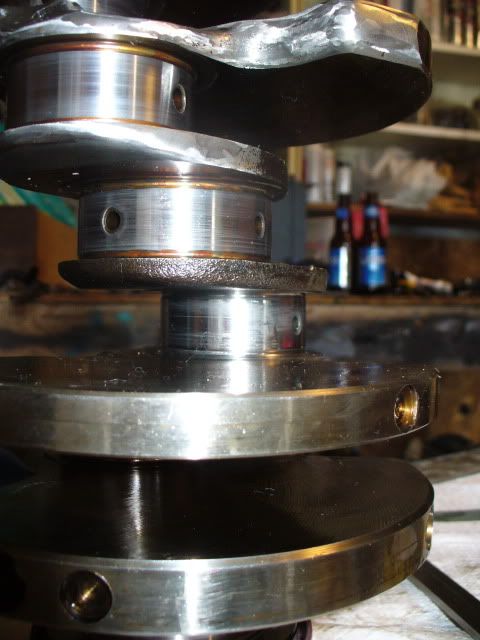
Said screw it and pulled the crank out.
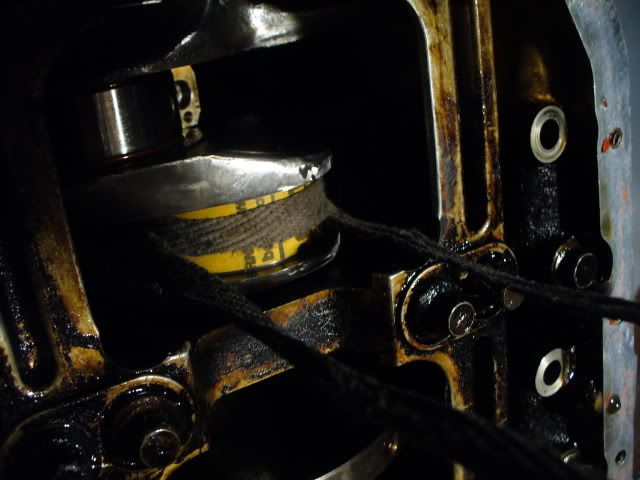
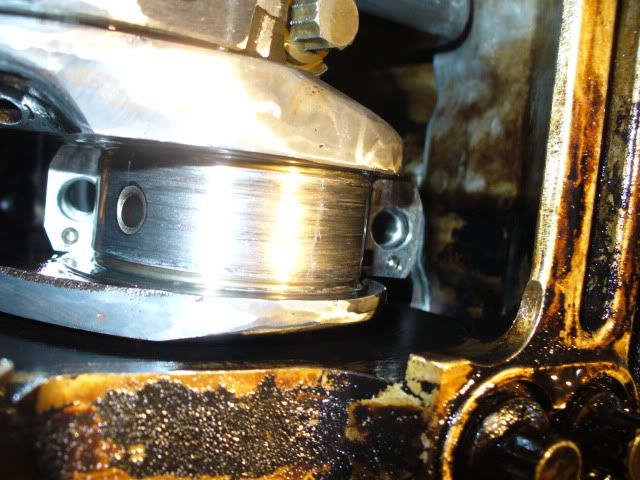
The front main bearing looks like it has chunks of aluminum welded to it, so I'm going to just call this a debris issue.
I'm getting the crank reground, new bearings, new oil pump, and heaven help this motor if it takes a s--- then...
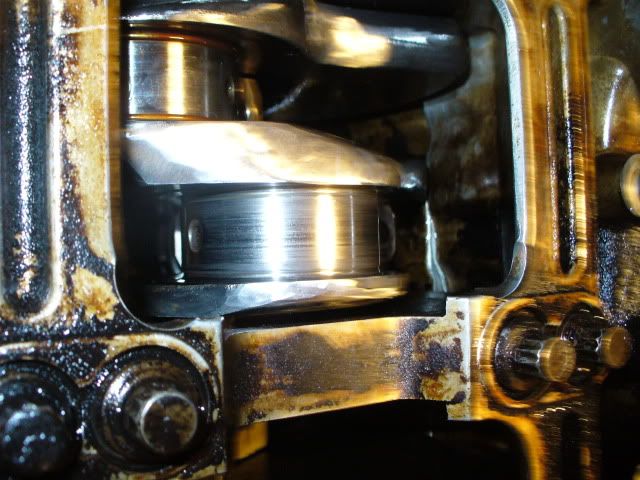
The cylinder walls look pretty dang shiny though

Re: Ryan's Final Build
Posted: June 10th, 2011, 4:00 pm
by WhiteFinish
Way to go Ryan !!
You keep going and a what a speed

Re: Ryan's Final Build
Posted: June 10th, 2011, 4:03 pm
by Ryan
some pretty major scoring on the top of #5 that I couldn't see with the block together:
the weird pitted/welded #1 main bearing
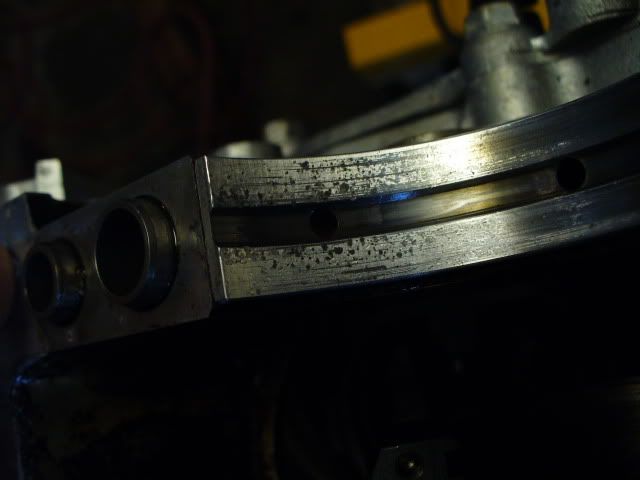
A cylinder wall
$120 to regrind all the journals, plus bearings, so this is about a $250 +15 hour mistake.
Re: Ryan's Final Build
Posted: June 10th, 2011, 5:31 pm
by wytbishop
Good call pulling the crank. I didn't want to sound like a know it all...but trying to just clean up that journal by hand and putting it back together was a recipe for another disaster.
So was the crank initially ground 0.010" under? Are they taking another 0.010" off or is it just a quick polish? do you have micrometers? I would be checking and double checking journal diameters. If it was already 10 thou under and they're polishing it again, you could wind up 14-15 thou under. In which case you'd basically have to go to 20 under to fit the next undersize bearing.
Definitely check it.
Re: Ryan's Final Build
Posted: June 10th, 2011, 5:45 pm
by Ryan
yeah, it was a depressed person solution.
I just checked some stuff with plastigauge, the mains are good on the oil pump side and progressively get worse to the flywheel side, which makes sense. They were all in spec, though.
Only done rod 6 and 5, 6 is a bit low, 5 is too low.
my machinist is actually meeting me after hours on his way to somewhere else so I can just drop the crank off with him and they'll check it out. I think I want to just grind it down so I can have exactly the tolerances I want (a little tighter than stock).
Its only $120 to do all 10 journals, plus another $120ish for bearings... turns into a $300 mistake, but now its upgraded from stock. Even if I decided to machine it down in the first place, it would have cost me this $120 (could have specified bearing size in the rebuild kit from topline)
so in reality, I'm only out $120 which is good considering what the damage could have been.
Edit, checked them all... they're all right on the edge(aside from #5 which is over), in the neighbourhood of 0.04mm
Re: Ryan's Final Build
Posted: June 10th, 2011, 6:12 pm
by Josh
That sux to put out more, but you know whats wrong. you should have him knife edge the crank while hes in there and lighten the load a bit.
Re: Ryan's Final Build
Posted: June 10th, 2011, 7:23 pm
by Ryan
Knife edge would require another balance (including heavy metals) and that would be at least another $400, so thats out of the question. Its already balanced.
Plus, if I were to drastically modify the crank, I'd actually turn it into a raindrop shape... Nature has all of the best designs, if you haven't thought about it.
Final diagnosis:
borderline clearances
dirty break in oil (on its 2nd batch, but still looked like rheomag fluid)
debris in the oil passages (from boring them out)
Perhaps oil pump.
Main #1 was pitted like the picture, and #2 less, and #3 less, and #4 less, so I call dirty oil on that.
Main #1 was perfectly clearanced, linear down to #4, which was a bit on the loose side, but acceptable.
all rod bearings were on the loose side, #5 was over (likely only from being spun/polished).