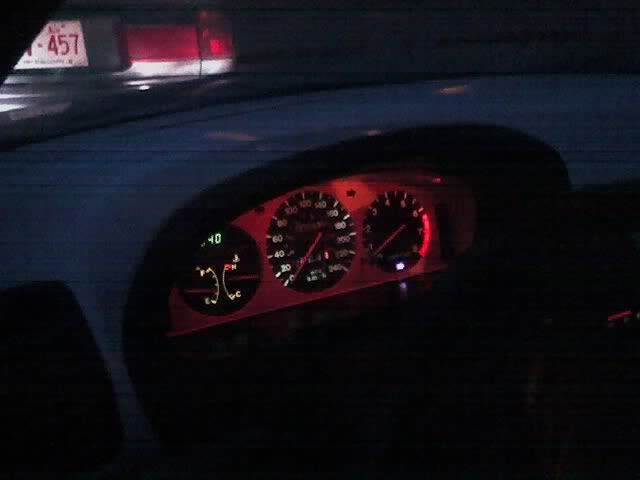
this is a cheap mod i did with the stock guages im my precidia
jus think itd be something someone would like to do as a cheap mod
for $13 lol
wat i did was took the guages from my car
took it apart and removed that black piece surrounding the guages
and painted it white with fusion krylon spray paint ($7)
then i took the light bulbs from behind and took the green sleeves or boots off
and went to jb power and purchased red sleeves instead ($3 x 2)
replaced the green ones and put the whole thing together again
takes some work but it turns out niice
jus make sure u get someone to help u if you have never removed the guages b4
Interesting Oven, how the hell did you do that. I've got an idea for guages, but the problem was the green guage plastic.
For those who don't know the plastic that the guages is printed on is green tinted all the way through. So when the white light shines through the green plastic you get green numbers. The faces of the guages is printed (or painted) onto the green plastic. There is a coat if thin white paint used first that ends up being the numbers. Then they paint the black faces and cover the number areas so that you have black faces with white numbers. Then the guage bezel covers the parts that aren't painted.
Thus we cannot, that I know of, but Oven has obviously found a way around, change the color of the numbers since it will be a combination of green and whatever color bulb cover you use.
So, what Iwas thinking is that if you sand the faces off the plastic then buy some faces from whomever makes them and use a colored bulb cover you should be able to get any guage face and any color you want. However, this was all stopped when I found that the plastic is green and I couldn't change the number color unless I recreated the plastic guage face panel. Which without some sort of super measuring and CAD work would be impossible.
So OVEN give us your secret and we'll collab and everyone will then be able to have whatever guage look they want.
ZE -strait neck,headers,2.5 exhaust,pheno spacers,lower cross member,GC coils,MS struts,Brembo slotted rotors,filled MS mounts,SS brake/clutch lines, CAI,to rear bat reloc,Hella headlamps,Hella DE fogs 180WHP
wow i dunno how ovendenk did it but i noticed that too
the guage faces were tinted green and no matter wat colour i used
it still comes out greeennn
i would love to get it to look like that tho
PATDIESEL wrote:Interesting Oven, how the hell did you do that....So OVEN give us your secret and we'll collab and everyone will then be able to have whatever guage look they want.
funny pat how you want me to reveal my secrets, yet you keep yours hidden, eh? cough, cough... straight neck
anyways, i'm working on a how-to for both the hvac as well as the gauge cluster with pics. maybe you want to help people out too?
BTW, the gauges are speed hut gauges, but my method should work the same as the hvac panel.
Argh, Oven. I've said it over and over again. It is not a good idea to use the striaght neck b/c it sits VERY close to the brake line bolt on the MC. I've also found that even doing it the way I did does not always work out the same. I've done the mod 4 times and 2 of them sat differetly and had to be further modded to make fit. I really have no interest in telling someone how to do something that will endanger their lives if things do not go exactly how they are supposed to.
Secondly, I'll get an inumerable number of questions which I really have no interest in.
I'll tell you what, I'll tell members whom I think are good enough with fab work and the MX-3 in general. They can PM me or email me and I'll tell them how I did it if I think they can handle it. There are no pics of the process and you cannot get a good shot of it from the engine bay. So words will have to be enough to guide you.
If I get chased off of here like I have so many times before from people flaming me for not telling, I'm not coming back again. It is a simple matter of safety...
I appreciate your giving up your info on how to do something that sets you apart. It was my original intention to keep the secret so that I would have something unique. However, I gave up on that some years ago when I reliazed that the MX is so rare that if I share something that saves money or gives some aesthetic or power value then I will give it up. There are just too many people on here who do not have the apptitude to perform the mod and follow it through until they are 100% sure (and correct about their assesment of safety) for me to give the info to everyone.
ZE -strait neck,headers,2.5 exhaust,pheno spacers,lower cross member,GC coils,MS struts,Brembo slotted rotors,filled MS mounts,SS brake/clutch lines, CAI,to rear bat reloc,Hella headlamps,Hella DE fogs 180WHP
pat, i was just bugging you. i have no interest in doing the straight neck myself. i just know that you get asked all the time about it. i didn't think you'd take it that seriously.
see my laughing happy face up there or the one with the tongue? ^ thought that'd be enough to indicate i was kidding, which i was.
Sorry Bro, sore spot for me. I've left and came back a few times now b/c of all the crap I've gotten for not telling. It just flattens me that I've gotten it all with it being potentially dangerous and doesn't give any power gain.
You still haven't answered how you did it though.
ZE -strait neck,headers,2.5 exhaust,pheno spacers,lower cross member,GC coils,MS struts,Brembo slotted rotors,filled MS mounts,SS brake/clutch lines, CAI,to rear bat reloc,Hella headlamps,Hella DE fogs 180WHP
You sand off the back of the gauge face Blahhh your secrets out ,haha
We've done it before on my buddys Mx6
I have a gauge cluster Im going to be working on soon I will post pics when I am done ..
Kris --
93 Kandy Tangerine Mx3 GS-DE
05 Saab 9-2x (Wrx power plant)
02 Subaru Impreza OBS
05 Subaru forester Xt - sti mods
04 dodge ram - toy hauler -FOR SALE
& Lots of Toys to haul
i don't recommend sanding because you have to be super careful not to go too far or else you scratch the black paint off, then the light will shine through. unless the gauges are made out of solid black plastic, then you're fine. i never modded the gauges, just the hvac panel which is made of clear plastic.
Here is what I think.
You are correct, which suprises me b/c I would have sworn that the green was actually tinted green plastic.
So I gave your method a try tonight after the MOCA meet and viola. The green is the first layer Mazda painted on the front side of the guage face. So the problem is getting it off without messing up ANY of the other colors which are all thin and come off easily. After about 30 minutes of trying I cannot get any one number perfect or even close enough that I would settle for the job. I would like to note that I am pretty adept at minute detail as I am a veteran model hobbiest. Having MANY specialty tools at my disposal such as tiny q-tips, an assortment of thinners and paint removers, hobby knives of all shapes and a few magnifing glasses.
I think there is an easier way to do this and get a 100% perfect finish. What we need is to scan the guage faces and then find a way to print them at a 1/1 ratio so that they are the same size. If we can figure that out we can do a ton of different things with the guage faces.
1. this will allow us to play with the colors and such using a printer (some of which are so advanced that you could virtually make any color, graphic or design that you wanted).
2. then print the designed/colored faces on some white vinyl and then have the numbers and holes cut out with a laser. This would allow you to do either reverse or indiglo guage styles. You would need to use a high grade vinyl so that the light didn't shine through the faces for indi-glow or the numbers for reverse glow.
3. sand the guage face completely clean on the front side. The back of the face is just a white layer of paint that helps to diffuse the light of the bulbs and evens it out so that all numbers look evenly lit. Leave it alone or you might get bright spots in the faces.
4. (Indi-Glow)-place the vinly template on the face of the guage and then peel the laser cut numbers and holes off. Print a second plain template to cover the designed one, again peeling the numbers out. You can then paint the numbers any color TINT that you want. Remember that it must be tint so that the light can shine through on a reverse glow guage. (Reverse Indi-Glo) place the vinly template on the face of the guage and then peel the face off leaving the numbers. Print a second plain template to cover the designed one, again peeling the face out. Then paint the face any color TINT you want. Remember that it must be tint so that the light can shine through the face. Remove the second template from the designed one and you should be left with a perfectly designed and tinted guage face.
I had a guy working with me on the scanned template, but he lived in Hawaii and it was difficult to communicate. It also seems that they must have had different guage faces b/c he could make a print that matched my OEM ones. The size was about right, but the numbers were off and the little placement holes were in the wrong spots. So with a bit of help from someone with a decent scanner we should be able to get this going.
Any takers, with a good scanner and a working knowledge of document manipulating?
ZE -strait neck,headers,2.5 exhaust,pheno spacers,lower cross member,GC coils,MS struts,Brembo slotted rotors,filled MS mounts,SS brake/clutch lines, CAI,to rear bat reloc,Hella headlamps,Hella DE fogs 180WHP


