How to replace friction gear springs W/O removing the Tbelt
Posted: September 25th, 2010, 6:57 pm
Yay for little saturday write-up.
First of all, I take no responsibility for your actions, regardless or this, or any thread, ever. Reading this, you consent to not bringing this into the legal sandbox whatsoever. Blah blah...
Okay. So your car ticks. its probably when hot, and not when cold. The issues is a brilliant Mazda engineer's not so brilliant idea.
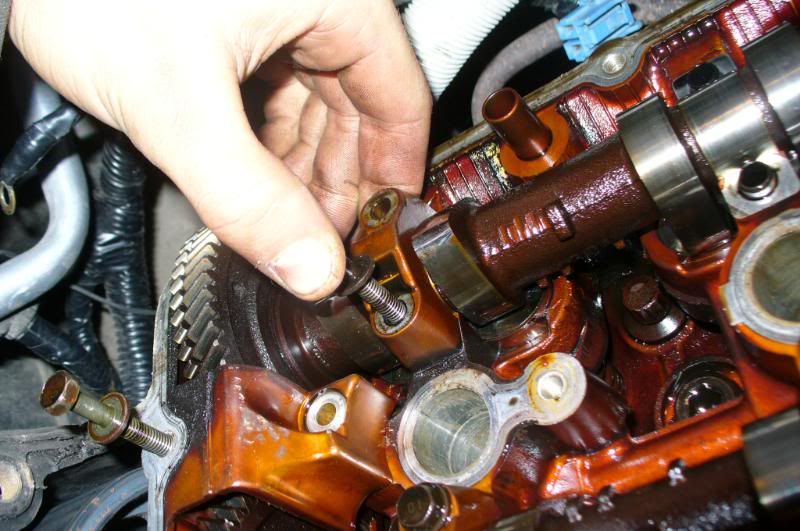
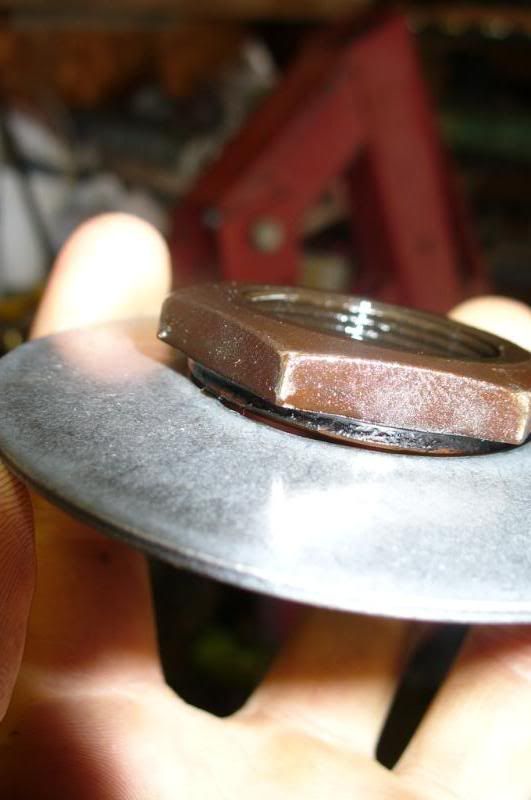
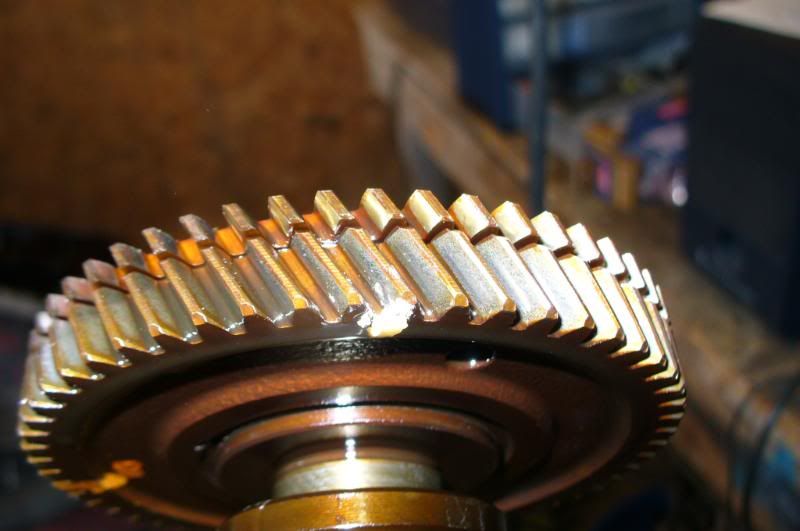
Its caused by this little guy on the right:

As you can see, the difference between the OEM and the new is the little tabs on the inside of the washer. the old design caused the washer to just spin on the nut. What dummy didn't see that coming as a possibility? No engineer I can imagine...
Anhow, so here's how you do the repair:
Go to Mazda, and buy two cam washers. They're ~$11 each. you can buy the nuts too, but you don't have to if you own an angle grinder.
Odd tools I didn't, or you might not have laying around, that you need:
- 1-5/8" wrench or socket (or a good adjustable wrench capable of that)
- 1" +/- 1/8 wrenches, or an monkey wrench/adjustable wrench, whatever.
-torque wrench (pretty important)
-white-out or similar, to mark cam gear position relative to eachother
-gasket maker
-valve cover gaskets, you may as well, you're doing all the work to do it.
-If you have all day, combine this with timing belt /waterpump /HLA service....
And then your basic socket set w/ various extensions, etc...
Keday, lets do the easy part first.
-Warm up your car. The only purpose for this is to soften up the timing covers so they don't crack when you bend them around later.
-Disconnect your negative terminal, take off all connectors onto the intake manifold, fuel, throttle, intake(all the rubber stuff), idle air control, knock sensor, VICS, and EGR solenoids(remember the yellow connector goes on the top solenoid), brake booster hose, and the crankcase vent on the rear head on the passenger side. Take off your strut bar, if applicable... you get the idea.
Remove your front valvecover. No need to remove the distributor. Oh, lay the plug wires aside too, but no need to disconnect them from the cap.
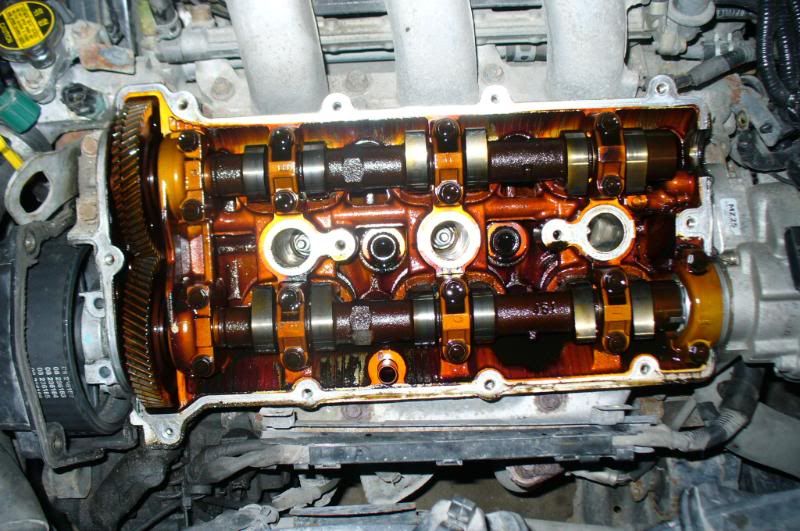
Horray. Alright, now before you remove any cam caps, mark the gears so you know how it goes together again.
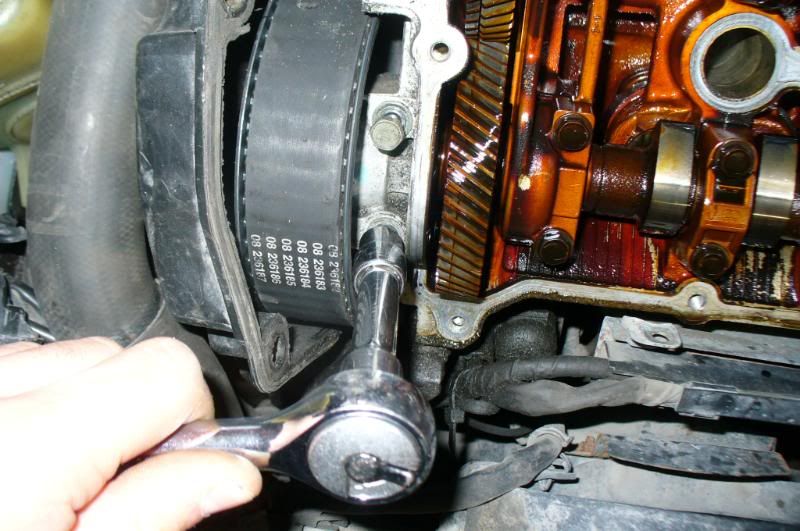
Now, stick the 1 inch ish wrench on the exahust cam, and pull back the timing covers and stick a 17mm wrench on the bolt. Its a tight bastard. loosen it a few turns, but DON'T TAKE IT OFF! Also, don't let that big wrench just jam on the head, hold it while you try and get the bolt loose
Now, gently pry the gear away a little with your hands, just enough so you can fit a socket on the bolts on that end cap, under the gear.
Remove the cam caps that you need to get the intake cam out. Do it as per the manual if you're unsure. Pretty much each bolt a 1/4 turn until they're all loose. I have never broken a cam doing it more than that, but you choose your own level of 'careful'
Remember the order and orientation, its important. If you forget, G is the one closest to the disty, and read from the same direction as the numbers on the exhaust cam caps.
TRICK:
Use the bolt to pry the cap off the alignment studs. Better than getting the BFH out .
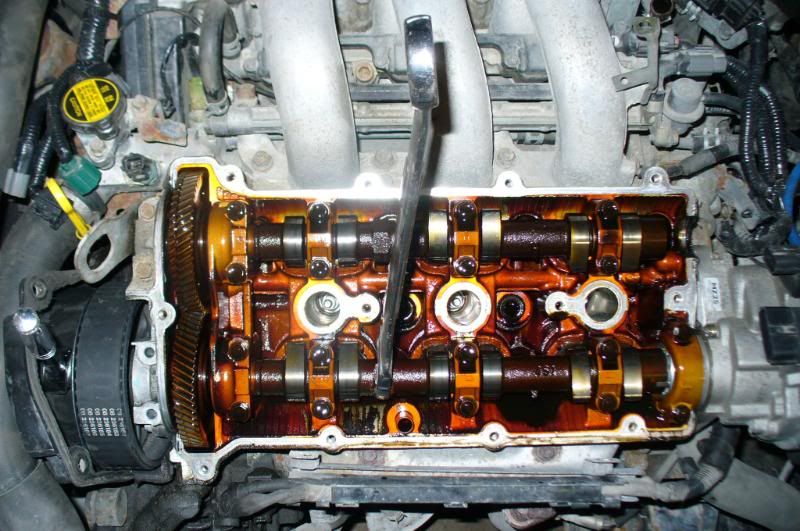
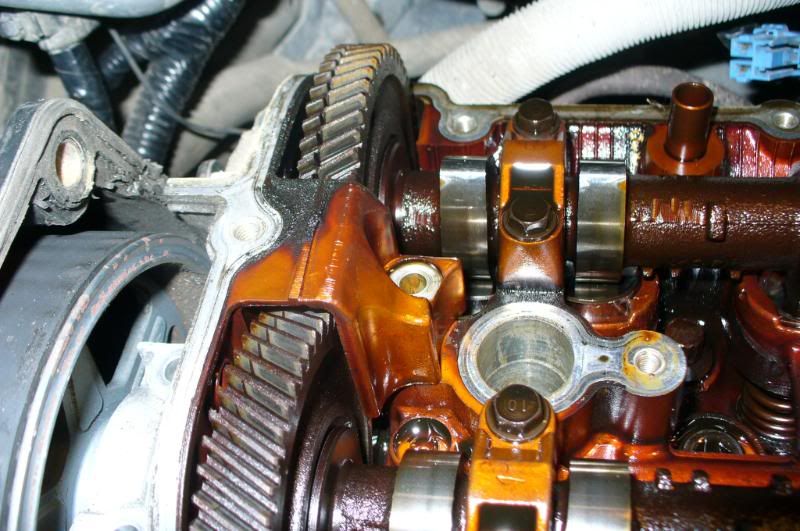
If you can't get the cap out from under the gear like this:
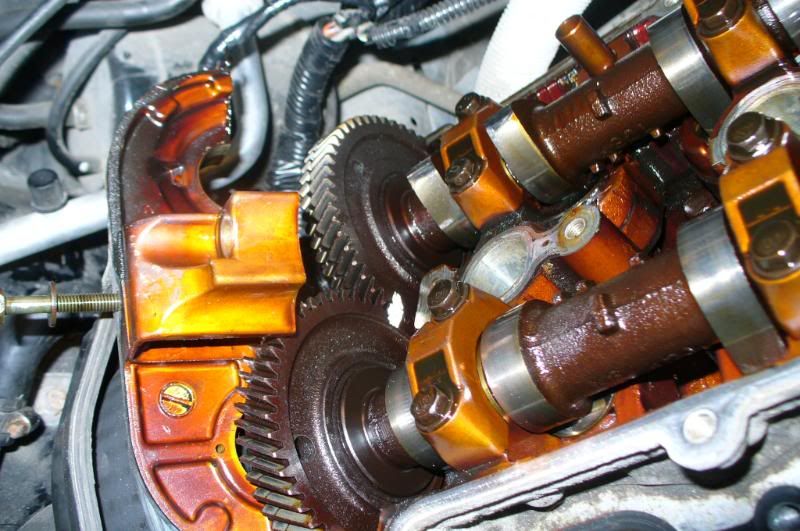
Then pull the gear off a little more until you can. Don't be afraid to scrape the cams a little, the caps are aluminum and won't scratch the cams unless you really go at it.
Now, remove the cam and squish it in your bench vice. on the hexagonal part. you should probably wrap the rest of the cam in a cloth so you don't accidentally damage the lobes. Also, be careful, the cams and caps and stuff are sharp.
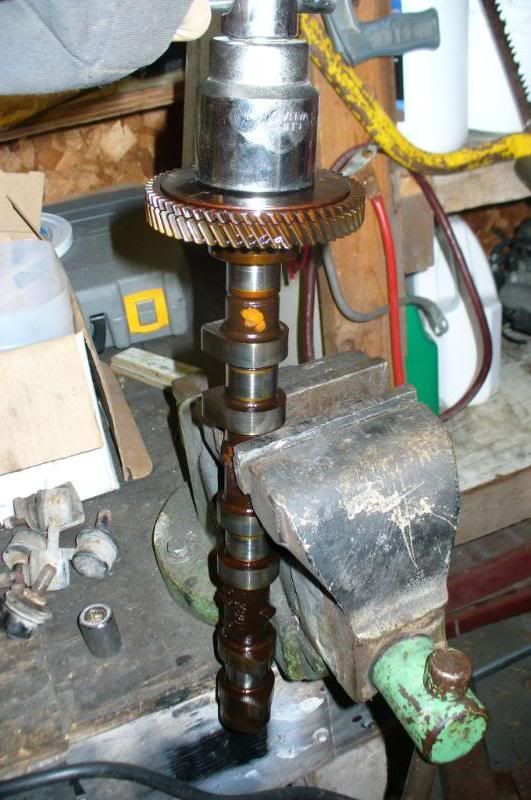
Now get that big 1-5/8 socket on there and get'r off. That's in the picture above. Obviously, note how it goes together, its only 2 parts... no need to remove the friction gear at all, just the washer and nut.
Now when you go to put the new washer on, you'll notice a problem:
So, out with your grinder, unless you have the nut, then skip down to trying to align the gears.
Until you get this:
REMEMBER NOT TO GRIND ANYWHERE NEAR YOUR CAM OR OPEN ENGINE AND REMEMBER TO CLEAN OFF THE NUT!
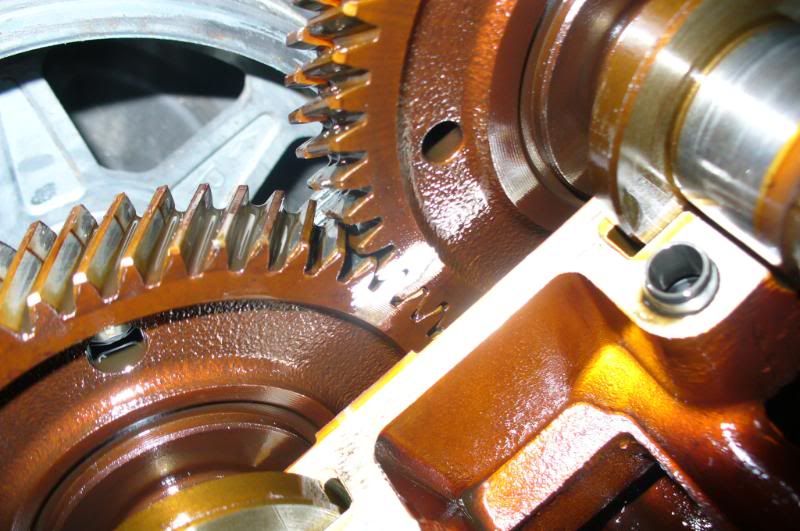
Now, put it back together. Okay, TRICK: Look at your mark as you tighten it down. Tighten it NEARLY as tight as you can, and see how the teeth align. You may have to back off, or tighten a tiny bit more than perhaps feels right.
This is what you want, see how the teeth line up nicely:
Now, re-install the cam, and tighten the cam caps down to circa 10 ft lbs. manual suggest 100-125 inch pounds ( divide by 12 for foot lbs)
Don't forget to put sealant under the end cap, just a little. Don't let it squish into the cam journals. Here:
http://www.mx-3.com/manuals/showimg.php ... B2-099.gif" onclick="window.open(this.href);return false;
Also, you need to somehow manage to get the cam seals in place properly. I just did my best and hoped for the best. Make sure they're in the right spot, and maybe put a little sealant on the rim of it.
Reinstall the cam end bolt to around 90 ft lbs. Remember to hold the wrench, and not jam it on the head.
Install the valvecover with your new gaskets, if applicable, with sealant in the correct places as per the manual link above.
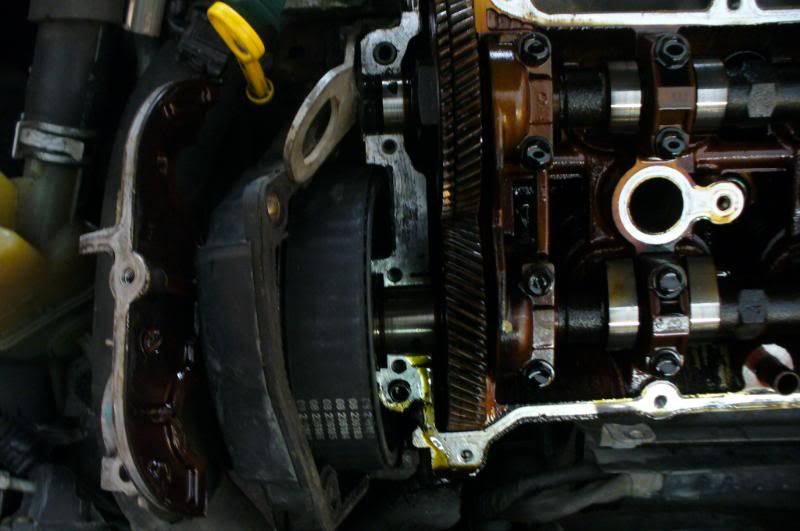
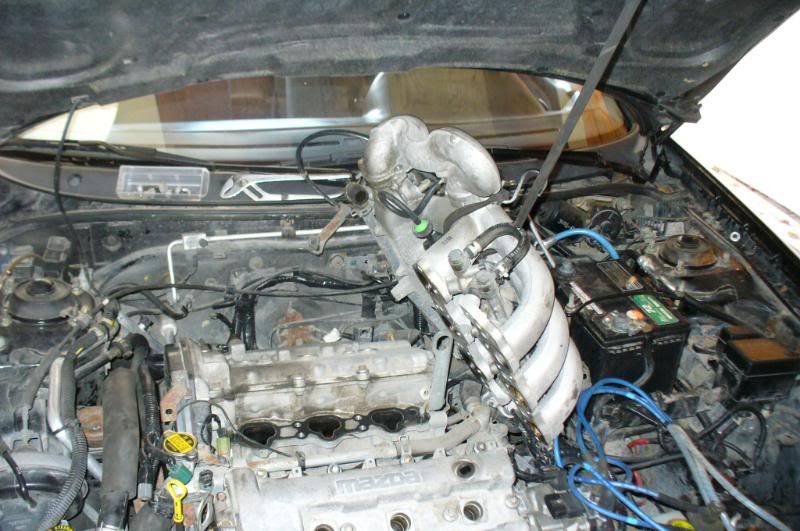
Next is the rear head.
Remove just enough stuff to get the intake manifold up like this:
Check your valves for oil. If there's a pool of oil, bad valve stem seals / sleeves. You need to remove the heads and pay someone quite a bit to fix that.
Stuff something down the ports, and take a shop vac and suck all the loose stuff away just for good measure.
Remove the rear valve cover, and pretty much repeat the process.
I actually opted to NOT loosen the cam gear. I managed to get the end cap off and cam out, but the struggle is cleaning the gasket surface and re-applying the maker on re-installation. Your choice.
On this end cap there is an extra bolt, don't forget it, and be a moron and get pissed trying to get the cap off with a bolt still in it...
Repeat the mark / remove / vice / align teeth / reinstall.
sealant under the end caps again. You're technically supposed to remove all the old stuff, too.
New valvecover gasket, blah blah, reinstall VC.
then take out the stuff in your intake ports, and reassemble your motor. I opted to leave the bastard bolt on the back of the manifold OFF. I really hate that thing, and the manifold has a lip that sits on that bracket anyway.
Tada, enjoy your quiet engine.
Keywords: cam washers friction gear spring without timing belt
First of all, I take no responsibility for your actions, regardless or this, or any thread, ever. Reading this, you consent to not bringing this into the legal sandbox whatsoever. Blah blah...
Okay. So your car ticks. its probably when hot, and not when cold. The issues is a brilliant Mazda engineer's not so brilliant idea.
Its caused by this little guy on the right:
As you can see, the difference between the OEM and the new is the little tabs on the inside of the washer. the old design caused the washer to just spin on the nut. What dummy didn't see that coming as a possibility? No engineer I can imagine...
Anhow, so here's how you do the repair:
Go to Mazda, and buy two cam washers. They're ~$11 each. you can buy the nuts too, but you don't have to if you own an angle grinder.
Odd tools I didn't, or you might not have laying around, that you need:
- 1-5/8" wrench or socket (or a good adjustable wrench capable of that)
- 1" +/- 1/8 wrenches, or an monkey wrench/adjustable wrench, whatever.
-torque wrench (pretty important)
-white-out or similar, to mark cam gear position relative to eachother
-gasket maker
-valve cover gaskets, you may as well, you're doing all the work to do it.
-If you have all day, combine this with timing belt /waterpump /HLA service....
And then your basic socket set w/ various extensions, etc...
Keday, lets do the easy part first.
-Warm up your car. The only purpose for this is to soften up the timing covers so they don't crack when you bend them around later.
-Disconnect your negative terminal, take off all connectors onto the intake manifold, fuel, throttle, intake(all the rubber stuff), idle air control, knock sensor, VICS, and EGR solenoids(remember the yellow connector goes on the top solenoid), brake booster hose, and the crankcase vent on the rear head on the passenger side. Take off your strut bar, if applicable... you get the idea.
Remove your front valvecover. No need to remove the distributor. Oh, lay the plug wires aside too, but no need to disconnect them from the cap.
Horray. Alright, now before you remove any cam caps, mark the gears so you know how it goes together again.
Now, stick the 1 inch ish wrench on the exahust cam, and pull back the timing covers and stick a 17mm wrench on the bolt. Its a tight bastard. loosen it a few turns, but DON'T TAKE IT OFF! Also, don't let that big wrench just jam on the head, hold it while you try and get the bolt loose
Now, gently pry the gear away a little with your hands, just enough so you can fit a socket on the bolts on that end cap, under the gear.
Remove the cam caps that you need to get the intake cam out. Do it as per the manual if you're unsure. Pretty much each bolt a 1/4 turn until they're all loose. I have never broken a cam doing it more than that, but you choose your own level of 'careful'
Remember the order and orientation, its important. If you forget, G is the one closest to the disty, and read from the same direction as the numbers on the exhaust cam caps.
TRICK:
Use the bolt to pry the cap off the alignment studs. Better than getting the BFH out .
If you can't get the cap out from under the gear like this:
Then pull the gear off a little more until you can. Don't be afraid to scrape the cams a little, the caps are aluminum and won't scratch the cams unless you really go at it.
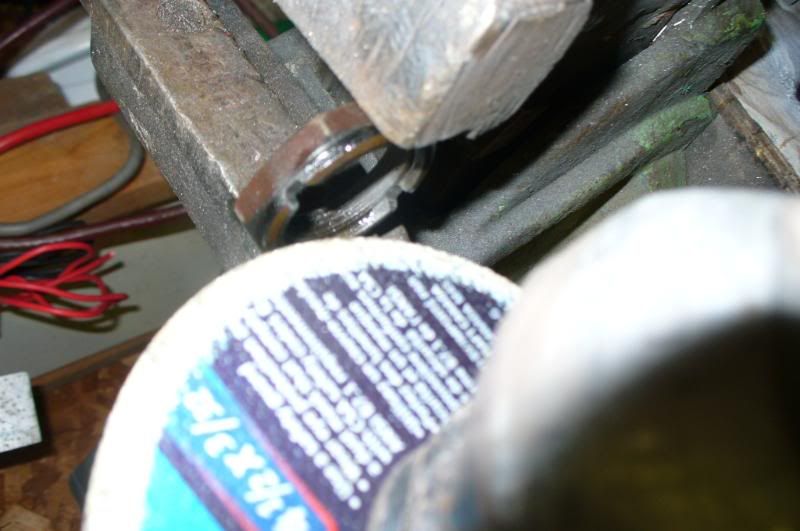
Now, remove the cam and squish it in your bench vice. on the hexagonal part. you should probably wrap the rest of the cam in a cloth so you don't accidentally damage the lobes. Also, be careful, the cams and caps and stuff are sharp.
Now get that big 1-5/8 socket on there and get'r off. That's in the picture above. Obviously, note how it goes together, its only 2 parts... no need to remove the friction gear at all, just the washer and nut.
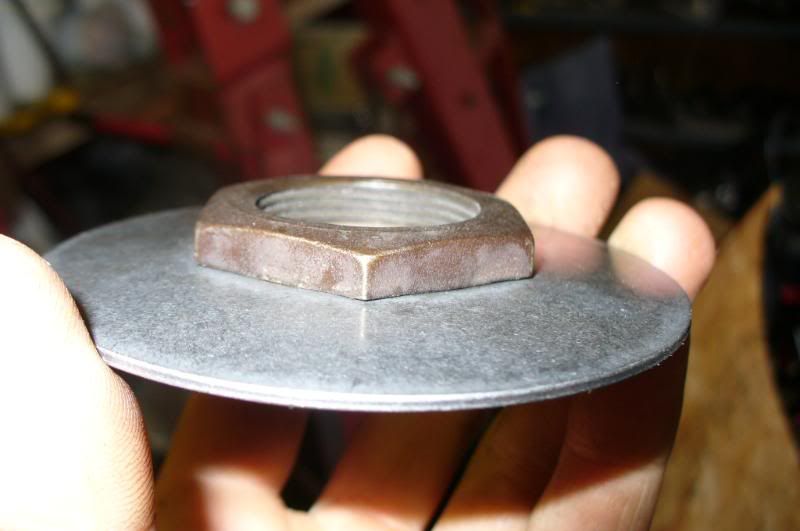
Now when you go to put the new washer on, you'll notice a problem:
So, out with your grinder, unless you have the nut, then skip down to trying to align the gears.
Until you get this:
REMEMBER NOT TO GRIND ANYWHERE NEAR YOUR CAM OR OPEN ENGINE AND REMEMBER TO CLEAN OFF THE NUT!
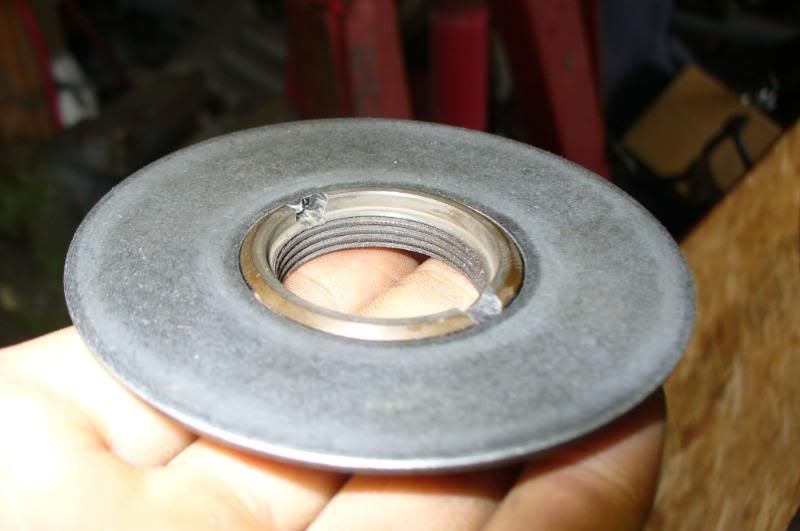
Now, put it back together. Okay, TRICK: Look at your mark as you tighten it down. Tighten it NEARLY as tight as you can, and see how the teeth align. You may have to back off, or tighten a tiny bit more than perhaps feels right.
This is what you want, see how the teeth line up nicely:
Now, re-install the cam, and tighten the cam caps down to circa 10 ft lbs. manual suggest 100-125 inch pounds ( divide by 12 for foot lbs)
Don't forget to put sealant under the end cap, just a little. Don't let it squish into the cam journals. Here:
http://www.mx-3.com/manuals/showimg.php ... B2-099.gif" onclick="window.open(this.href);return false;
Also, you need to somehow manage to get the cam seals in place properly. I just did my best and hoped for the best. Make sure they're in the right spot, and maybe put a little sealant on the rim of it.
Reinstall the cam end bolt to around 90 ft lbs. Remember to hold the wrench, and not jam it on the head.
Install the valvecover with your new gaskets, if applicable, with sealant in the correct places as per the manual link above.
Next is the rear head.
Remove just enough stuff to get the intake manifold up like this:
Check your valves for oil. If there's a pool of oil, bad valve stem seals / sleeves. You need to remove the heads and pay someone quite a bit to fix that.
Stuff something down the ports, and take a shop vac and suck all the loose stuff away just for good measure.
Remove the rear valve cover, and pretty much repeat the process.
I actually opted to NOT loosen the cam gear. I managed to get the end cap off and cam out, but the struggle is cleaning the gasket surface and re-applying the maker on re-installation. Your choice.
On this end cap there is an extra bolt, don't forget it, and be a moron and get pissed trying to get the cap off with a bolt still in it...
Repeat the mark / remove / vice / align teeth / reinstall.
sealant under the end caps again. You're technically supposed to remove all the old stuff, too.
New valvecover gasket, blah blah, reinstall VC.
then take out the stuff in your intake ports, and reassemble your motor. I opted to leave the bastard bolt on the back of the manifold OFF. I really hate that thing, and the manifold has a lip that sits on that bracket anyway.
Tada, enjoy your quiet engine.
Keywords: cam washers friction gear spring without timing belt