Page 3 of 7
Re: Calg_93GS's worklog (3/25/2012 - "DIY grounding kit")
Posted: March 26th, 2012, 10:38 am
by Tavman_1213
Calg_93GS wrote:RobMinhas wrote:Thats great, they look great. Have you looked into power coating them yet?
not yet, waiting for an email back from a place in red deer that does the hydro dipping like on tavs valve cover

Hahahaha yes I started a trend!! Muahaha

Re: Calg_93GS's worklog (3/25/2012 - "DIY grounding kit")
Posted: March 26th, 2012, 1:24 pm
by WesleyK
Did you notice any difference after grounding these extra points? I measured the resistance in my ground system last week and its from 1 ohm from negative pole to chassis to 5 ohm from negative to the engine. I imagine this could be alot lower, but do you notice?
I already have the parts..:
Rockford fosgate battery clamps + 4 gauge wire. Should be enough

Re: Calg_93GS's worklog (3/25/2012 - "DIY grounding kit")
Posted: March 26th, 2012, 6:07 pm
by Calg_93GS
little quicker response on the throttle, the "rpm humm" in my speakers is gone, haven't noticed much else tho, they say it makes your headlights a bit brighter also but i have HID's already so if there was a difference, i didn't notice it. Ive seen grounding kits used on the dyno and there is virtually no power gain (1 whp is what my friend gained with the same points grounded on his EP3 SiR) its more to just clean up the "static" under the hood that's all, i didn't bother breaking out the multimeter to check anything.
Re: Calg_93GS's worklog (3/25/2012 - "DIY grounding kit")
Posted: April 2nd, 2012, 12:18 am
by Calg_93GS
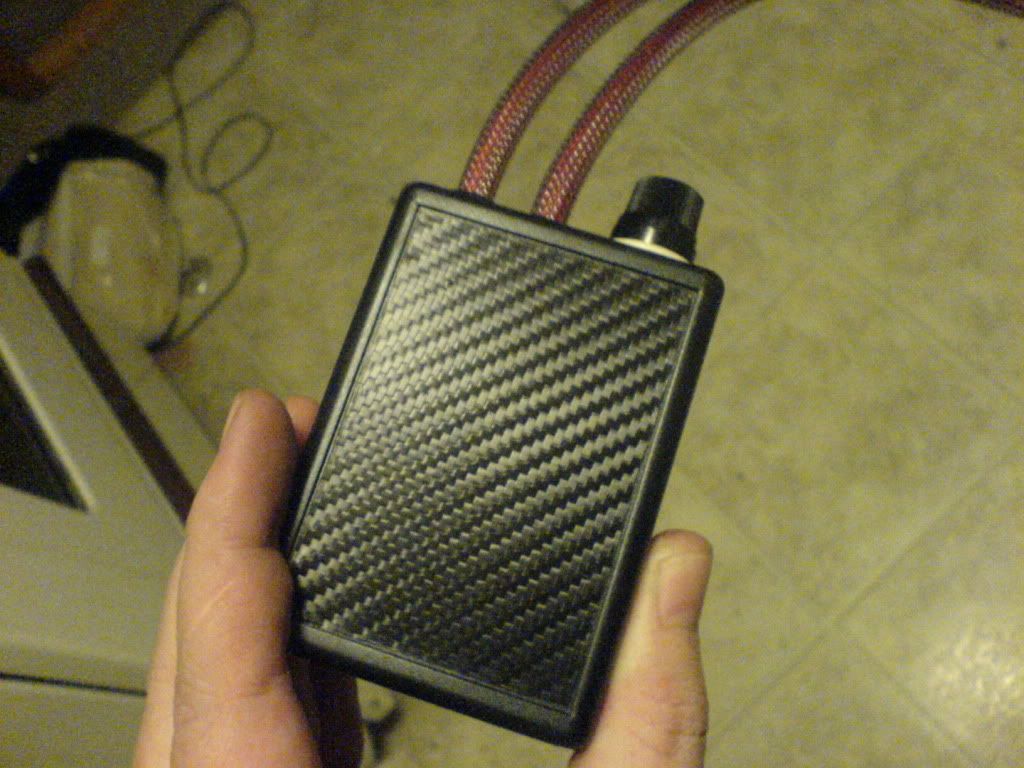
so did alot research on voltage stabilizers and what they do, and more importantly, how to build one. $30 worth of parts roughly later, I had my stabilizer built, sorry about no photos of the internals at this point, i got a bit carried away while putting it together, i have to open it back up to put some new resistors in for the LED's (used the wrong values when i made it and they fried the LED's...oops).
I will also post the wiring diagram and the parts used for anyone interested
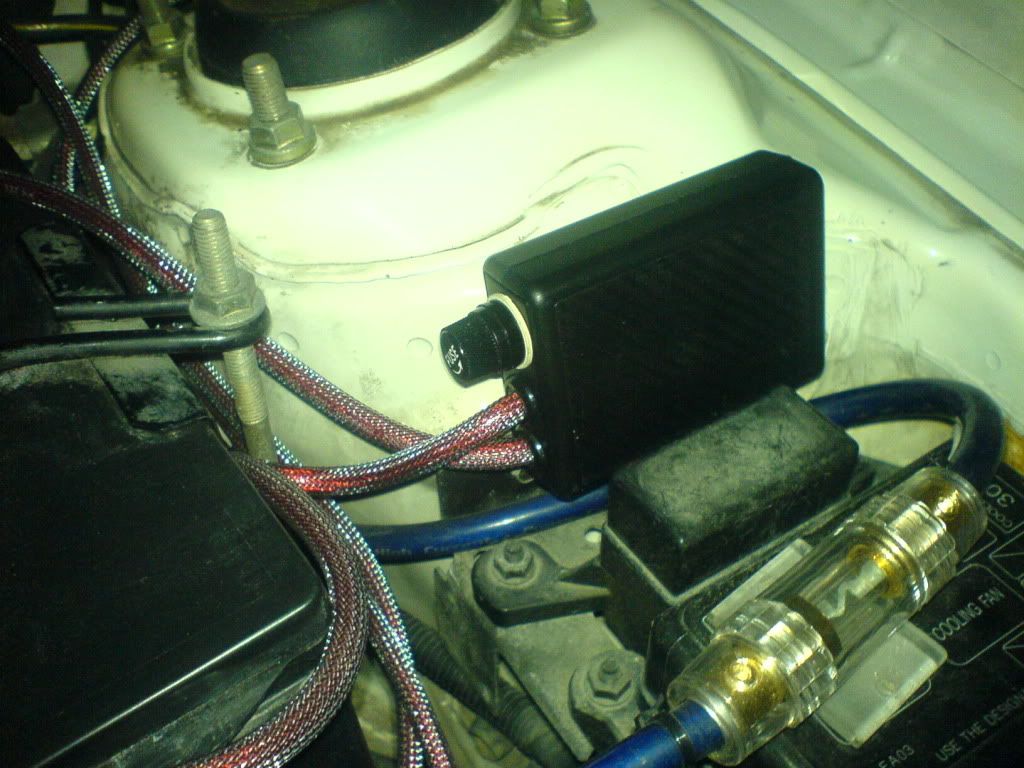
the unit accepted the charge and held the charge after disconnect (home made cattle prod? lol)
Re: Calg_93GS's worklog (4/01/2012 - "DIY voltage stabilizer
Posted: April 2nd, 2012, 12:43 am
by Tavman_1213
Nice work on the stabilizer!!
Oh wait is that dirt in your engine bay??? Hahaha jk
Re: Calg_93GS's worklog (4/01/2012 - "DIY voltage stabilizer
Posted: April 2nd, 2012, 12:47 am
by Calg_93GS
Tavman_1213 wrote:Nice work on the stabilizer!!
Oh wait is that dirt in your engine bay??? Hahaha jk
it is... and it bothers me... alot...lol, tho, not as dirty as that bay in your garage!

Re: Calg_93GS's worklog (4/01/2012 - "DIY voltage stabilizer
Posted: April 28th, 2012, 5:38 am
by Calg_93GS
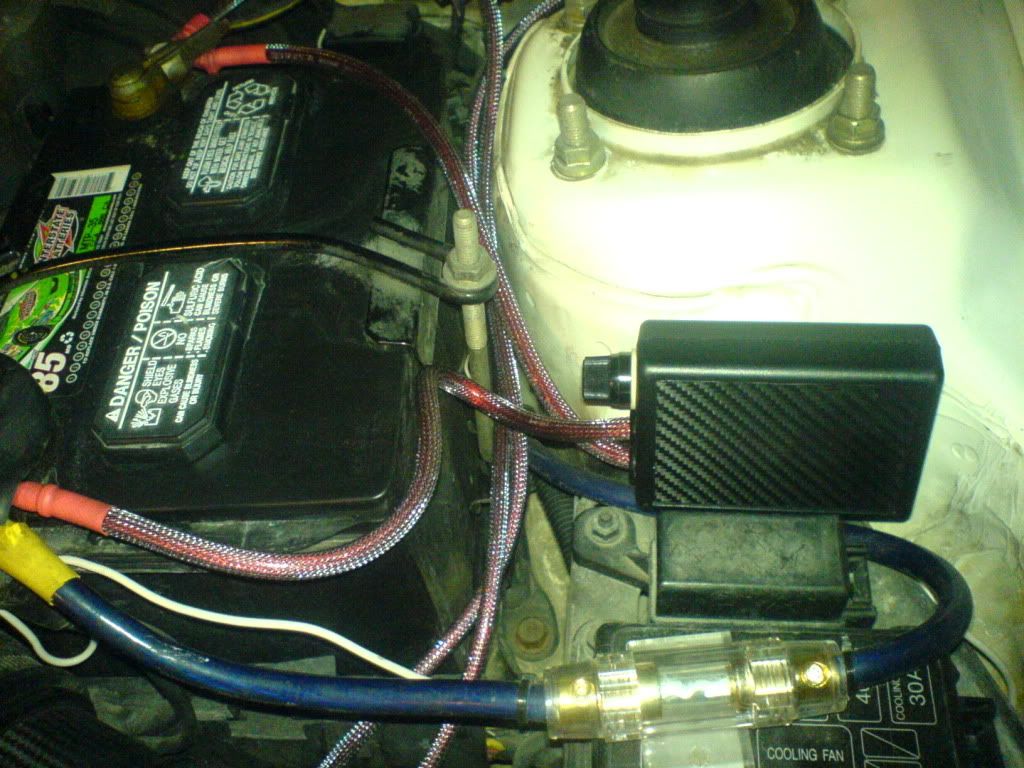
so spent a couple hours scrubbing out the engine bay, 2 cans of degreaser, some scrub brushes and alot of elbow grease and most of the winter grime is gone (tho not in this photo, i got tired of people bugging me about the last remaining piece of my stock intake so it took it off and remounted the prop rod clip)
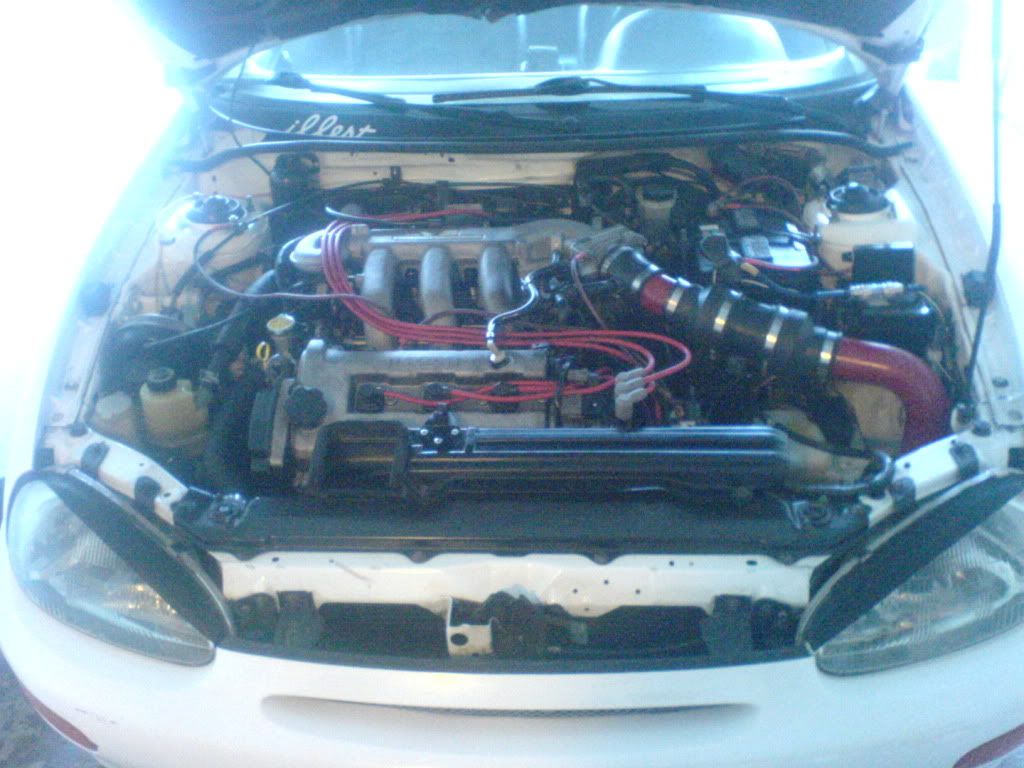
did an oil change and put the summers back on. have a couple projects on the go atm before i do some things to the car, repairing the gs lip, sanding and painting the lip, euro mini sides, and mudflaps. also building a sandblasting box (should have pics of that soon) and working up the nerve to pull my sub box out so i can do my tail lights. with the recent good weather, working in my carport has been more bearable again

Re: Calg_93GS's worklog (4/01/2012 - "DIY voltage stabilizer
Posted: April 28th, 2012, 6:03 am
by Calg_93GS
also as i mentioned before, here is the diagram for the voltage stabilizer:
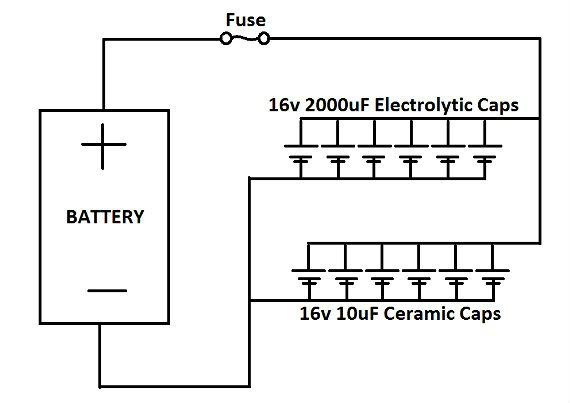
6x 16v 2000uF Electrolytic capacitors
6x 16v 10uF Ceramic capacitors
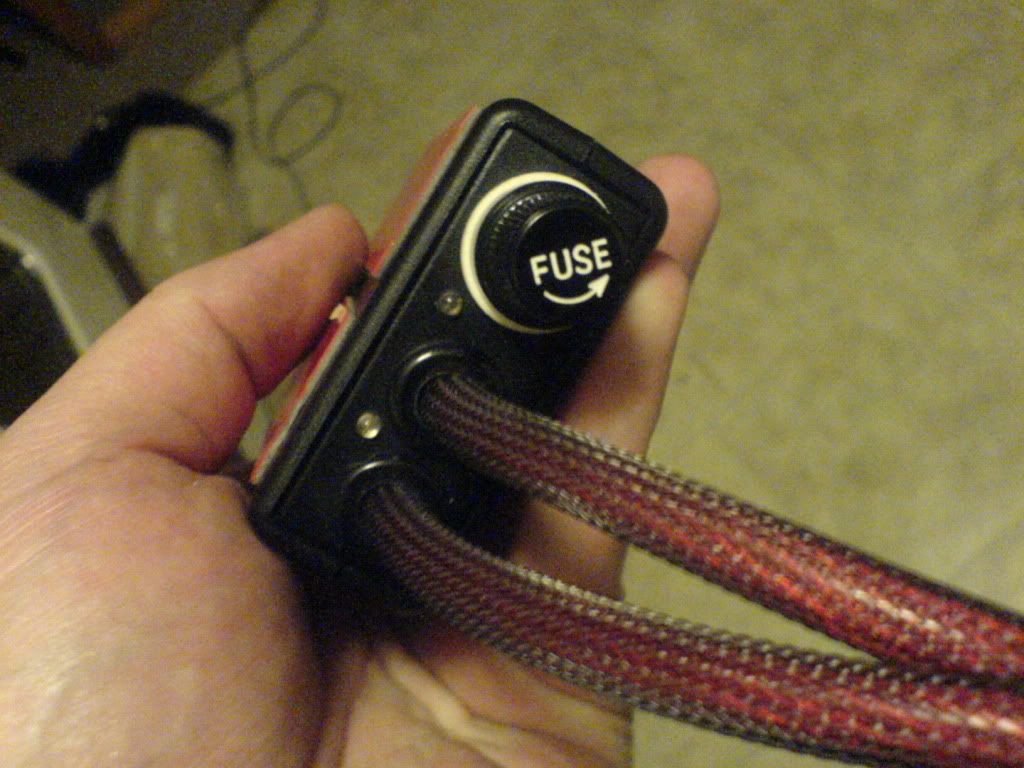
1x fuse holder with 15amp fuse
1x PCB board
1x "project box" (most electronic stores sell these in varying sizes)
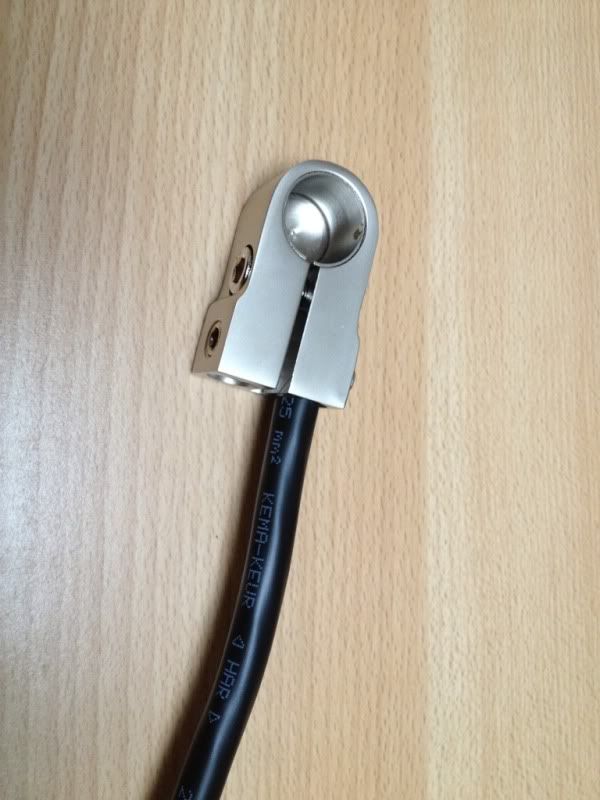
2x 1 foot lengths of 8 gauge wire with "o" rings crimped and soldered (as well as "sleeved" purely for aesthetics)
its fairly simple in design and it amazes me that people fork over $250-300 bucks for these things, the parts cost me less then $30 CAD from a hobby shop, and it accomplishes the same thing as any retail version. the reason for the the 2 different types of capacitors is for high and low electrical frequencies. im currently working on "revision 2.0" of my stabilizer (larger voltage capacity and a bit more visually pleasing since it will be visible when the hood is up)
Re: Calg_93GS's worklog (4/01/2012 - "DIY voltage stabilizer
Posted: April 28th, 2012, 6:40 am
by WesleyK
But do you notice any difference ...
?
Re: Calg_93GS's worklog (4/01/2012 - "DIY voltage stabilizer
Posted: April 28th, 2012, 6:50 am
by Calg_93GS
WesleyK wrote:But do you notice any difference ...
?
with the stabilizer, much more then i did with just the grounding kit. idle is cleaner, power band was noticeably smoother and throttle response was
very noticeable. if you aren't afraid to use a soldering iron, this is definitely a mod that i would recommend. as far as it goes for paying the 280+ for the buddy club 2 stabilizer, i would recommend against it, what they don't tell you, is the lifespan of capacitors used in this manner is only around 2-3 years, and as nice as the noticeable differences are, i personally, cant justify the cost.
so in a nut shell... "yes, but build one, don't buy the retail one"
Re: Calg_93GS's worklog (4/01/2012 - "DIY voltage stabilizer
Posted: April 28th, 2012, 8:00 am
by Sleeper6
Nice work! 2 questions though, what size fuse did you use and how/why are the leds in place?
Re: Calg_93GS's worklog (4/01/2012 - "DIY voltage stabilizer
Posted: April 28th, 2012, 2:32 pm
by Calg_93GS
Sleeper6 wrote:Nice work! 2 questions though, what size fuse did you use and how/why are the leds in place?
the led's were "supposed" to be for power and the fuse, i used the incorrect values when using the led calculator and the led's popped but the stabilizer still works. the fuse is just a glass tube style fuse, 15 amp
Re: Calg_93GS's worklog (4/01/2012 - "DIY voltage stabilizer
Posted: April 30th, 2012, 2:36 pm
by whitete
Looks great man! clean engine bays make it better. Great job on the stabalizer and
just a thought you can look at my cardomain page in my engine bay and see it without the air dam
in the front IMO it looks better if its gone it only served a for the factory airbox design.
Just a thought for ya

Re: Calg_93GS's worklog (4/01/2012 - "DIY voltage stabilizer
Posted: April 30th, 2012, 3:18 pm
by Calg_93GS
whitete wrote:Looks great man! clean engine bays make it better. Great job on the stabalizer and
just a thought you can look at my cardomain page in my engine bay and see it without the air dam
in the front IMO it looks better if its gone it only served a for the factory airbox design.
Just a thought for ya
thanks! and as far as it goes for the airdam, its gone already, that pic was taken a day or 2 before i took it out
Re: Calg_93GS's worklog (4/01/2012 - "DIY voltage stabilizer
Posted: April 30th, 2012, 4:19 pm
by WesleyK
Calg_93GS wrote:WesleyK wrote:But do you notice any difference ...
?
with the stabilizer, much more then i did with just the grounding kit. idle is cleaner, power band was noticeably smoother and throttle response was
very noticeable. if you aren't afraid to use a soldering iron, this is definitely a mod that i would recommend. as far as it goes for paying the 280+ for the buddy club 2 stabilizer, i would recommend against it, what they don't tell you, is the lifespan of capacitors used in this manner is only around 2-3 years, and as nice as the noticeable differences are, i personally, cant justify the cost.
so in a nut shell... "yes, but build one, don't buy the retail one"
I'm a hardware engineer, so i'm not really afraid to use a soldering iron hehe. But thanks, now i have to make one myself

. I can probably make one for under 20 bucks, so why not
. Yep, these caps don't last that long, but if you use quality caps (105C for example) you should expect something like 5 years lifespan. Thanks for the info!